What Can Smart Routes Do?
The module itself is designed to help your office find the most effective driving route to all of your stops. This can be done in two ways via this module. The first half of the add-on, called advanced routing, is designed for customers who have regularly scheduled visits to their customers. The second portion is called Smart Find, and is designed to find the best spot in your existing schedule for new jobs. Both parts can be used individually or together to provide the most convenient and effective route.
Smart Routes Setup
Once you have purchased and activated this module for your user(s) we must decide whether our field employees will be leaving from home or the office. If the field will leave from the office, Smart Routes will use the company address entered in the Setup screen of Smart Service. We recommend checking this address to make sure it is correct, and not a P.O. Box. If the address you supply to customers is a P.O. Box, but you would still like the technicians to receive routing from the office, head to the next section.
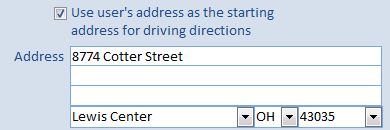
If your field employees leave from another location or you had the P.O. Box issue from above, there’s another option. Go to the Employees section of Smart Service, and open the employee you would like to route for. On the right of their profile, is a space for a routing address that will be used instead of the company’s address. Make sure to check the “User user’s address as the starting address got driving directions” checkbox.
Advanced Routing and Optimization
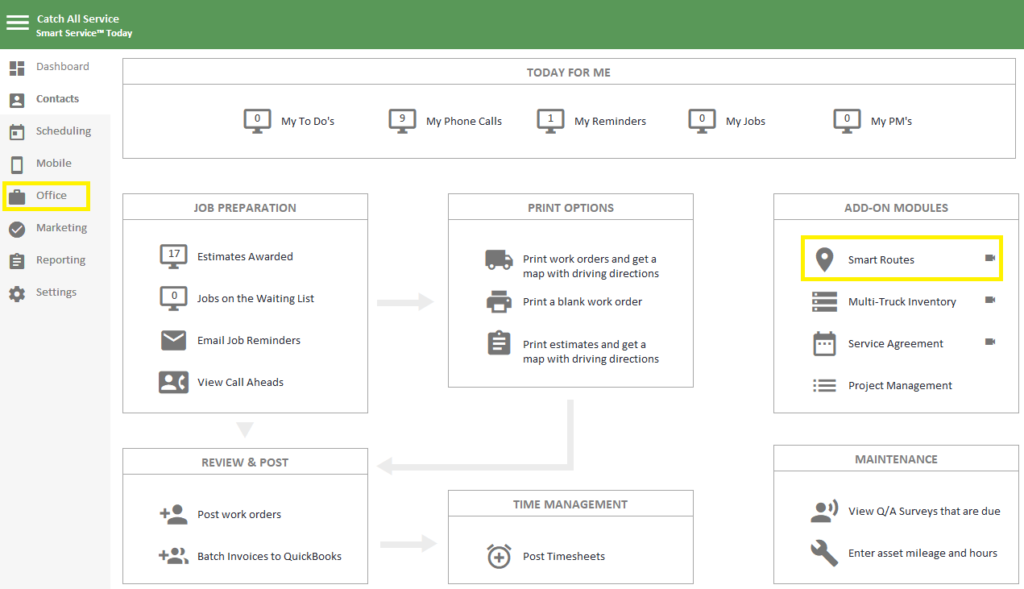
To begin using Smart Routes for advanced routing, navigate to the Office section and click on Smart Routes to get started.
Filtering the Route
Once you have navigated to the Smart Routes area of Smart Service, you will need to filter in the jobs that you would like to place on an optimized route.
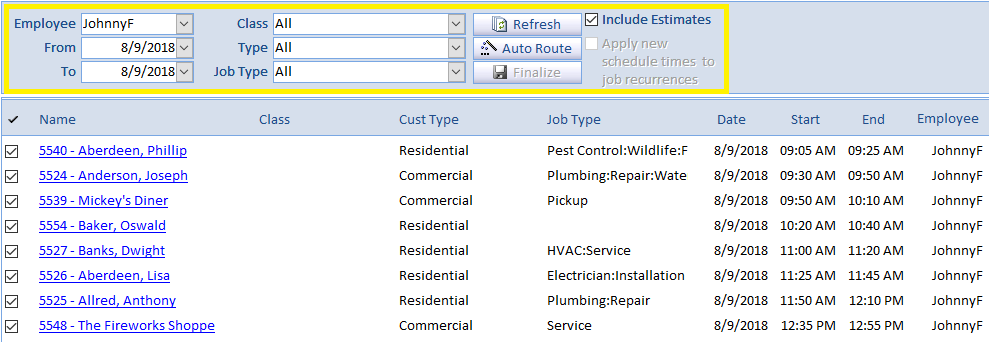
To set this filter up properly, select the employee that the jobs are currently scheduled for, selecting the From and To dates to bring in the jobs you are looking to reschedule.
To filter further, you can use the class, type (customer type), or job type options in the center, if you are looking to optimize a route for certain types of work.
Once the filter is set, review the jobs in view. If you notice any * next to a job in the list, this means that that job has been confirmed, or the customer knows you are coming at that time, so it should not be rescheduled. Any jobs with this should be accompanied by a message stating that they will be rescheduled, if they are not removed from the selection. You can remove these jobs from the list by un-checking the checkbox next to the job name.
Once you have taken care of these steps, use the “Auto Route” button to begin the optimization process.
Optimizing a Filtered Route
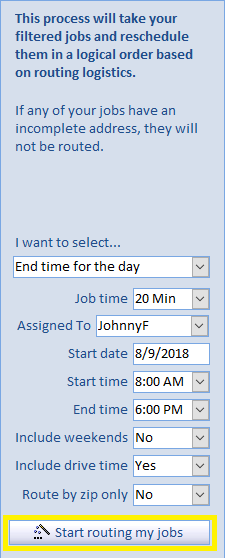
Once you use the “Auto Route” button, you will be directed to a new screen, where you will define how you would like the route to be generated. Please see the broken down options in this section below:
Choose from “End time for the day” and “Number of stops per day”.
End time for day will be based off of the “End Time” field. This will plot as many jobs as possible and then move the left overs to the next day in line.
Number of stops per day will be based off of the number you select further down in the configurable options, which will replace “End Time” when the number of stops option is selected.
Select orig time for the original scheduled time, so if the jobs are all scheduled as 2 hour jobs, they will remain at that 2 hour mark. If you change this to one of the other options, it will change the amount of time scheduled for that set of jobs.
Assigned to is used to define who you want the jobs to be routed to from your list of employees. You can leave the assigned to set to what appears when we open the routing screen or choose another employee to move all of the selected jobs to another employee.
Using the start date field will make Smart Routes start routing the jobs in your filter to that date.
For example, we have 10 jobs on 1/20/2018, we want to move these jobs to 2/20/2019. We would filter for jobs on 1/20/2018 and then in the optimization stage, we will change the start date to 2/20/2019.
The End Time will be used when you want to route for a specific date, but you don’t want to schedule past a certain hour of the day. When choosing this option, the jobs may not all fit on one day, so they may be moved to the next date.
The Number of Stops option will appear when you choose to route based on the number of stops per day. Selecting that option will allow you set the number of stops per day.
Choose to include weekends if you work weekends and you would like to include those days for scheduling.
Choose to include drive time to give an estimated amount of time between jobs for driving time.
Route by Zip Code is used in a last resort situation, where the customer address is not available, but you have the zip code. This function will route you to the local post office.
Finalizing the New Route
Once the job routing has been plotted out on your map view and organized in the visible list, if there are no adjustments needed, you can “Finish Optimizing”, which will have replaced your “Start routing my jobs” button if the previous steps were followed.
You can adjust the route if needed by using the arrow buttons along the list of jobs (between the map and the list of jobs).
Choosing the finish optimizing will direct you to the following screen.
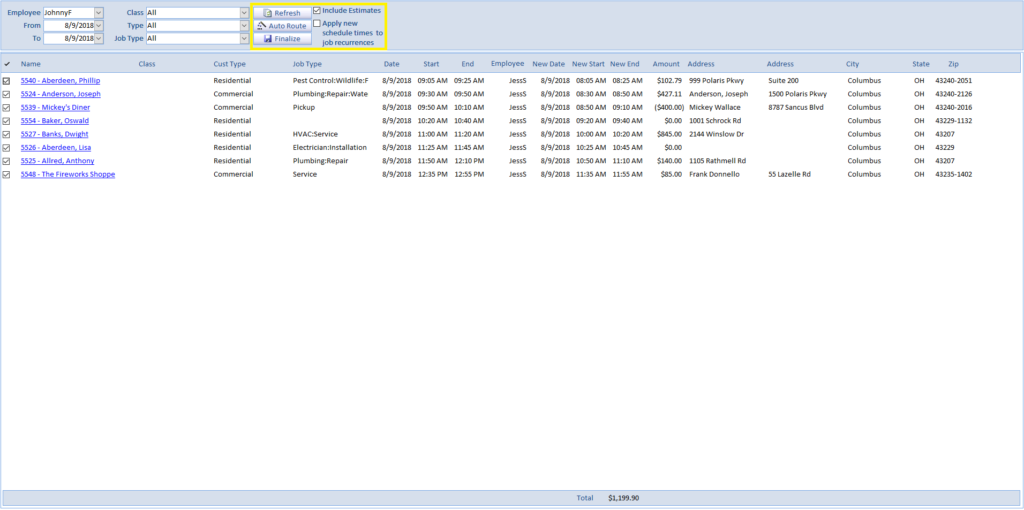
Review the list of jobs, decide whether or not this route should update the recurrence patterns on your recurring jobs by selecting the “Apply new schedule times to job recurrences” option along the top and click “Finalize” to complete this process.
Smart Find
Smart Routes also unlocks the Smart Find tool within your job records. This function will allow you to find an opening on an otherwise booked schedule. You can find this tool inside of the scheduling tab of a job.
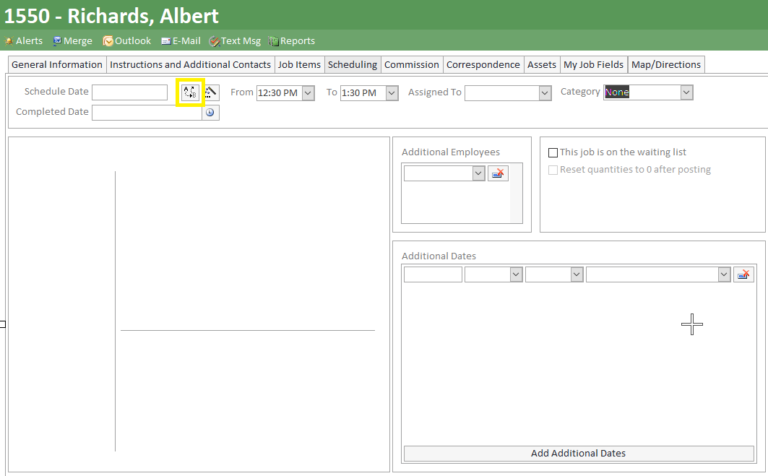
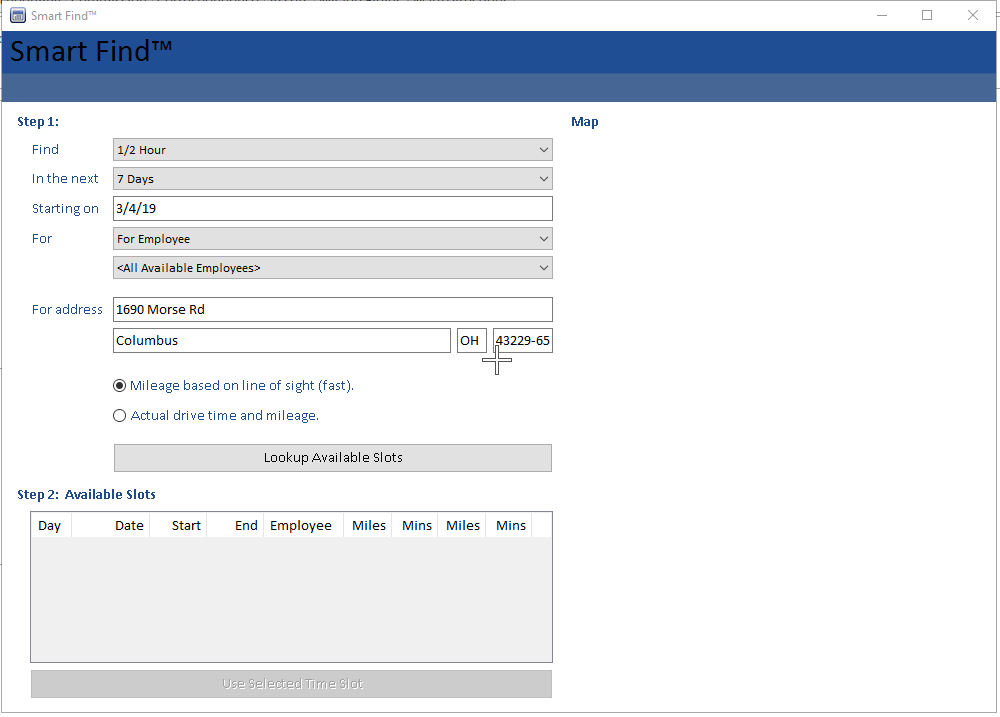
Upon using the “A to B” button, you will be able to define your criteria for how you would like to schedule this job in the booked schedule. These details are part of “Step 1”.
Set find to the amount of time you would be looking for to schedule the job.
Working off of the find field, set this to where you are looking for an opening. You can set this from 1 day to 14 days.
The starting on date is used to set when you want to start looking for openings.
In the for section, you can select to search all available employees, all departments, or you can filter down based on employees or departments to look for certain employees or certain departments. You will be able to see who the job is going to be scheduled for upon looking up available times in step 2.
The address in this section is the service address for the customer.
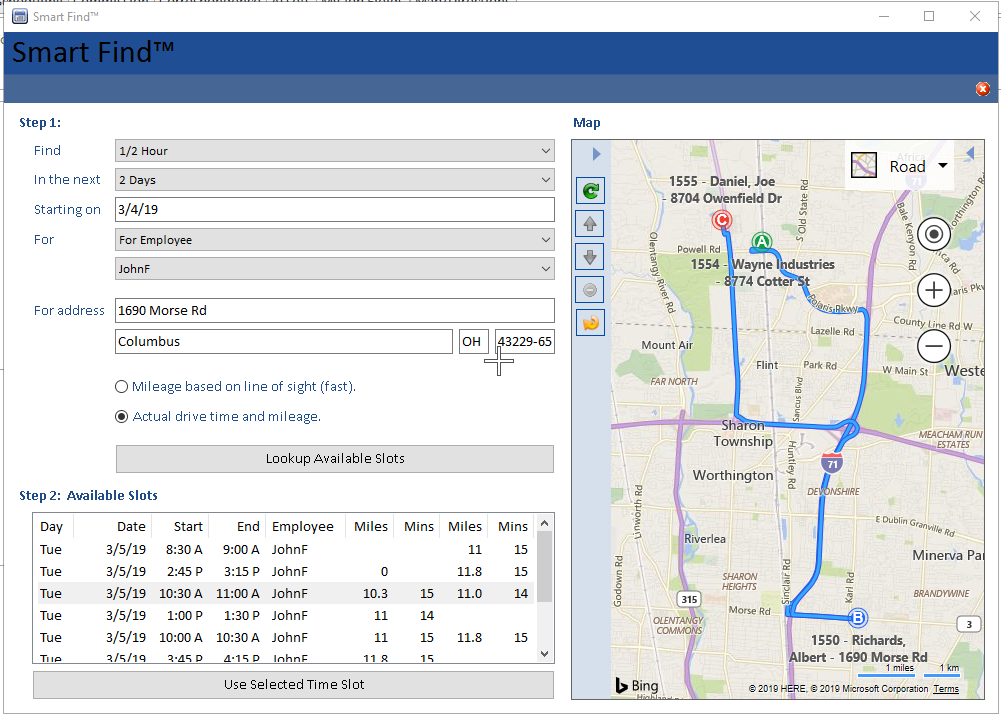
Step 1 was to define your criteria for scheduling the job. Step 2 will show you the available times based on your filter criteria.
You will select one of the options in the list and it will preview the route for that job. It will show the first job, the job you’re scheduling, and the job directly after it. You may or may not have other jobs before and after, they are not necessarily required, but it will be helpful to see what the rough time from site to site will be.
Upon highlighting the time you would like, “Use Selected Time Slot” to add this to the schedule.
