What's Equipment?
Equipment can be loosely defined as anything owned by the customer that you work on. This is different from the “Assets” section, which is used to track things your business owns and uses on jobs.
Customer-owned equipment can be stored on the customer or location record and used while performing services for the customer in iFleet. The purpose of this is to record important data such as model and serial numbers, locations, and service history of the customer’s equipment.
Equipment in Smart Service
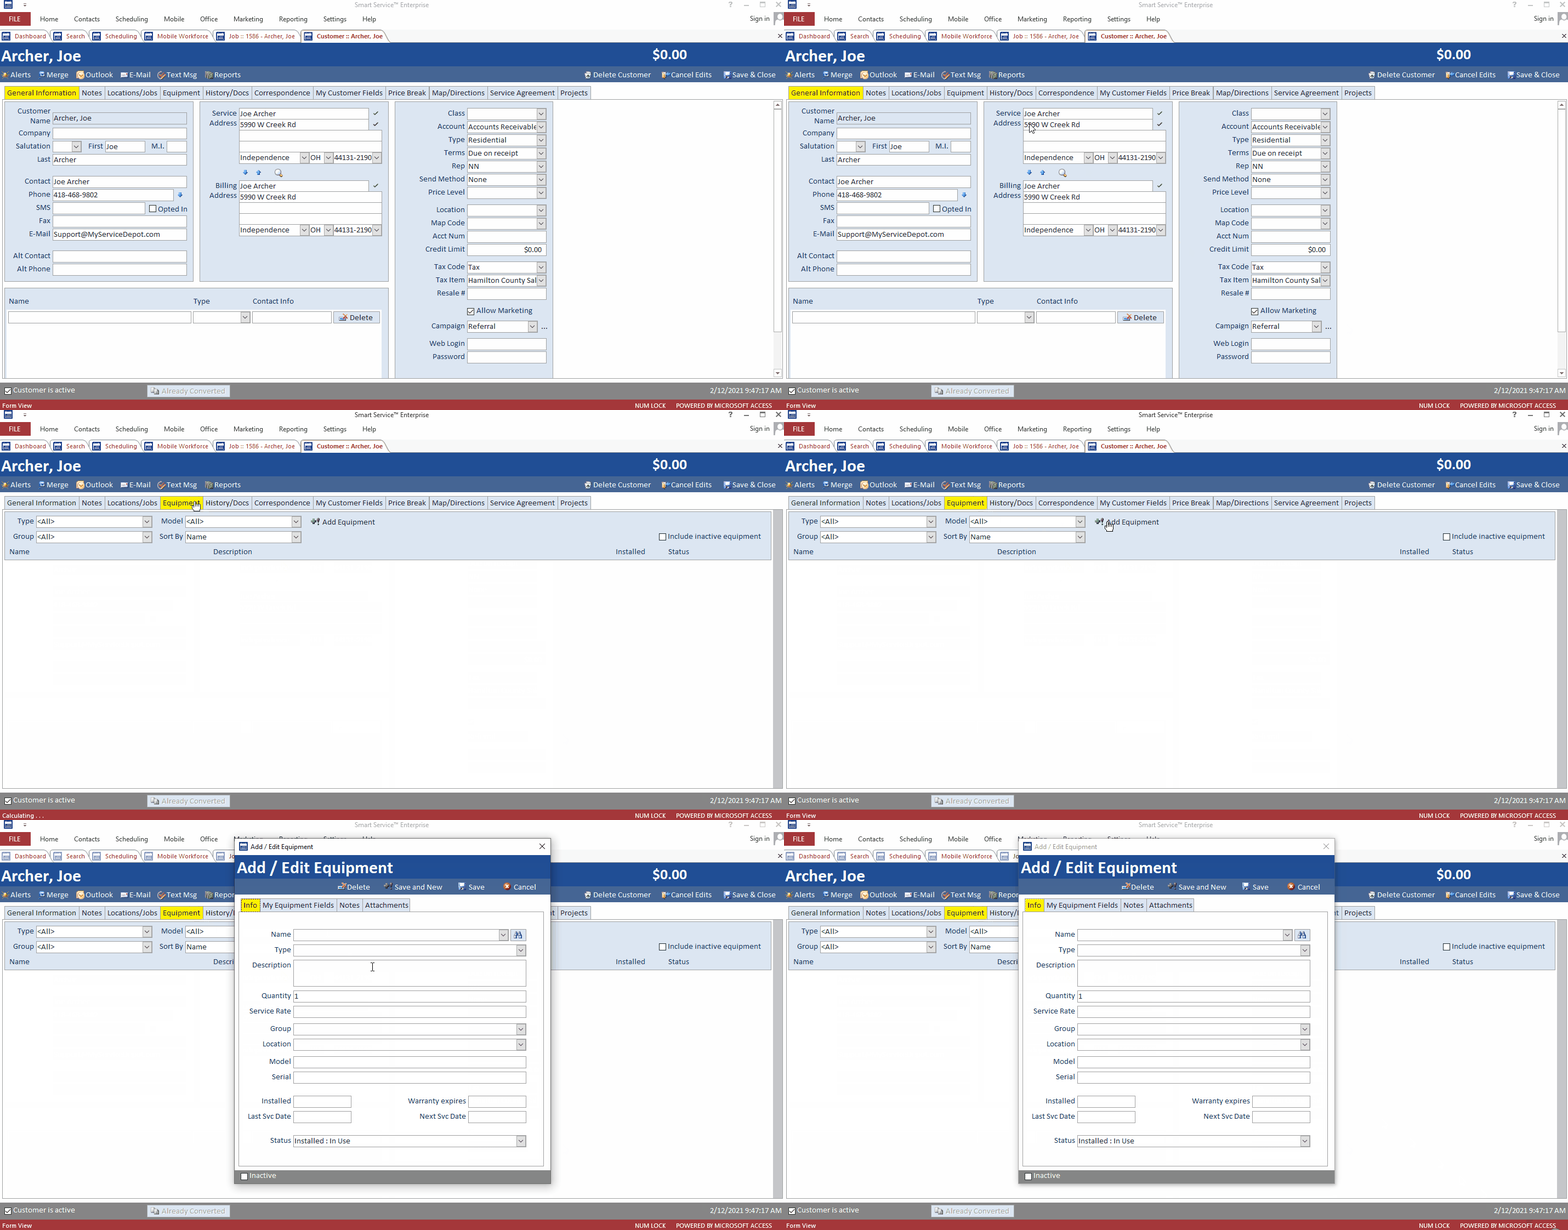
While iFleet typically creates and manages equipment records, the same can be done from Smart Service back in the office. If the customer you’re using has multiple locations, we recommend starting with the equipment tab for that location instead of the equipment tab on the customer. Since each location has its own equipment tab, equipment for location A won’t show up when you visit location B.
What’s important to you and your industry to record about customer-owned equipment is up to you and any documentation you need to fill out for any agency that monitors your work.
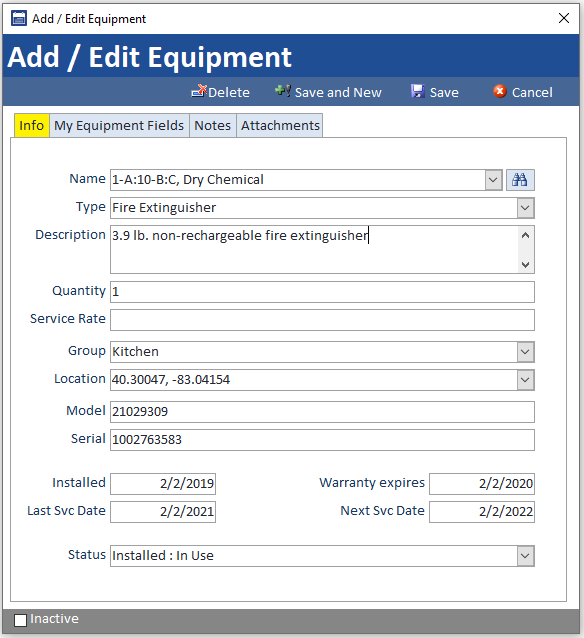
Smart Service has standardized fields available already for the basics, locations, model numbers, serial numbers, etc.
When you create equipment records, create one record per unit. There’s no limit to the number of equipment records you can create and you’ll want to be able to address each piece of equipment individually later in this article.
You can name the equipment anything you want, so pick a name that will help you identify this specific unit out of the list of units owned by the customer.
You can also choose from the dropdown to select an existing items from QuickBooks. Doing so doesn’t sell that item to the customer or decrease your inventory count, this is just a convenient way to select an equipment name using your item list.
While iFleet users can select types from this list, the office must generate the list here. Use this to categorize the different types of equipment you work with.
If you’re in fire protection, this would be extinguishers vs alarms. If you’re in plumbing, this could be the different types of water heaters (gas, electric, tankless, etc.).
This section is usually left blank as your techs probably don’t need an expanded description on this unit unless its a custom unit.
You can use this section to describe the equipment in question.
Most of you reading this should always enter a quantity of 1. If you have multiple identical units on site, and each has its own serial number, create an equipment record for each so you can store their serial numbers.
Adding a quantity of 2 or more will force you into servicing those units at the same time and make it difficult to tell their service history apart.
This is a legacy field and is typically no longer in use by most customers. Adding an amount here will cause the “Add Equipment” option under job items in iFleet to use the amount entered here instead of the job item amount.
Working on a big customer with a few different systems? If so, grouping will be important to you. You can create groups which you can use to bind equipment records together. For example, if I have 5 fire extinguishers on the first floor or a building and 3 more on the second floor, I can tie the 5 equipment records on floor one together by adding them all to the same group.
When your technician is looking at iFleet they’ll have the option to filter down to a particular “group” of items to make a big equipment list more manageable.
When using iFleet, your field user can stand next to this equipment and press a GPS coordinate pin to define the location of the unit.
Not every site requires that, though, so you can also write in a location like “kitchen” or “closet”.
Here you can store the model number of this unit. When your field user does this, there’s a built-in barcode scanner that they can use to capture this information.
If the equipment you work with doesn’t come with a barcode already, you could purchase or produce a roll of barcodes your field users can start sticking to customer equipment in the field.
While this information is useful for predicting what parts you need to bring with you to the customer, the model and serial number fields can also be scanned to identify the corresponding equipment record in the equipment list.
Here you can store the serial number of this unit. When your field user does this, there’s a built-in barcode scanner that they can use to capture this information.
If the equipment you work with doesn’t come with a barcode already, you could purchase or produce a roll of barcodes your field users can start sticking to customer equipment in the field.
While this information is useful for predicting what parts you need to bring with you to the customer, the model and serial number fields can also be scanned to identify the corresponding equipment record in the equipment list.
If you know the installation date of this equipment, you can add it here. This field is optional so you can skip it if you don’t have this information.
If you know the warranty expiration date of this equipment, you can add it here. This field is optional so you can skip it if you don’t have this information.
The system will fill these fields out for you when you add this equipment record to a recurring service using the “Add Equipment” feature under job items.
There are a few options here for the current status of the unit in question.
When you or your field user create equipment records for this customer or location, those records will be visible anytime you visit that customer until they are deleted or inactivated. This means that while you have to enter the equipment records as you go, your second visit to the customer will contain significantly more information about the customer’s equipment. Getting these equipment records in will also open other options elsewhere in the program for ordering parts, filling out forms, and running reports.
My Equipment Fields
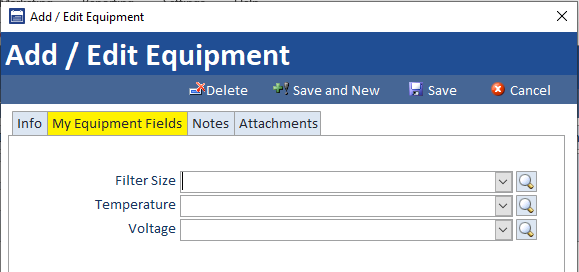
The “My Equipment Fields” section (which you may have renamed in your settings) stores any additional fields your company chose to add to equipment records. If you would like to create some additional fields of your own, you can do so here.
In the settings section linked above, you can create up to 12 user-defined fields which will show up here and in iFleet. iFleet users cannot create new fields, but they can fill out the fields you create.
When you’re creating your user-defined fields, those fields will show up on all equipment records you create in Smart Service or iFleet. This means that you have 12 total fields for additional information to cover all equipment types that you work with.
Notes
Not everything is important enough to require its own user-defined field. You have a notes section here where you can store and timestamp any notes you need for this equipment record. Some customers use this as a ledger to record service history.
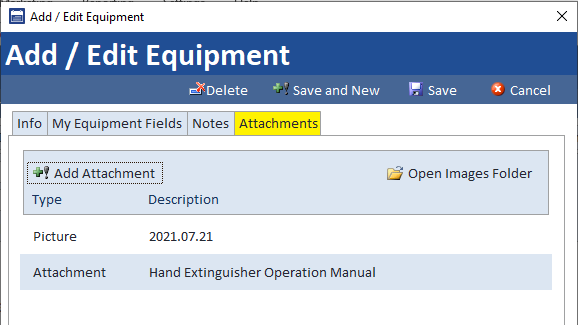
Attachments
The Equipment Screen
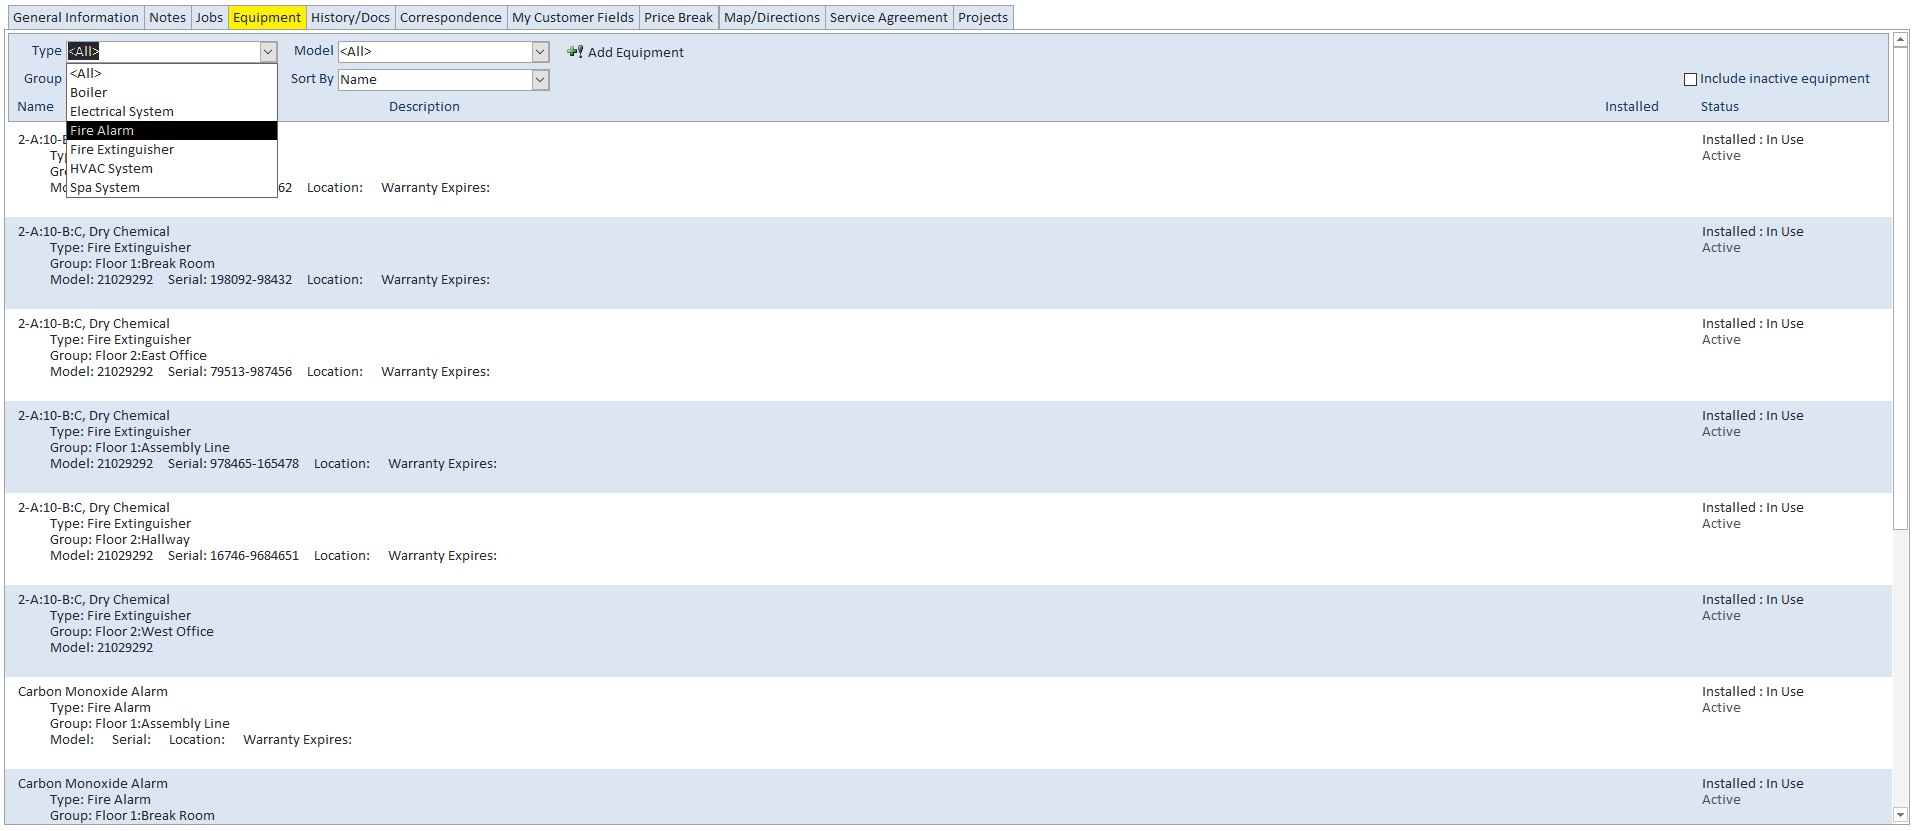
You can use the equipment screen to search and filter your equipment records, whether those records were created by you or created in the field. You can use the options at the top to filter this customer’s equipment list by the equipment type, group, model number, or choose a name from the dropdown.
Equipment in iFleet
Usually, the iFleet user is the one creating and maintaining equipment records as part of their visit to the customer. The following section displays screenshots from an Apple iPad, we do support phones and Android devices as well, but your view of these same options will be slightly different.
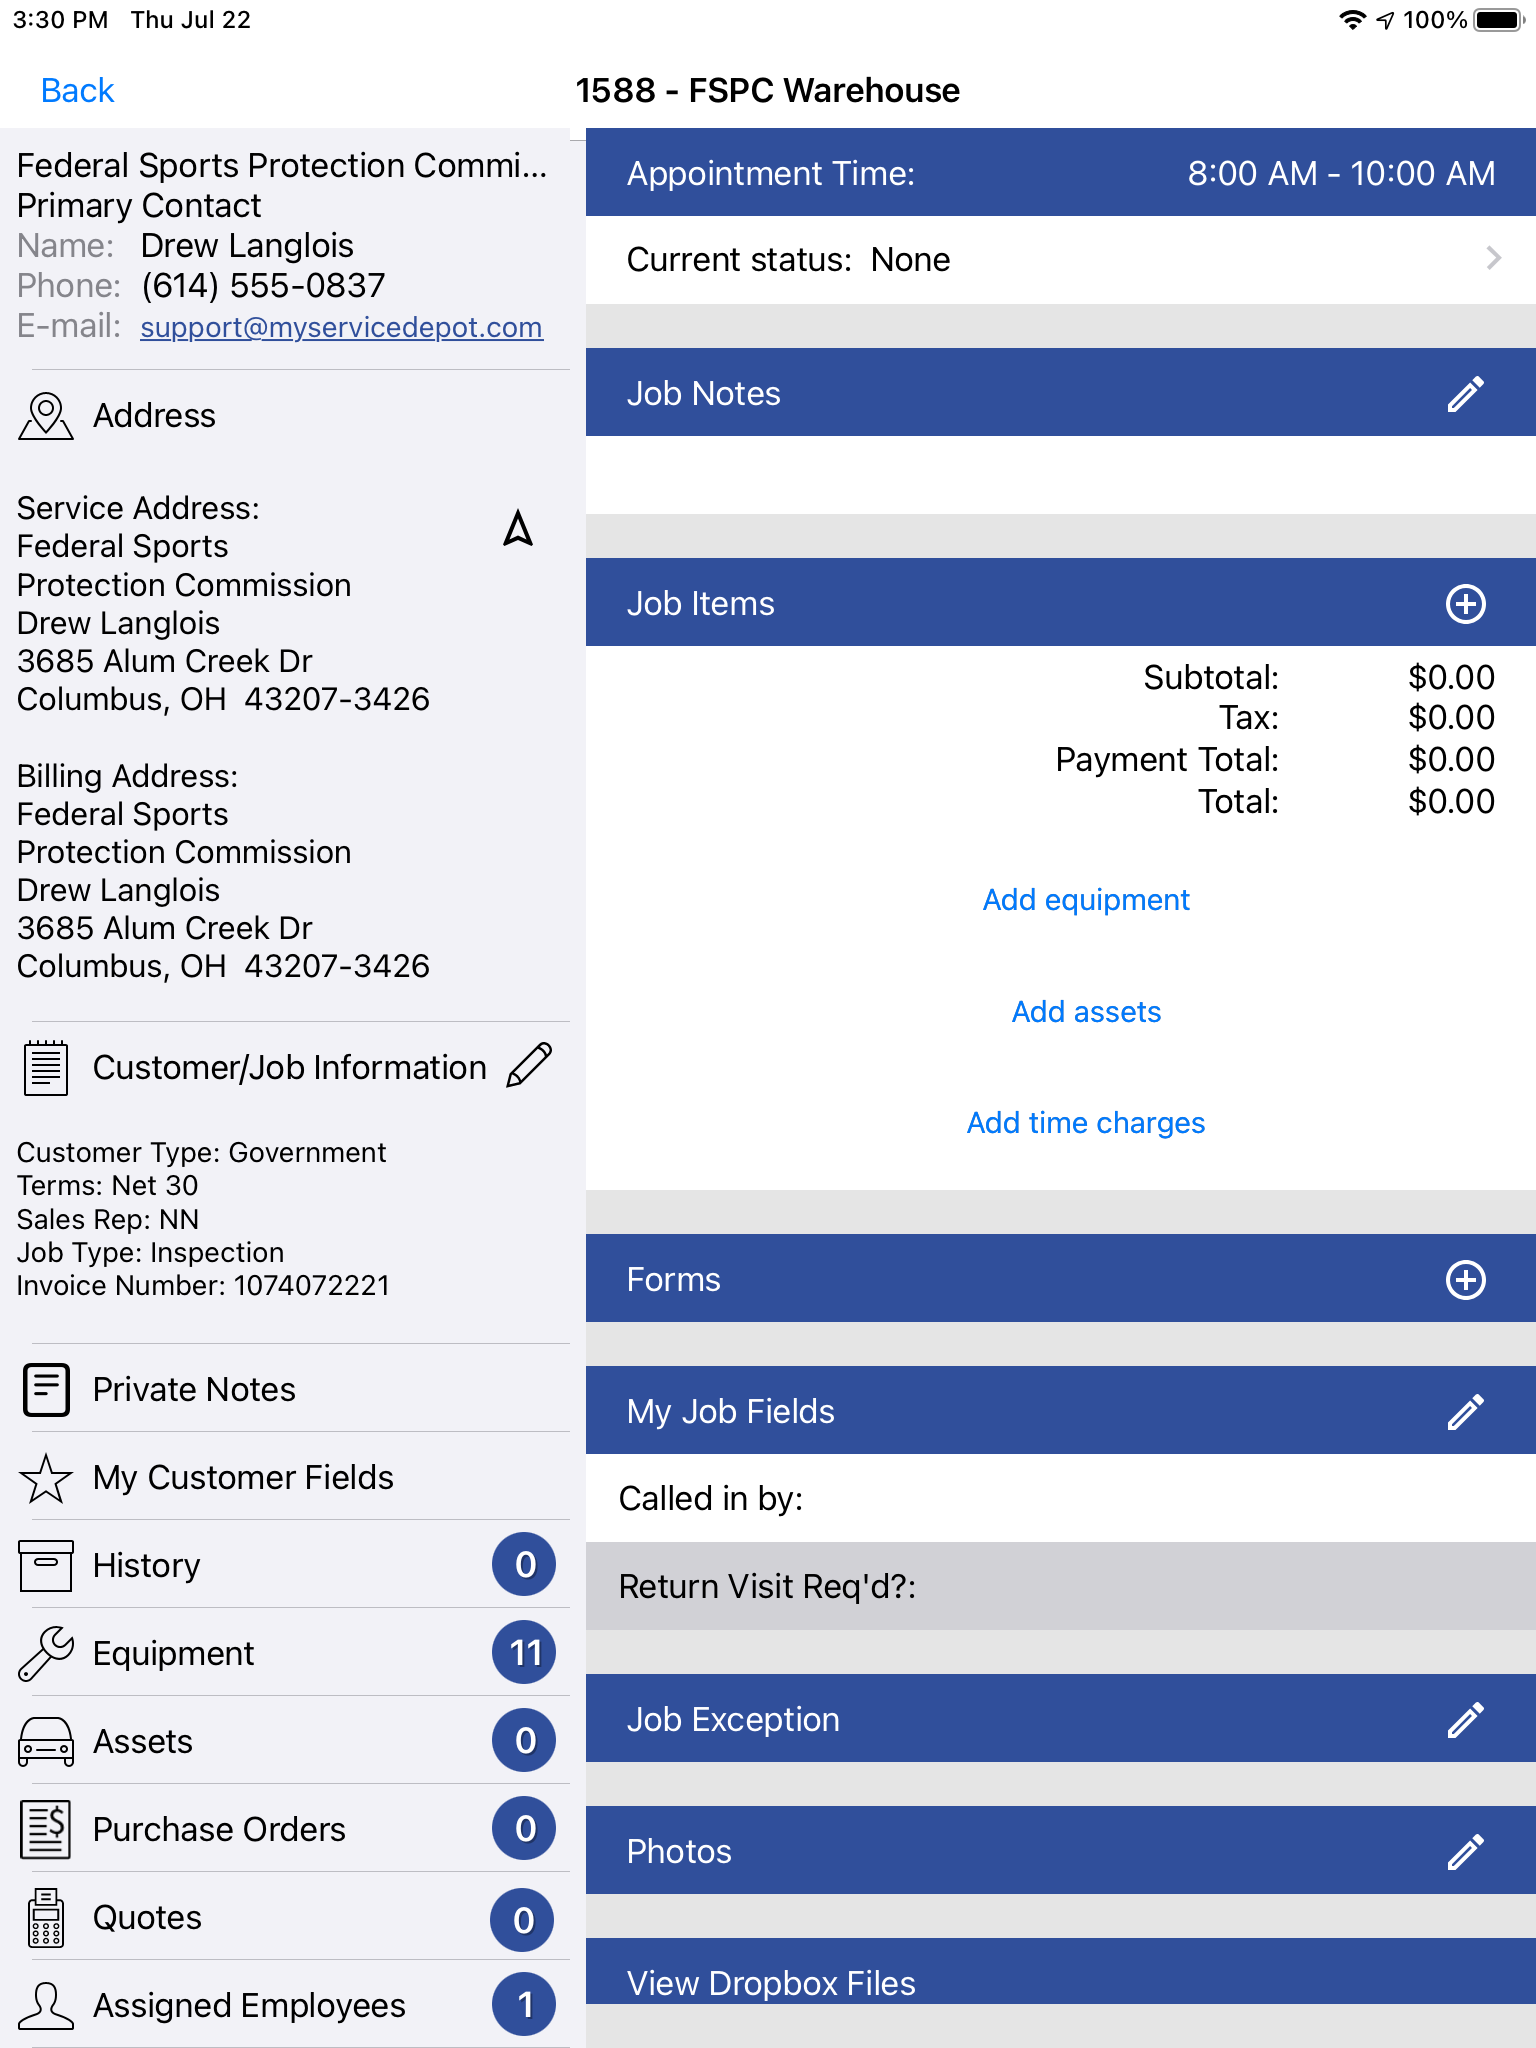
Whether your device is Android or iOS, if that device is a phone, the equipment options below will be inside the “Customer/Job Information” section on iFleet.
Accessing Equipment
When you open a work order in iFleet, you can access your equipment list under the “Customer/Job Information” section.
Generally, we see the creation and management of customer-owned equipment assigned to the field user rather than the office employee.
Once your field user creates these equipment records, they will become part of the customer and thus visible every time you visit this customer.
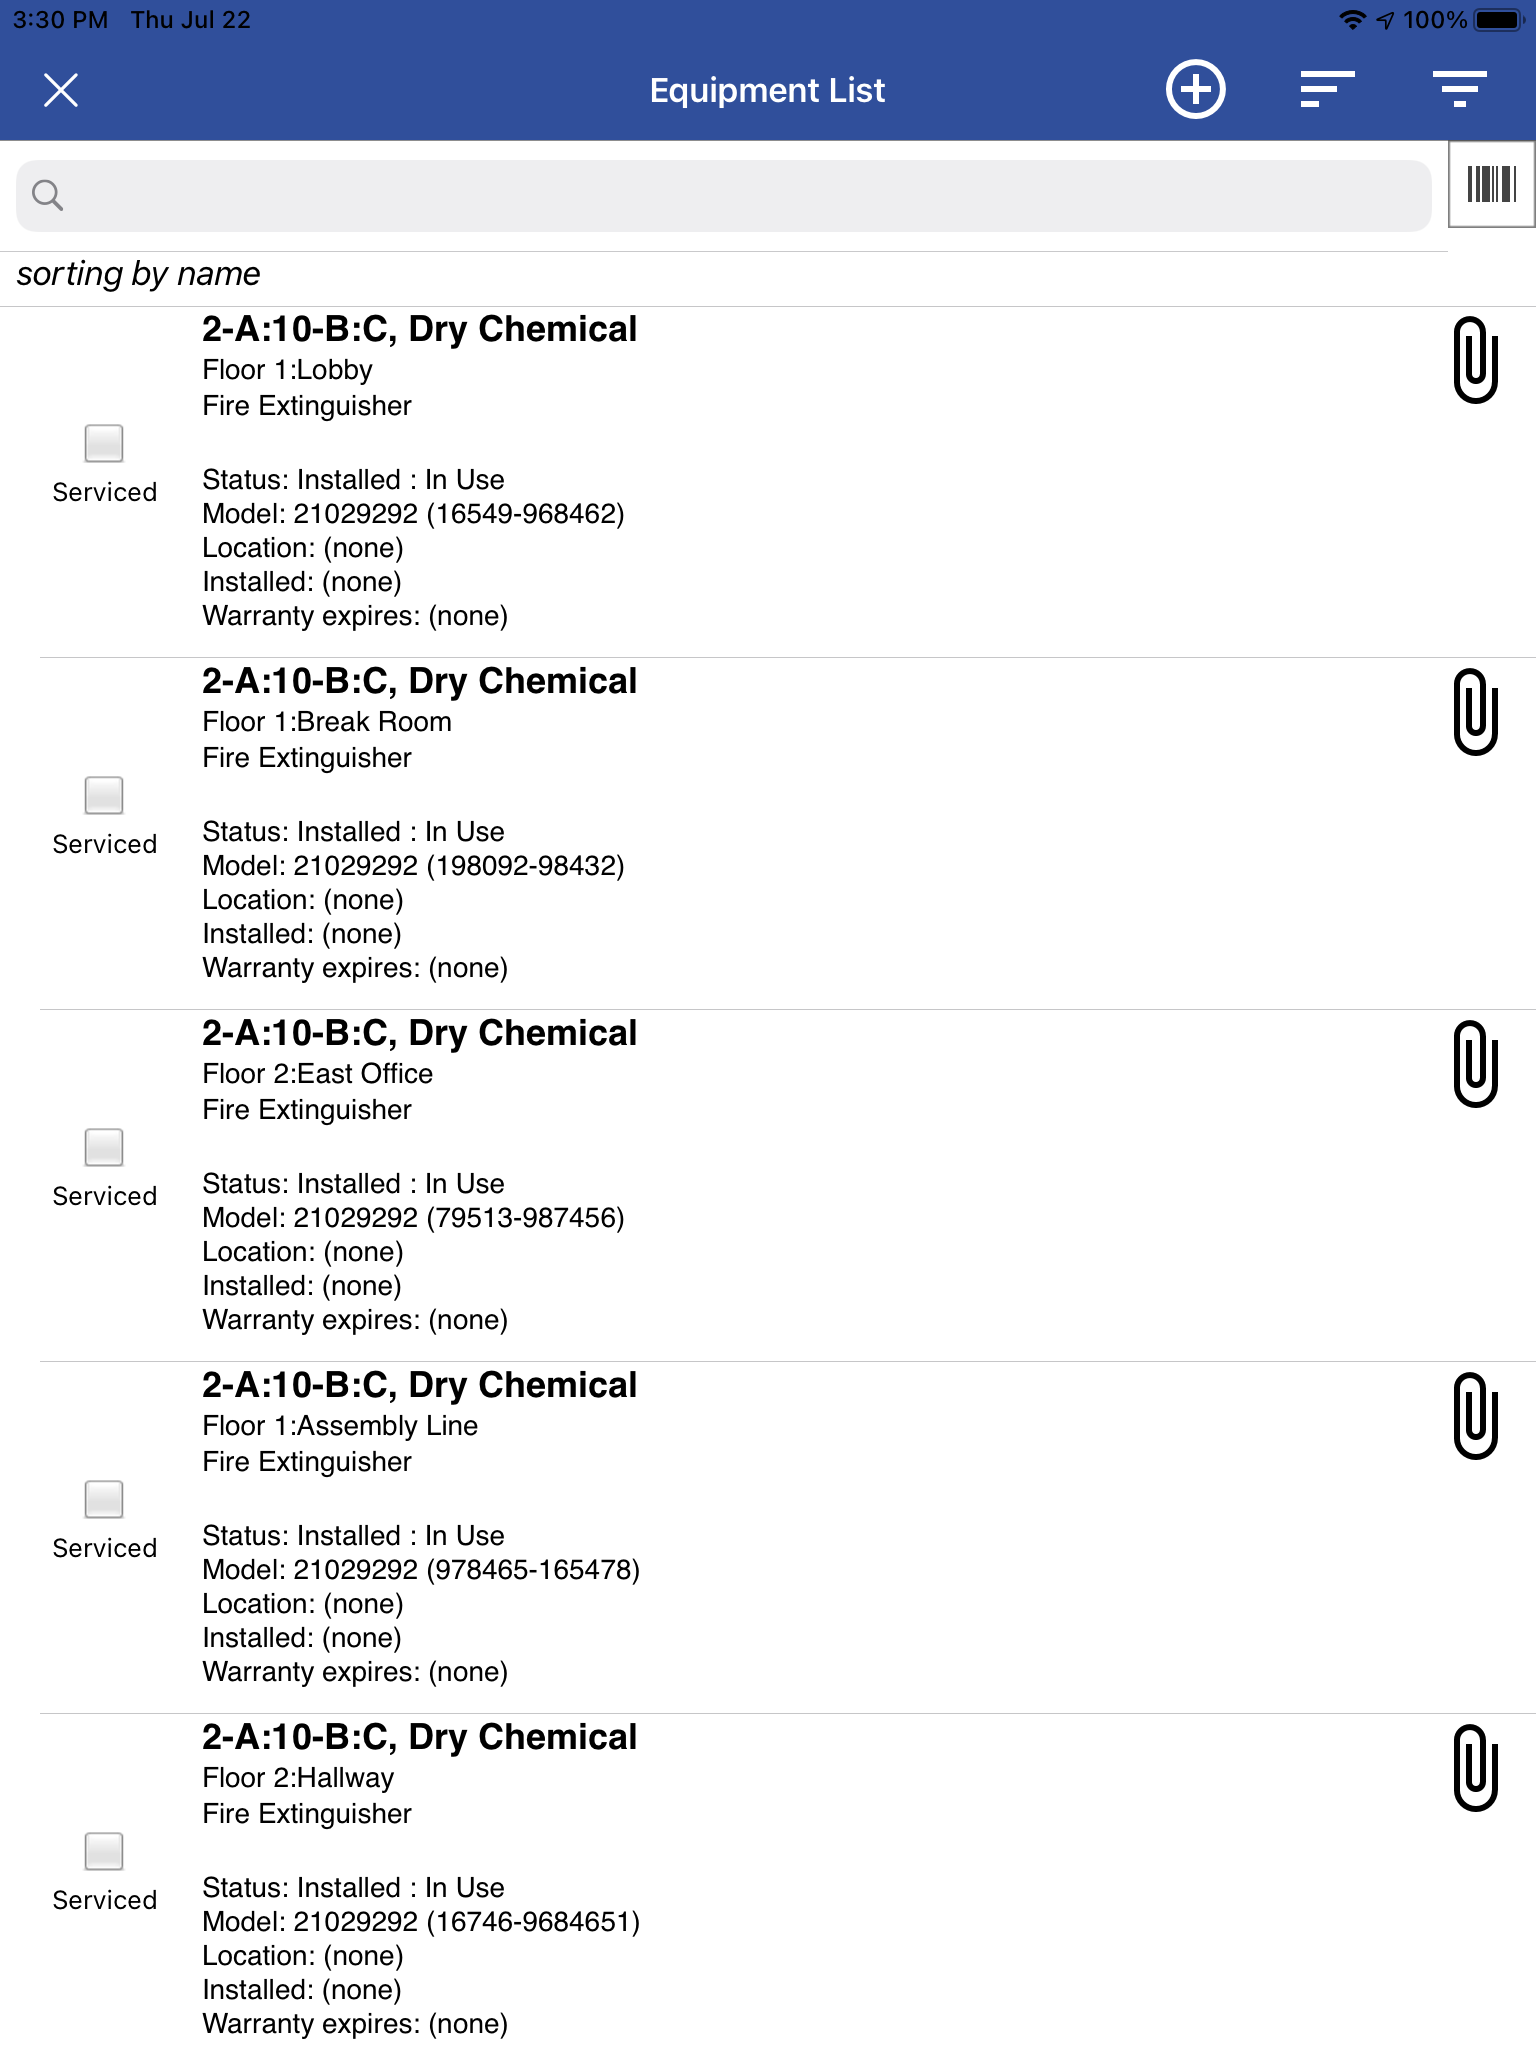
You can create new equipment records by tapping the plus symbol at the top right-hand corner of the window shown here. Otherwise search for and tap on the desired equipment record.
Sort & Filter Equipment
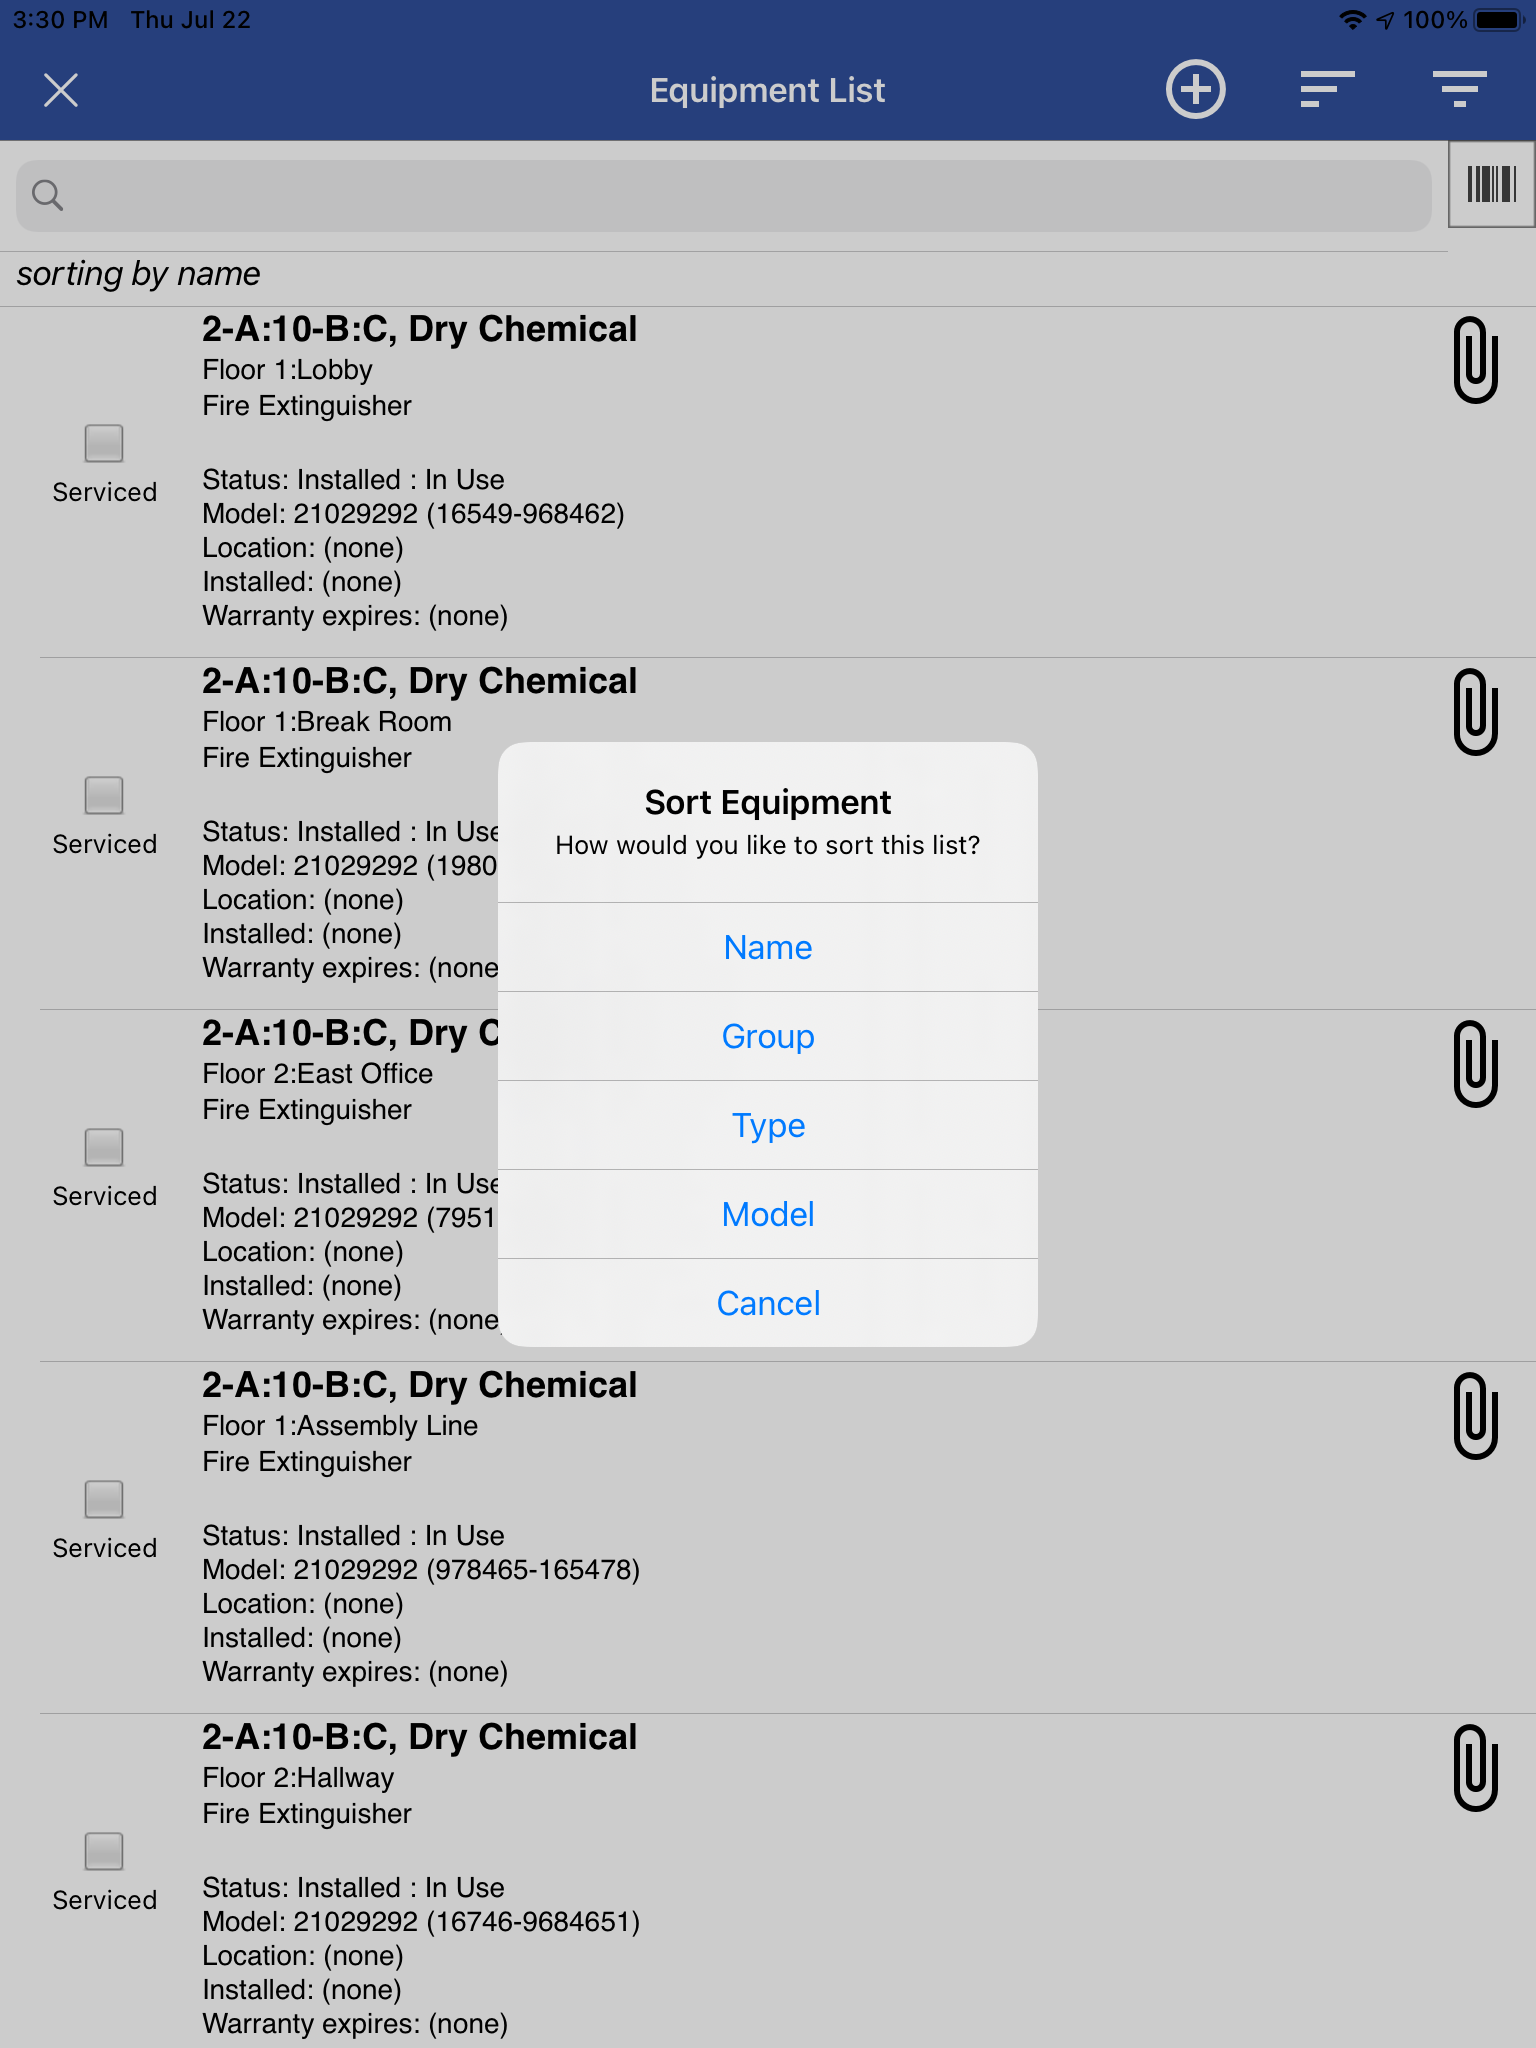
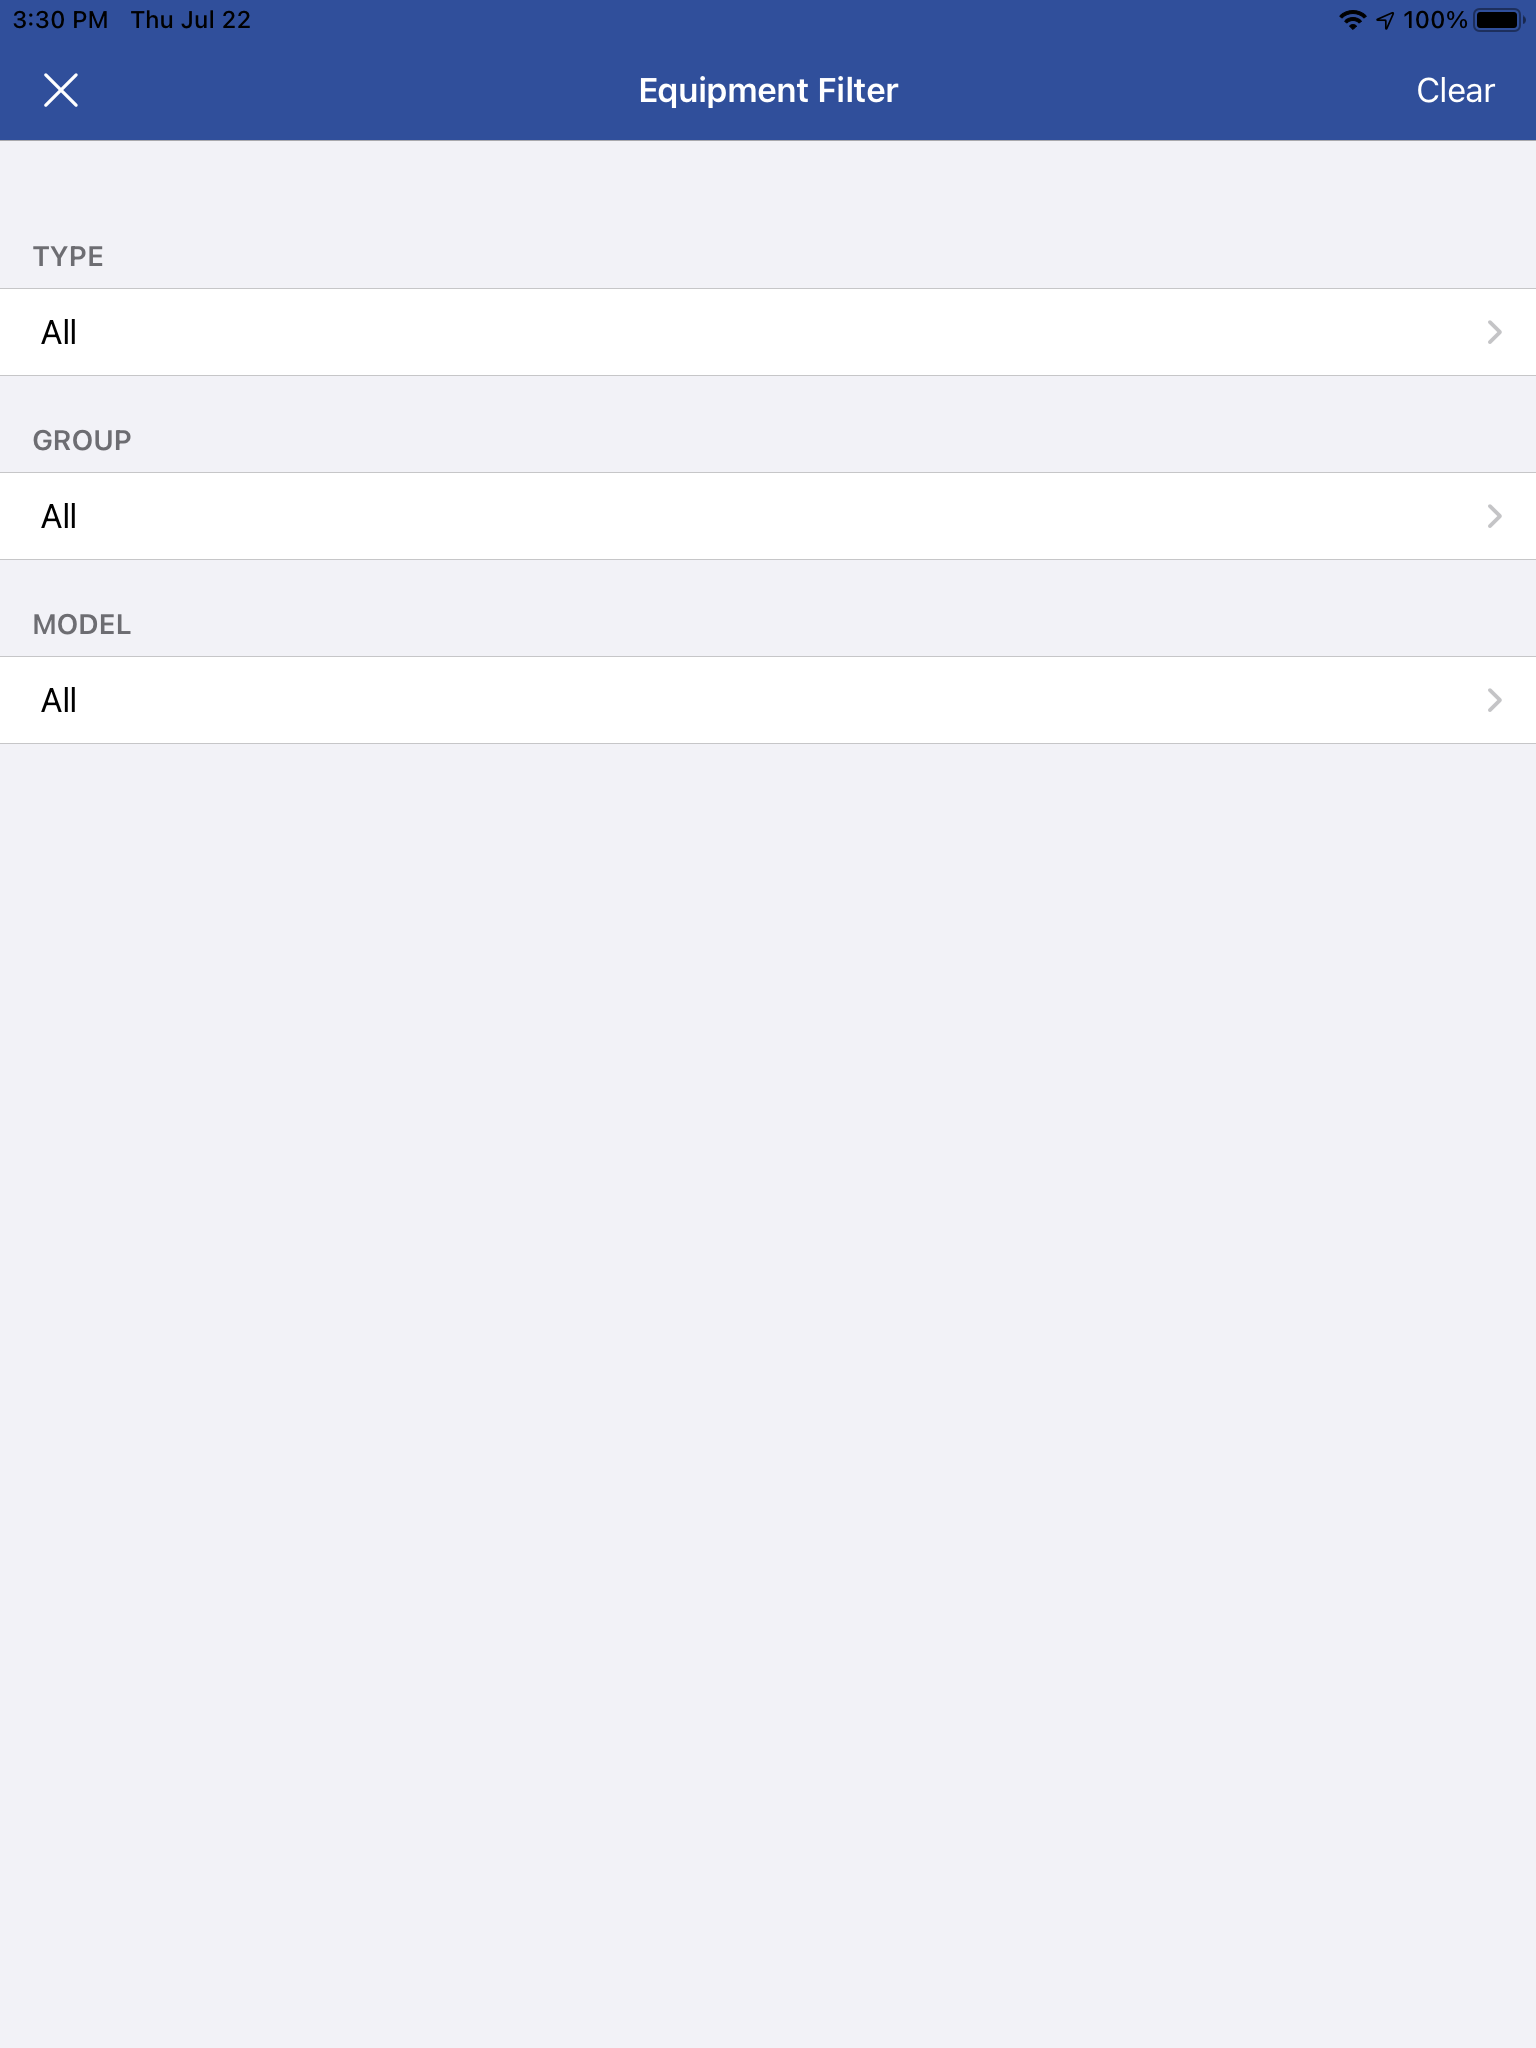
The sort and filter icons next to the plus symbol at the top right-hand corner will allow the user to sort and filter the equipment list.
If you want to return to the full list after sorting or filtering, you can tap on the same option and use the “clear” button at the top right.
Using the sort and filter options is a great way to limit a large equipment list to items of a certain type of items that are in a certain location of the building.
If you’re just joining us on this article, check out the section about adding equipment in Smart Service above to learn about setting up types and groups.
Equipment Records
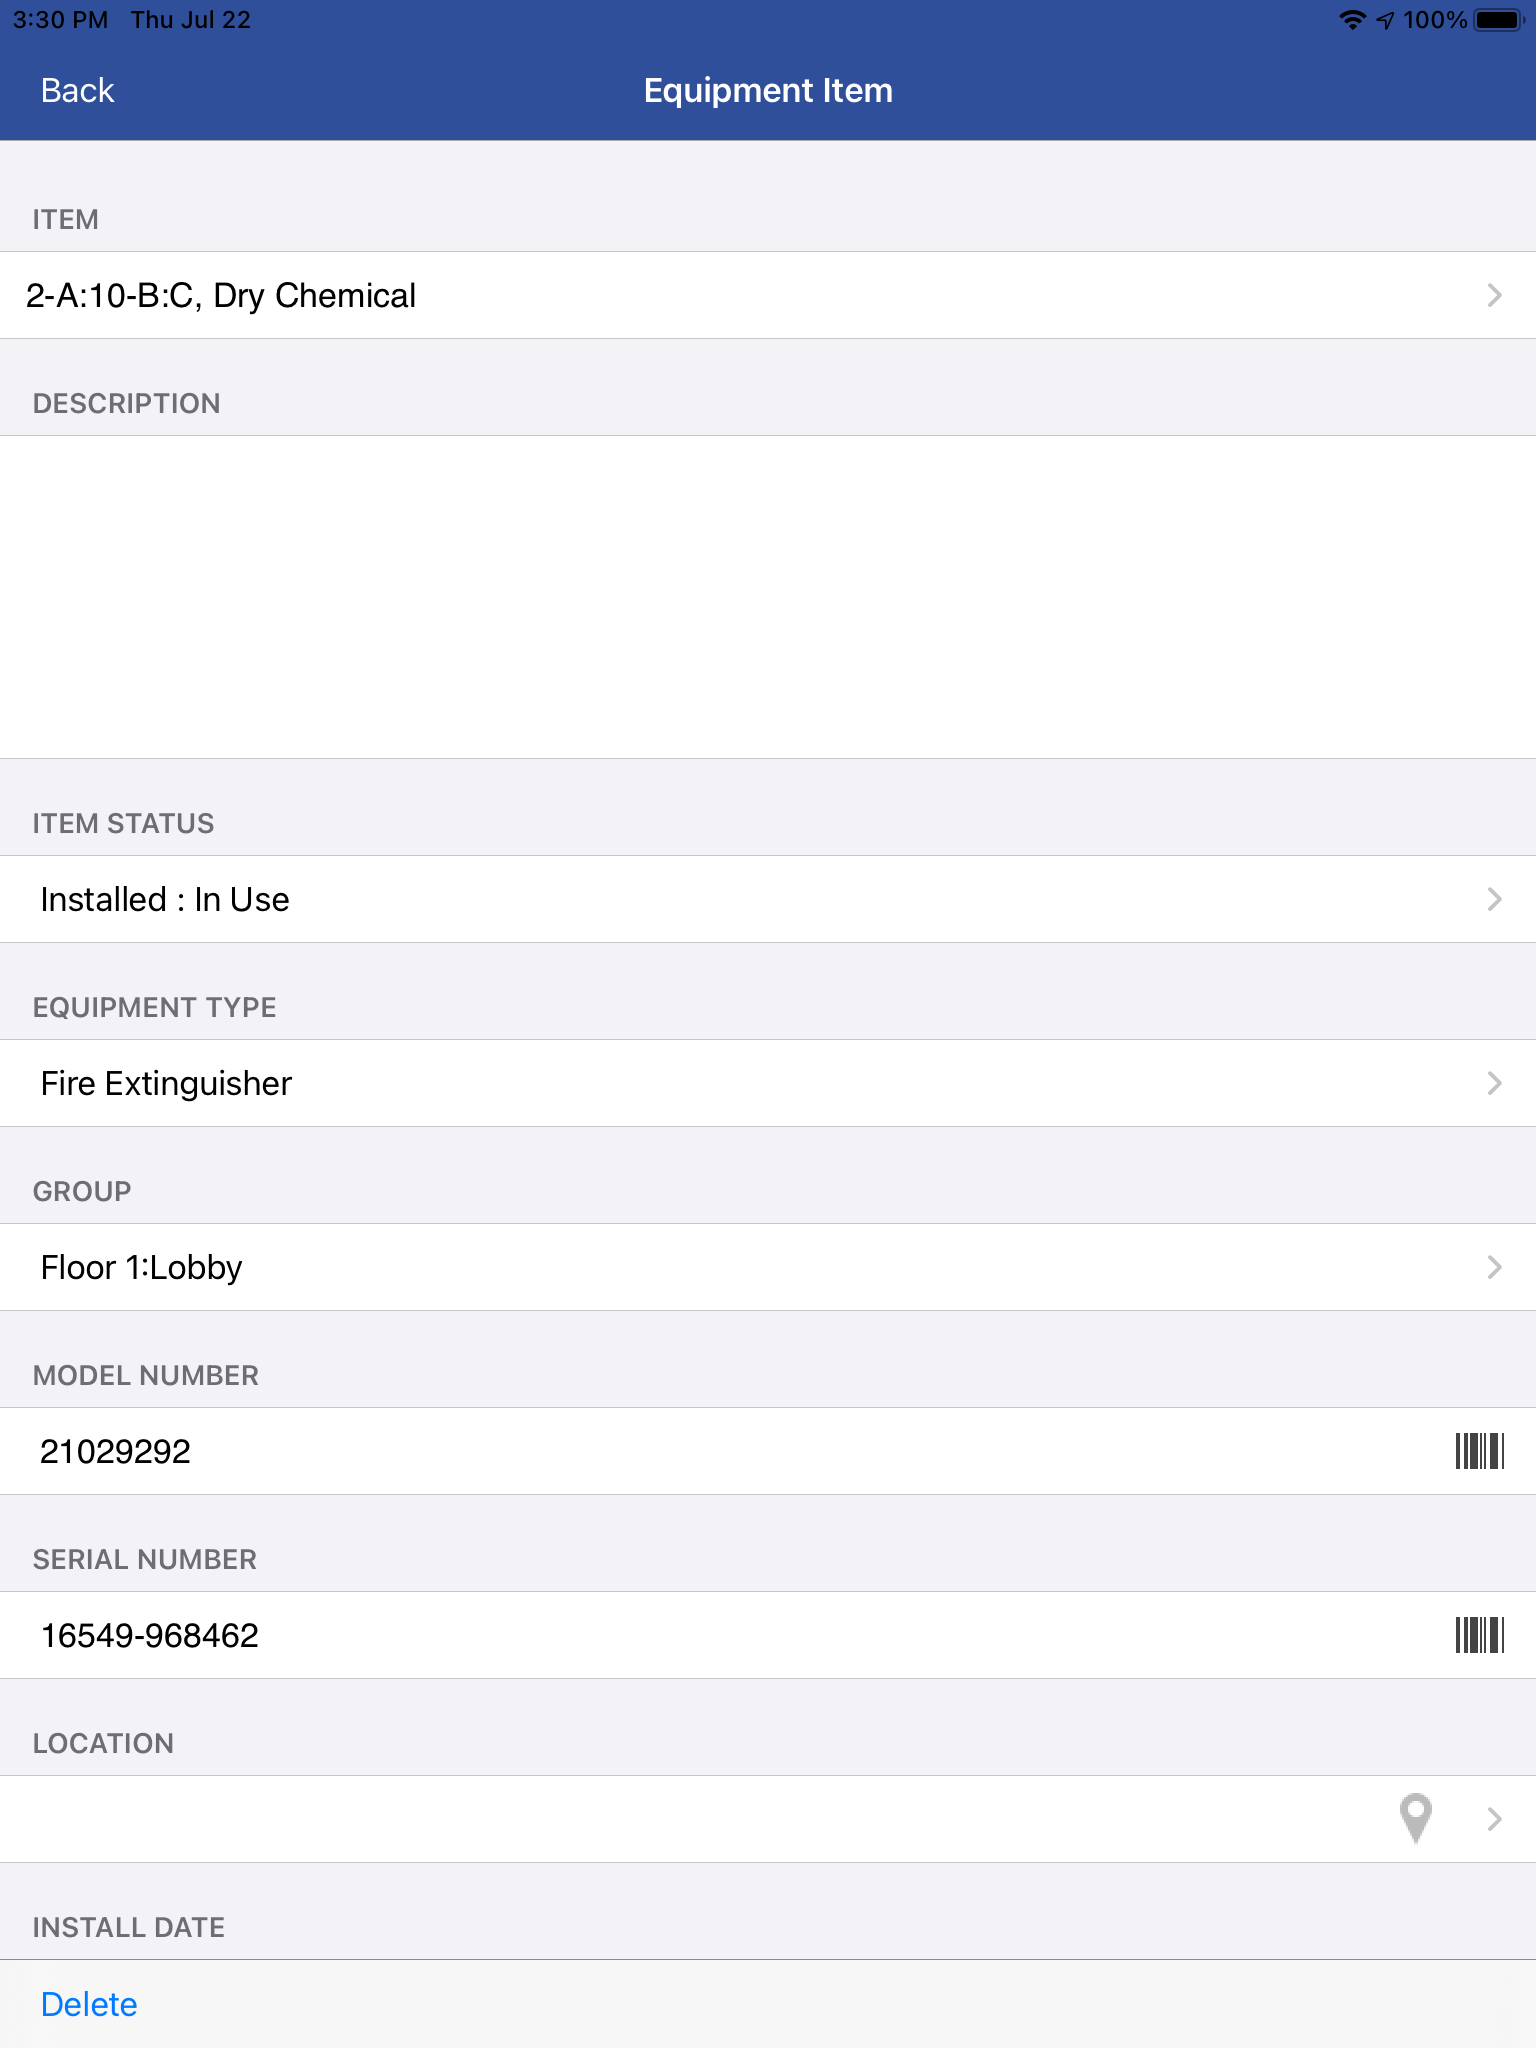
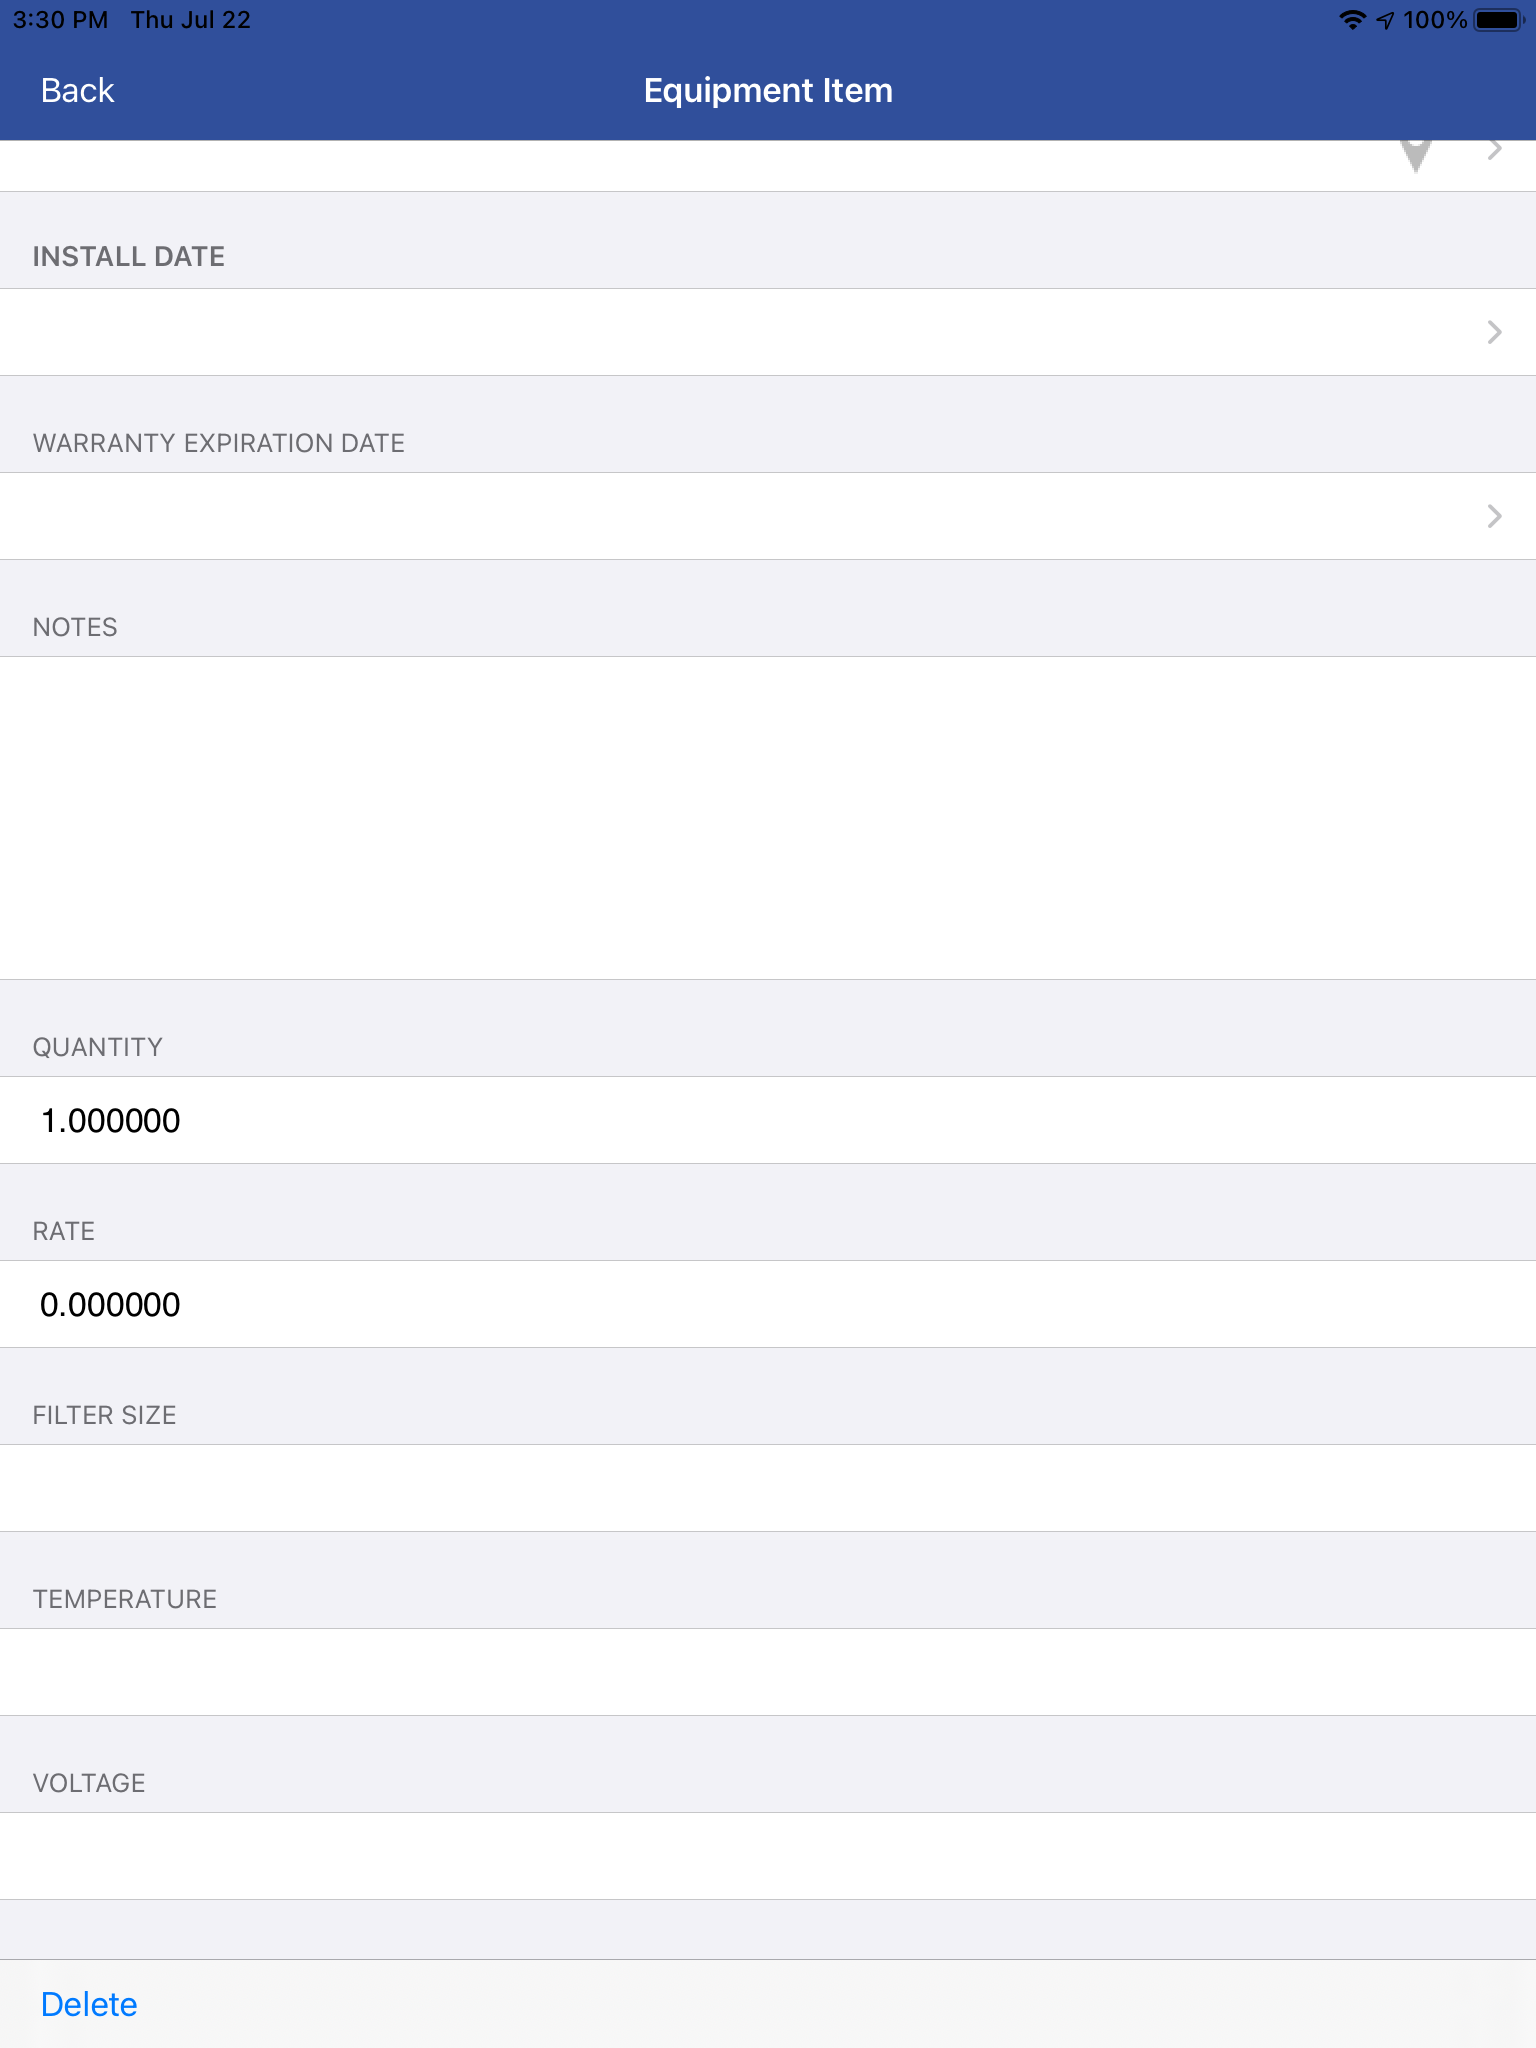
When you tap on an equipment record, you can see all of the available data from the standard fields plus the user-defined fields your business added to your copy of the program.
Where you see a barcode symbol, you can tap to scan the model / serial number when applicable. The GPS pin will mark the coordinates of where you’re standing, allowing navigation to this spot later.
When entering equipment, it is important to remember that you do not have to fill the “Item” field with an entry from your QuickBooks list. You have the option of typing a name of your choice into this space, doing so will only name this equipment record, not add the new name to your item list.
Serviced Equipment for Fillable Forms
This section can only be used if you’re pushing equipment records to a fillable PDF form. The purpose of doing this is to take the information in your equipment list and import it into an inspection form or some other important document your company needs to fill out in order to complete the service.
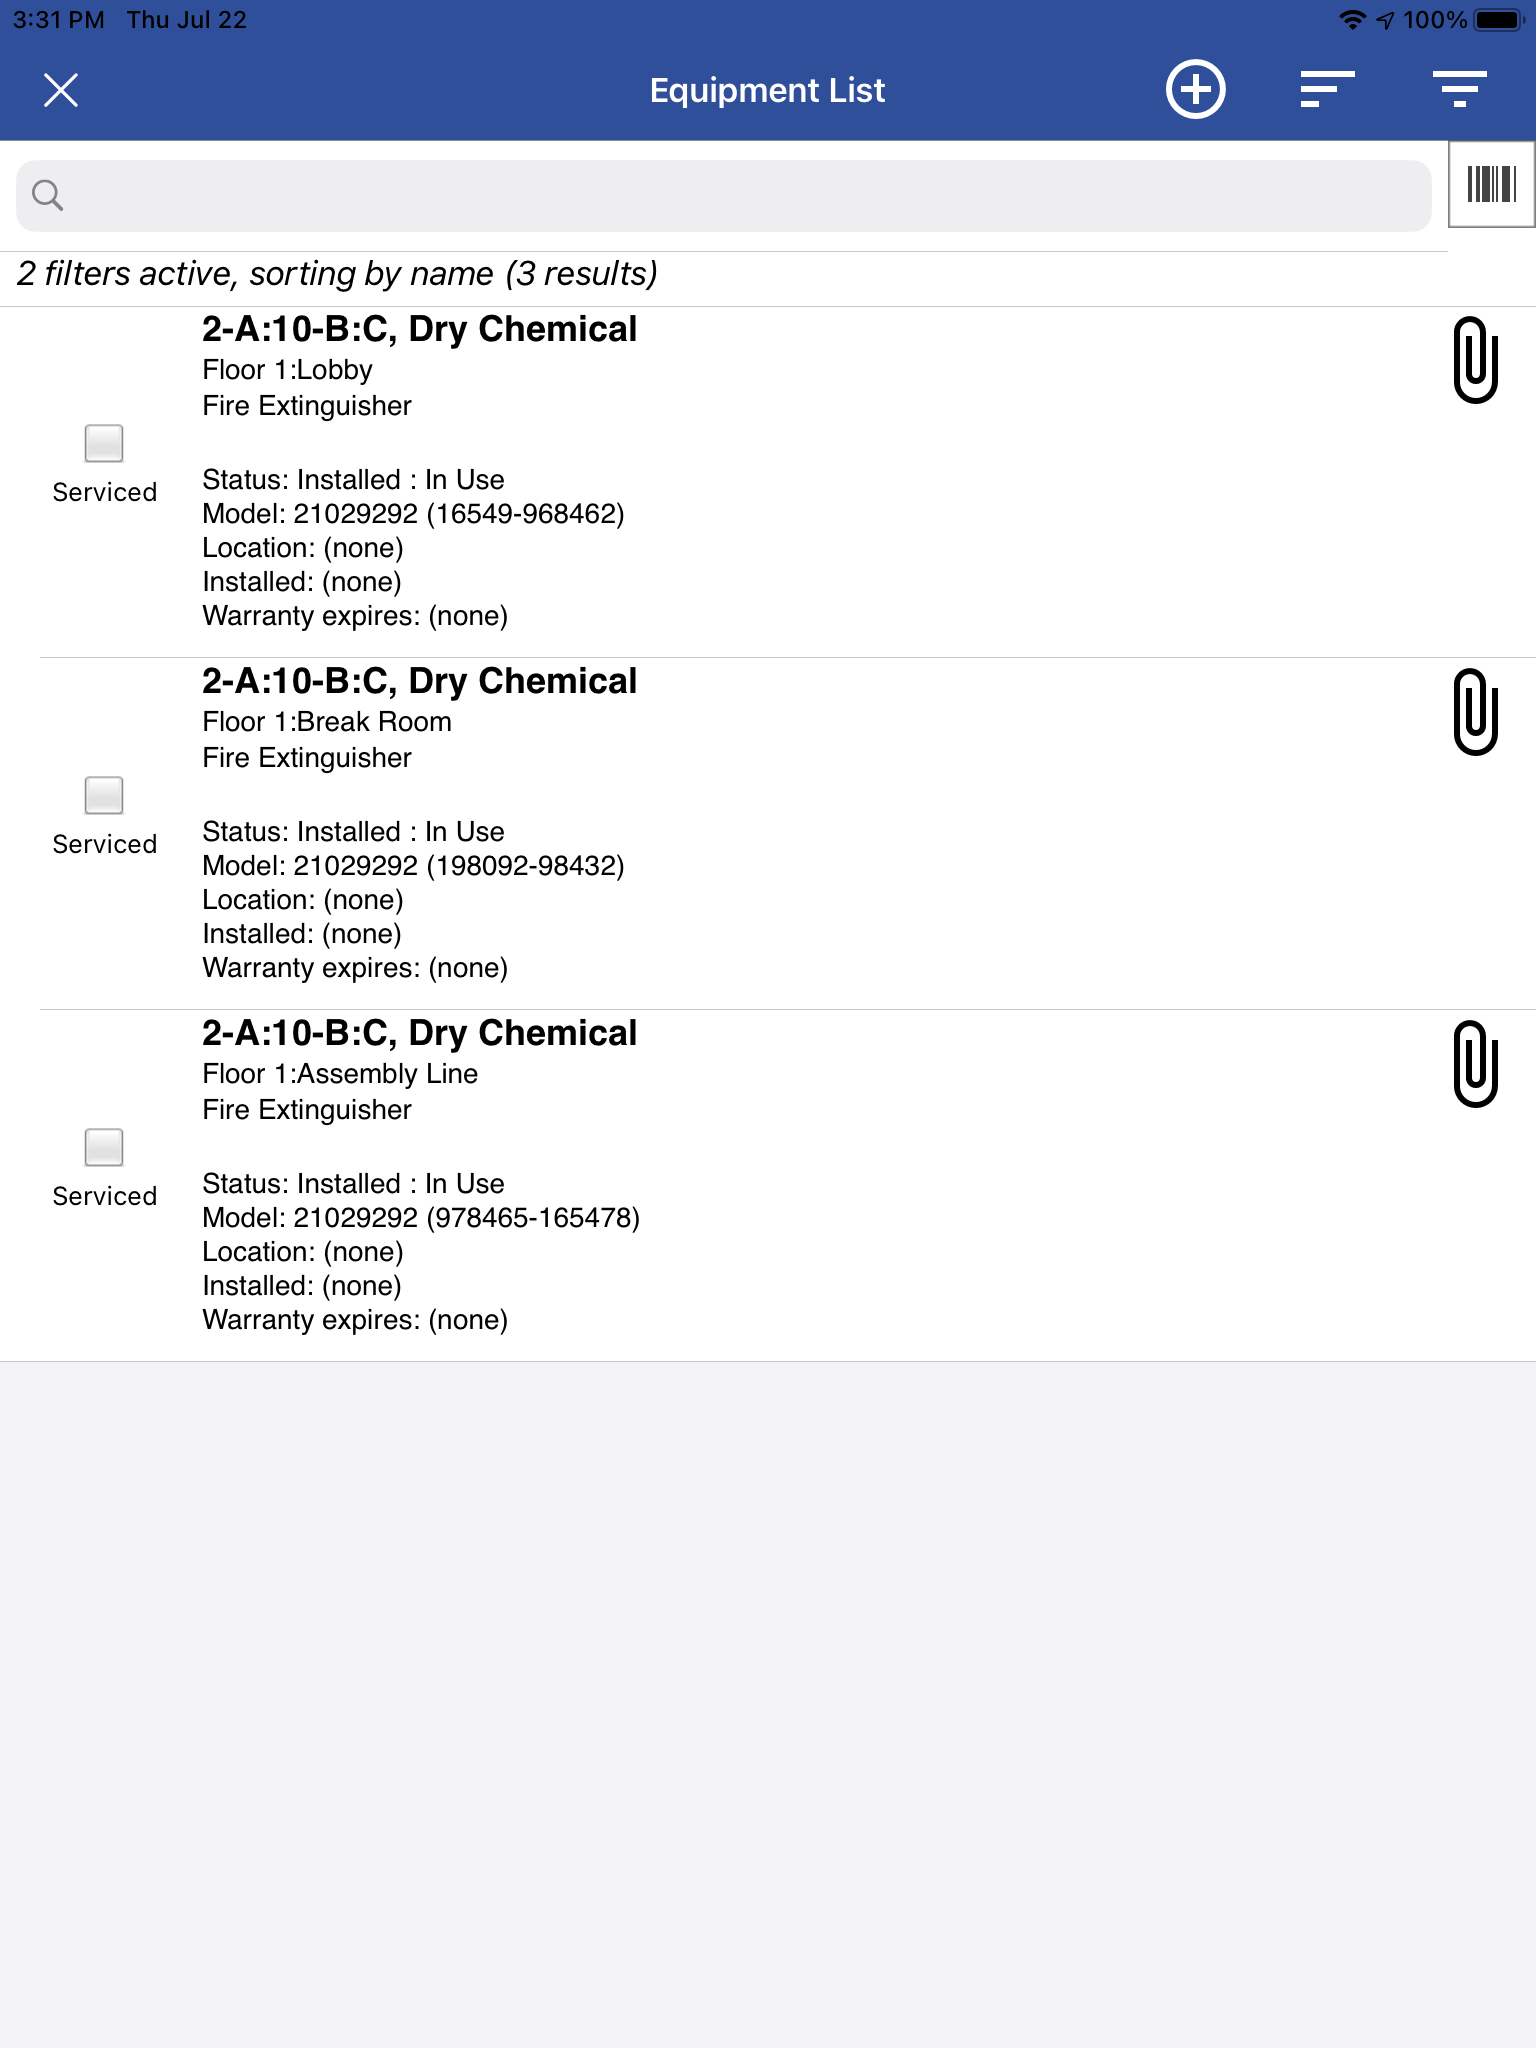
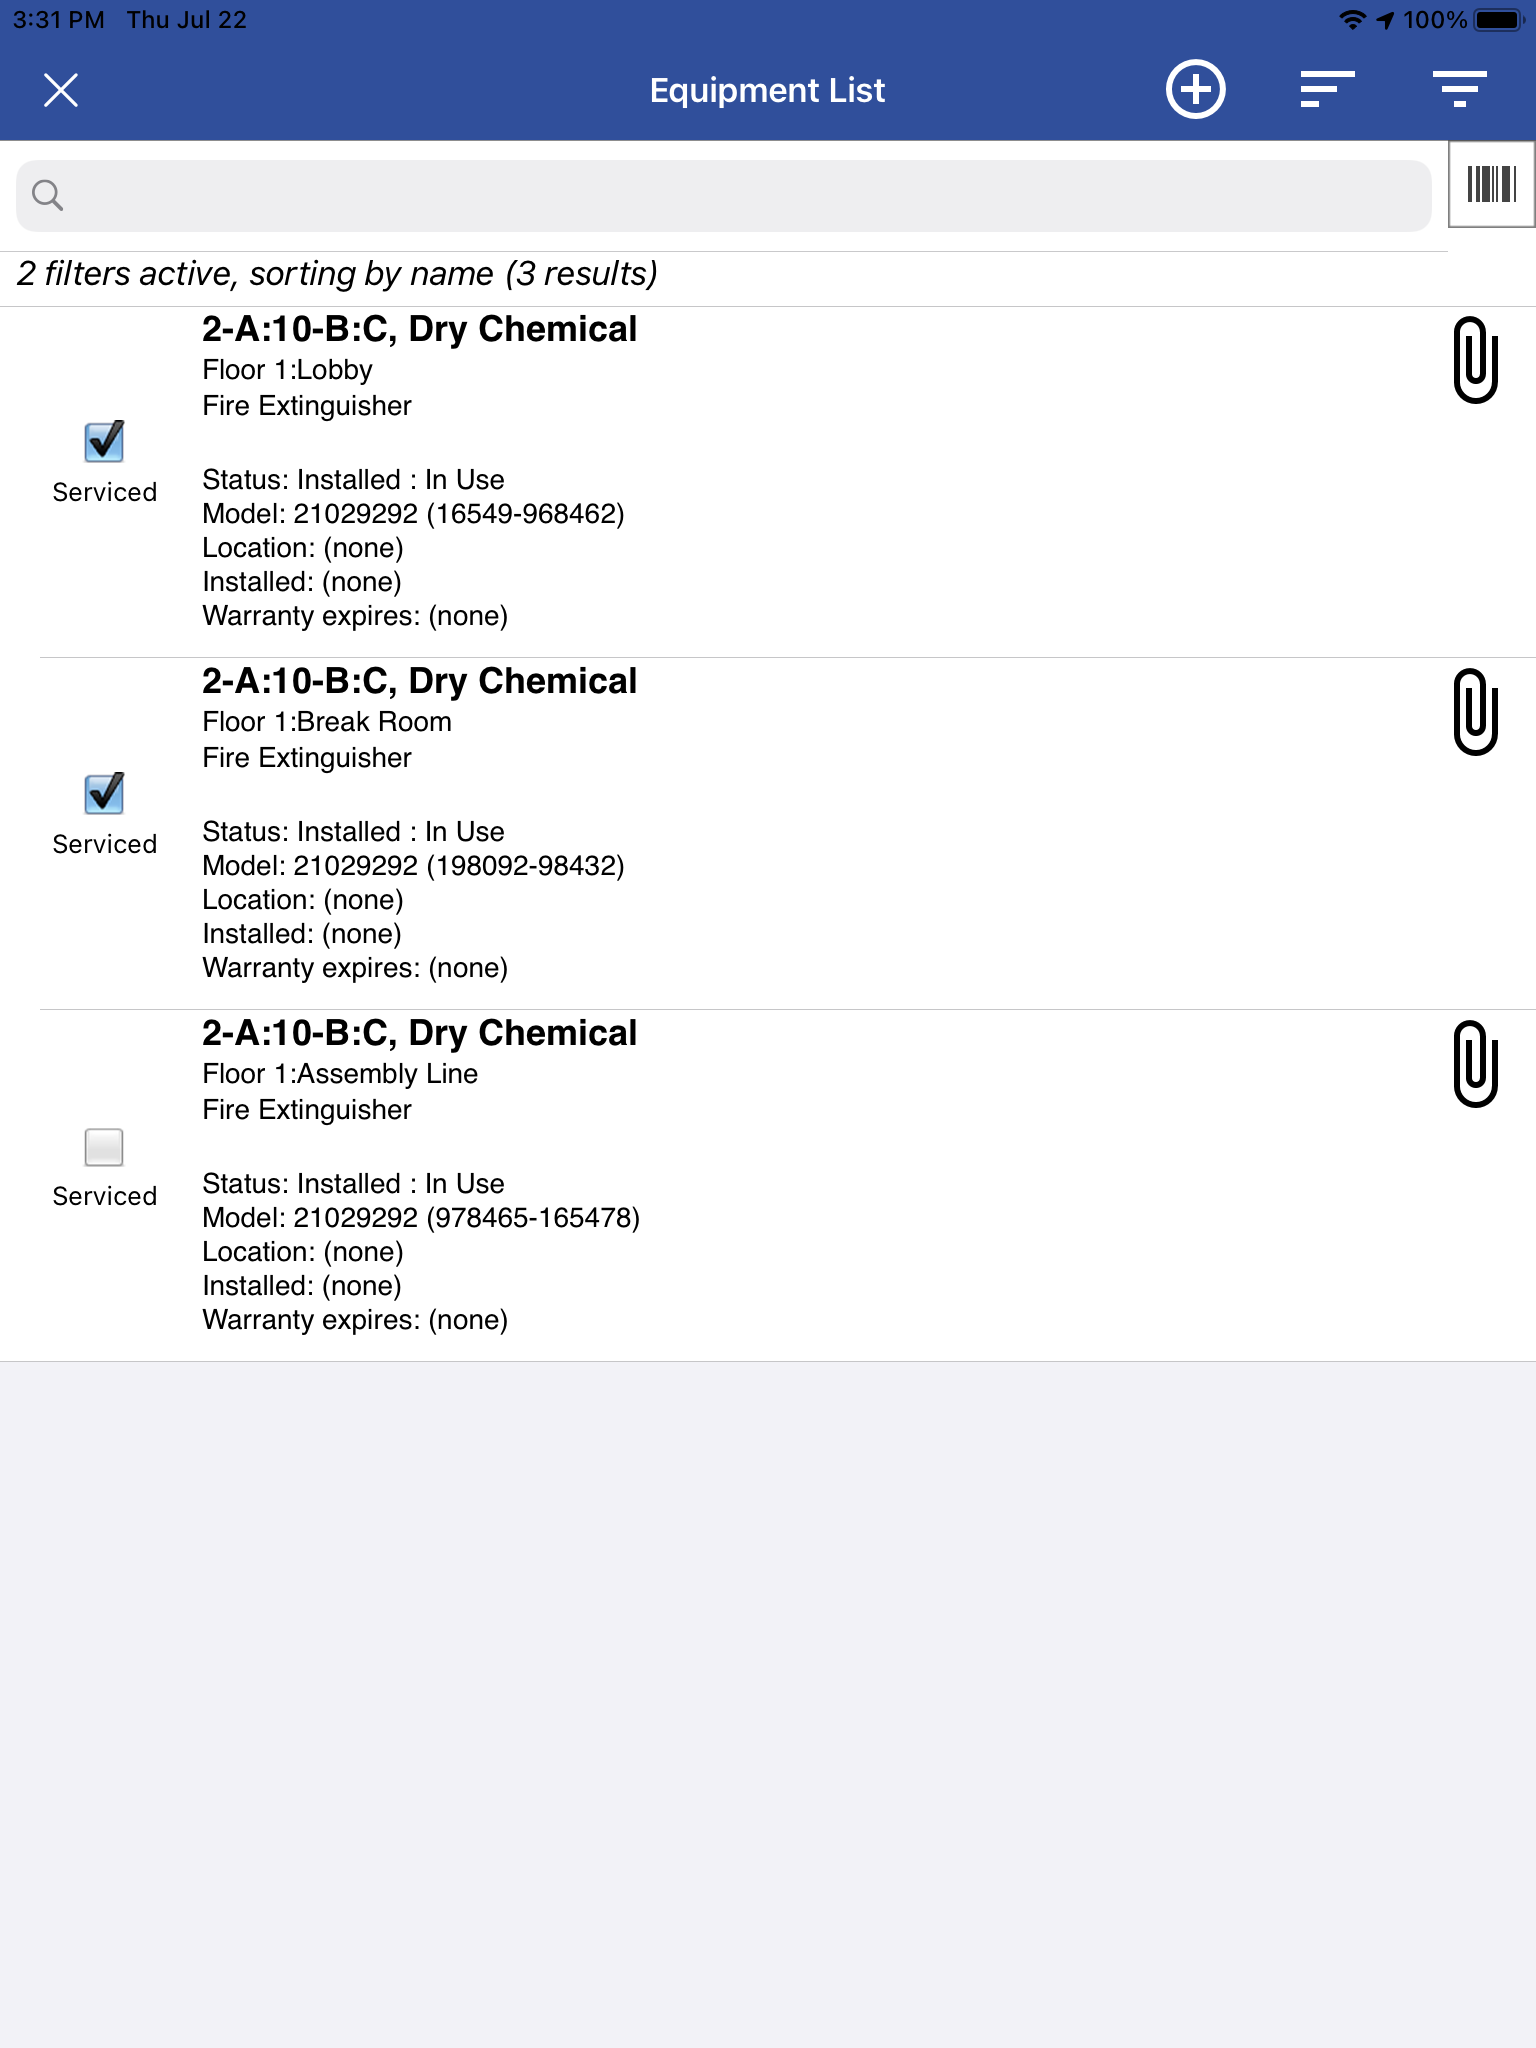
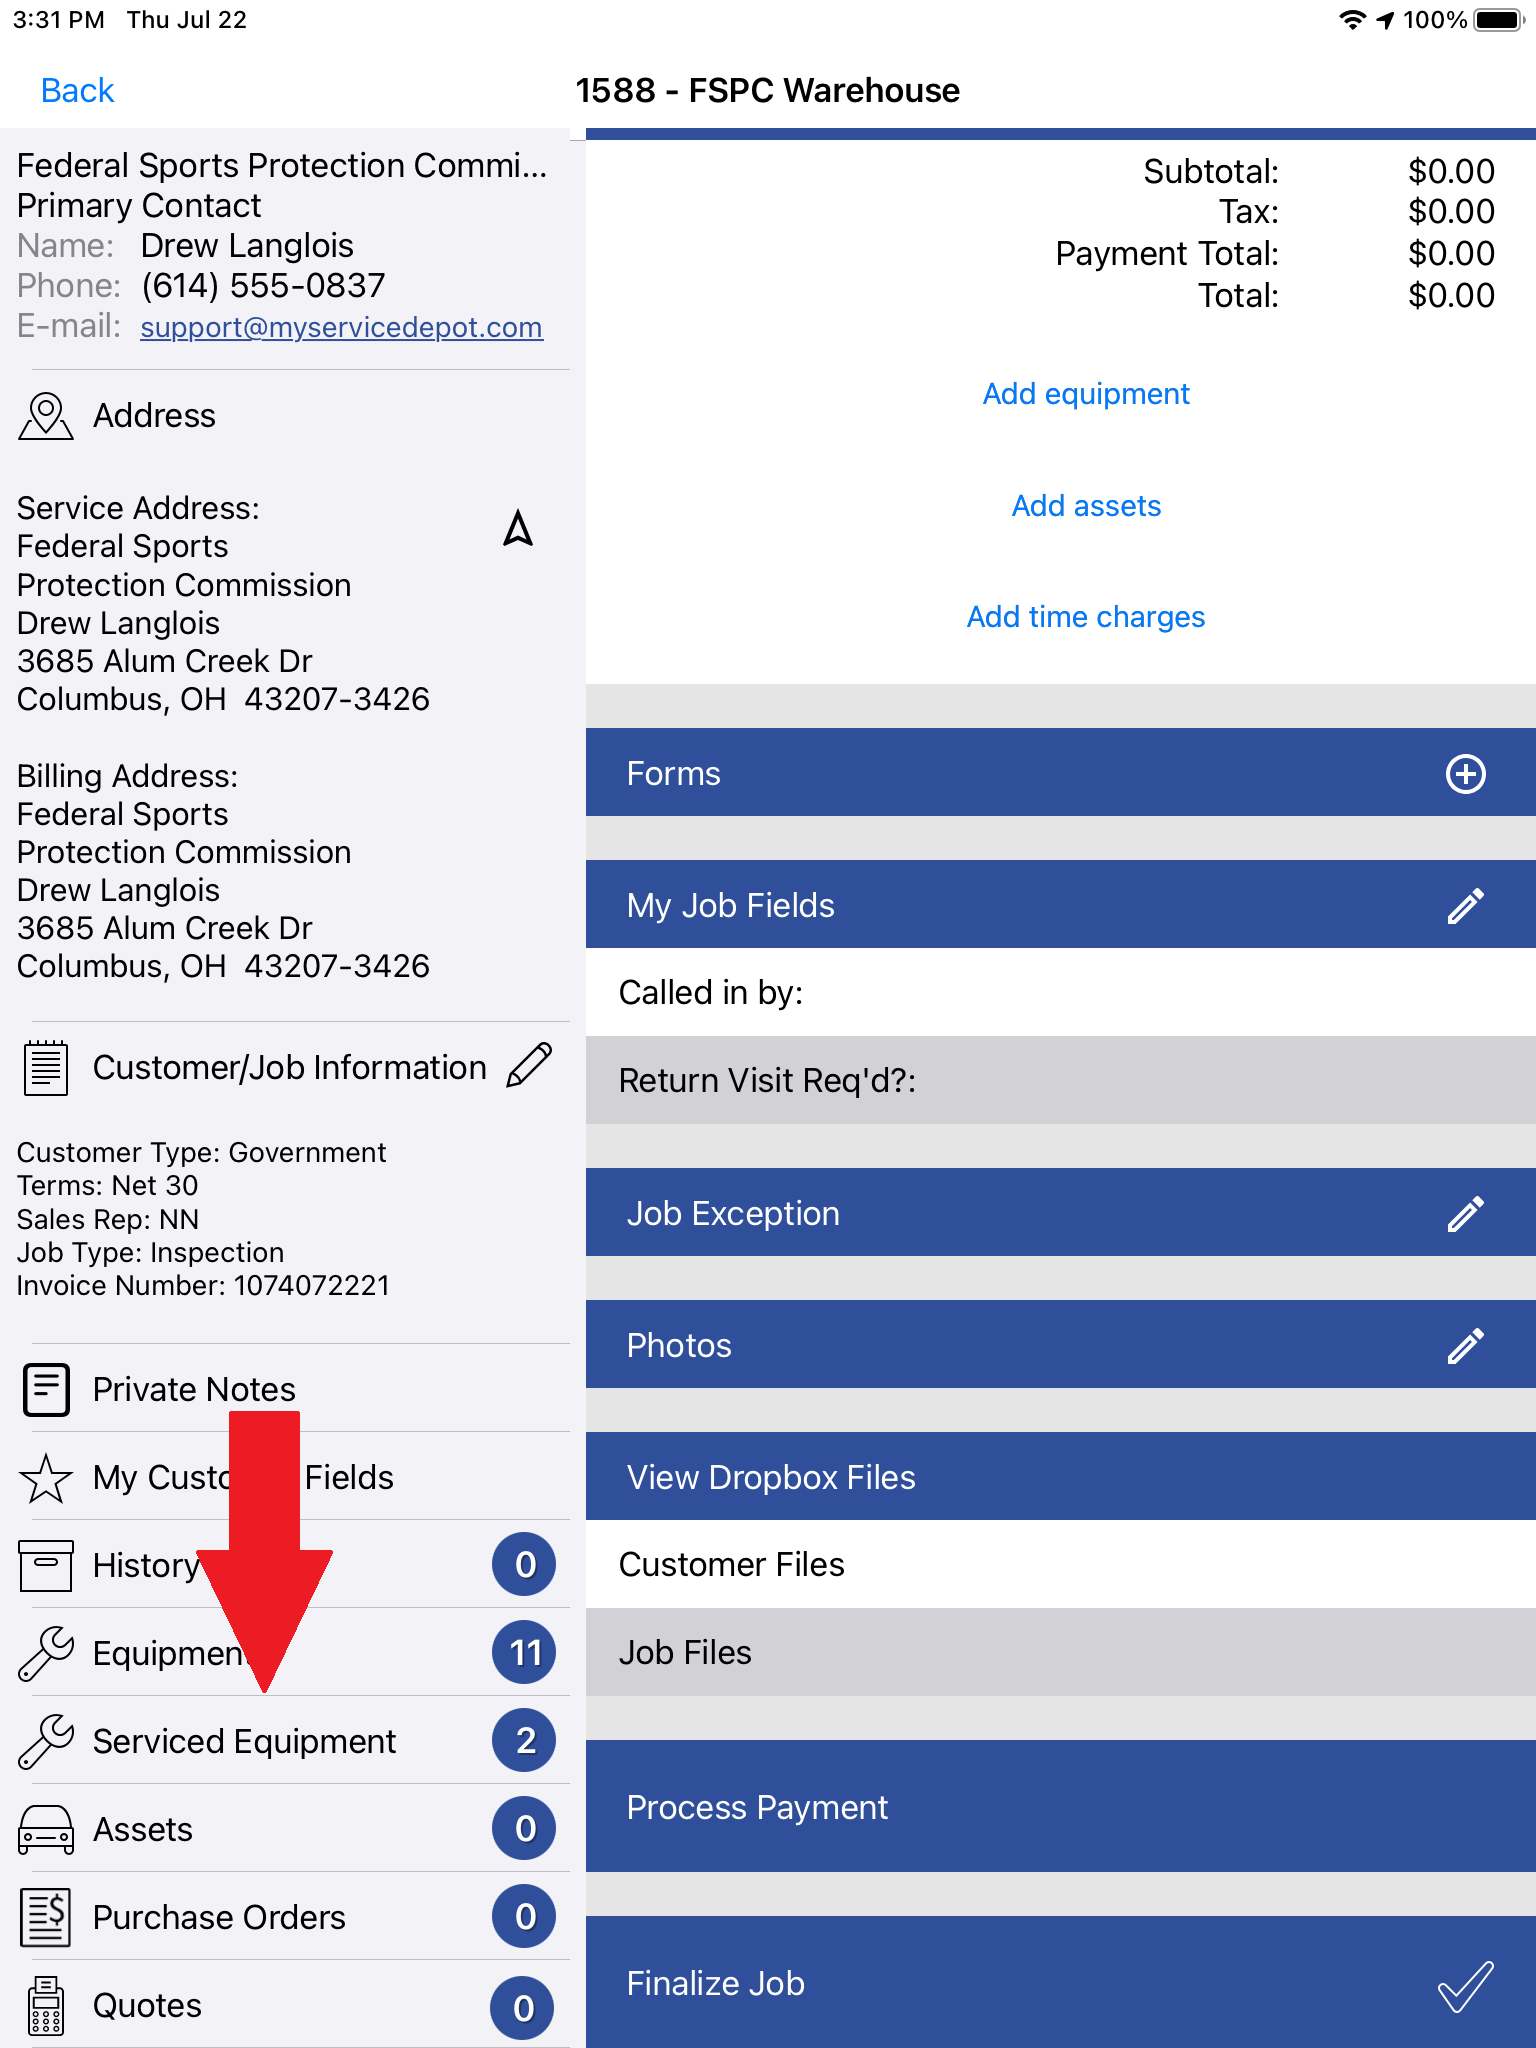
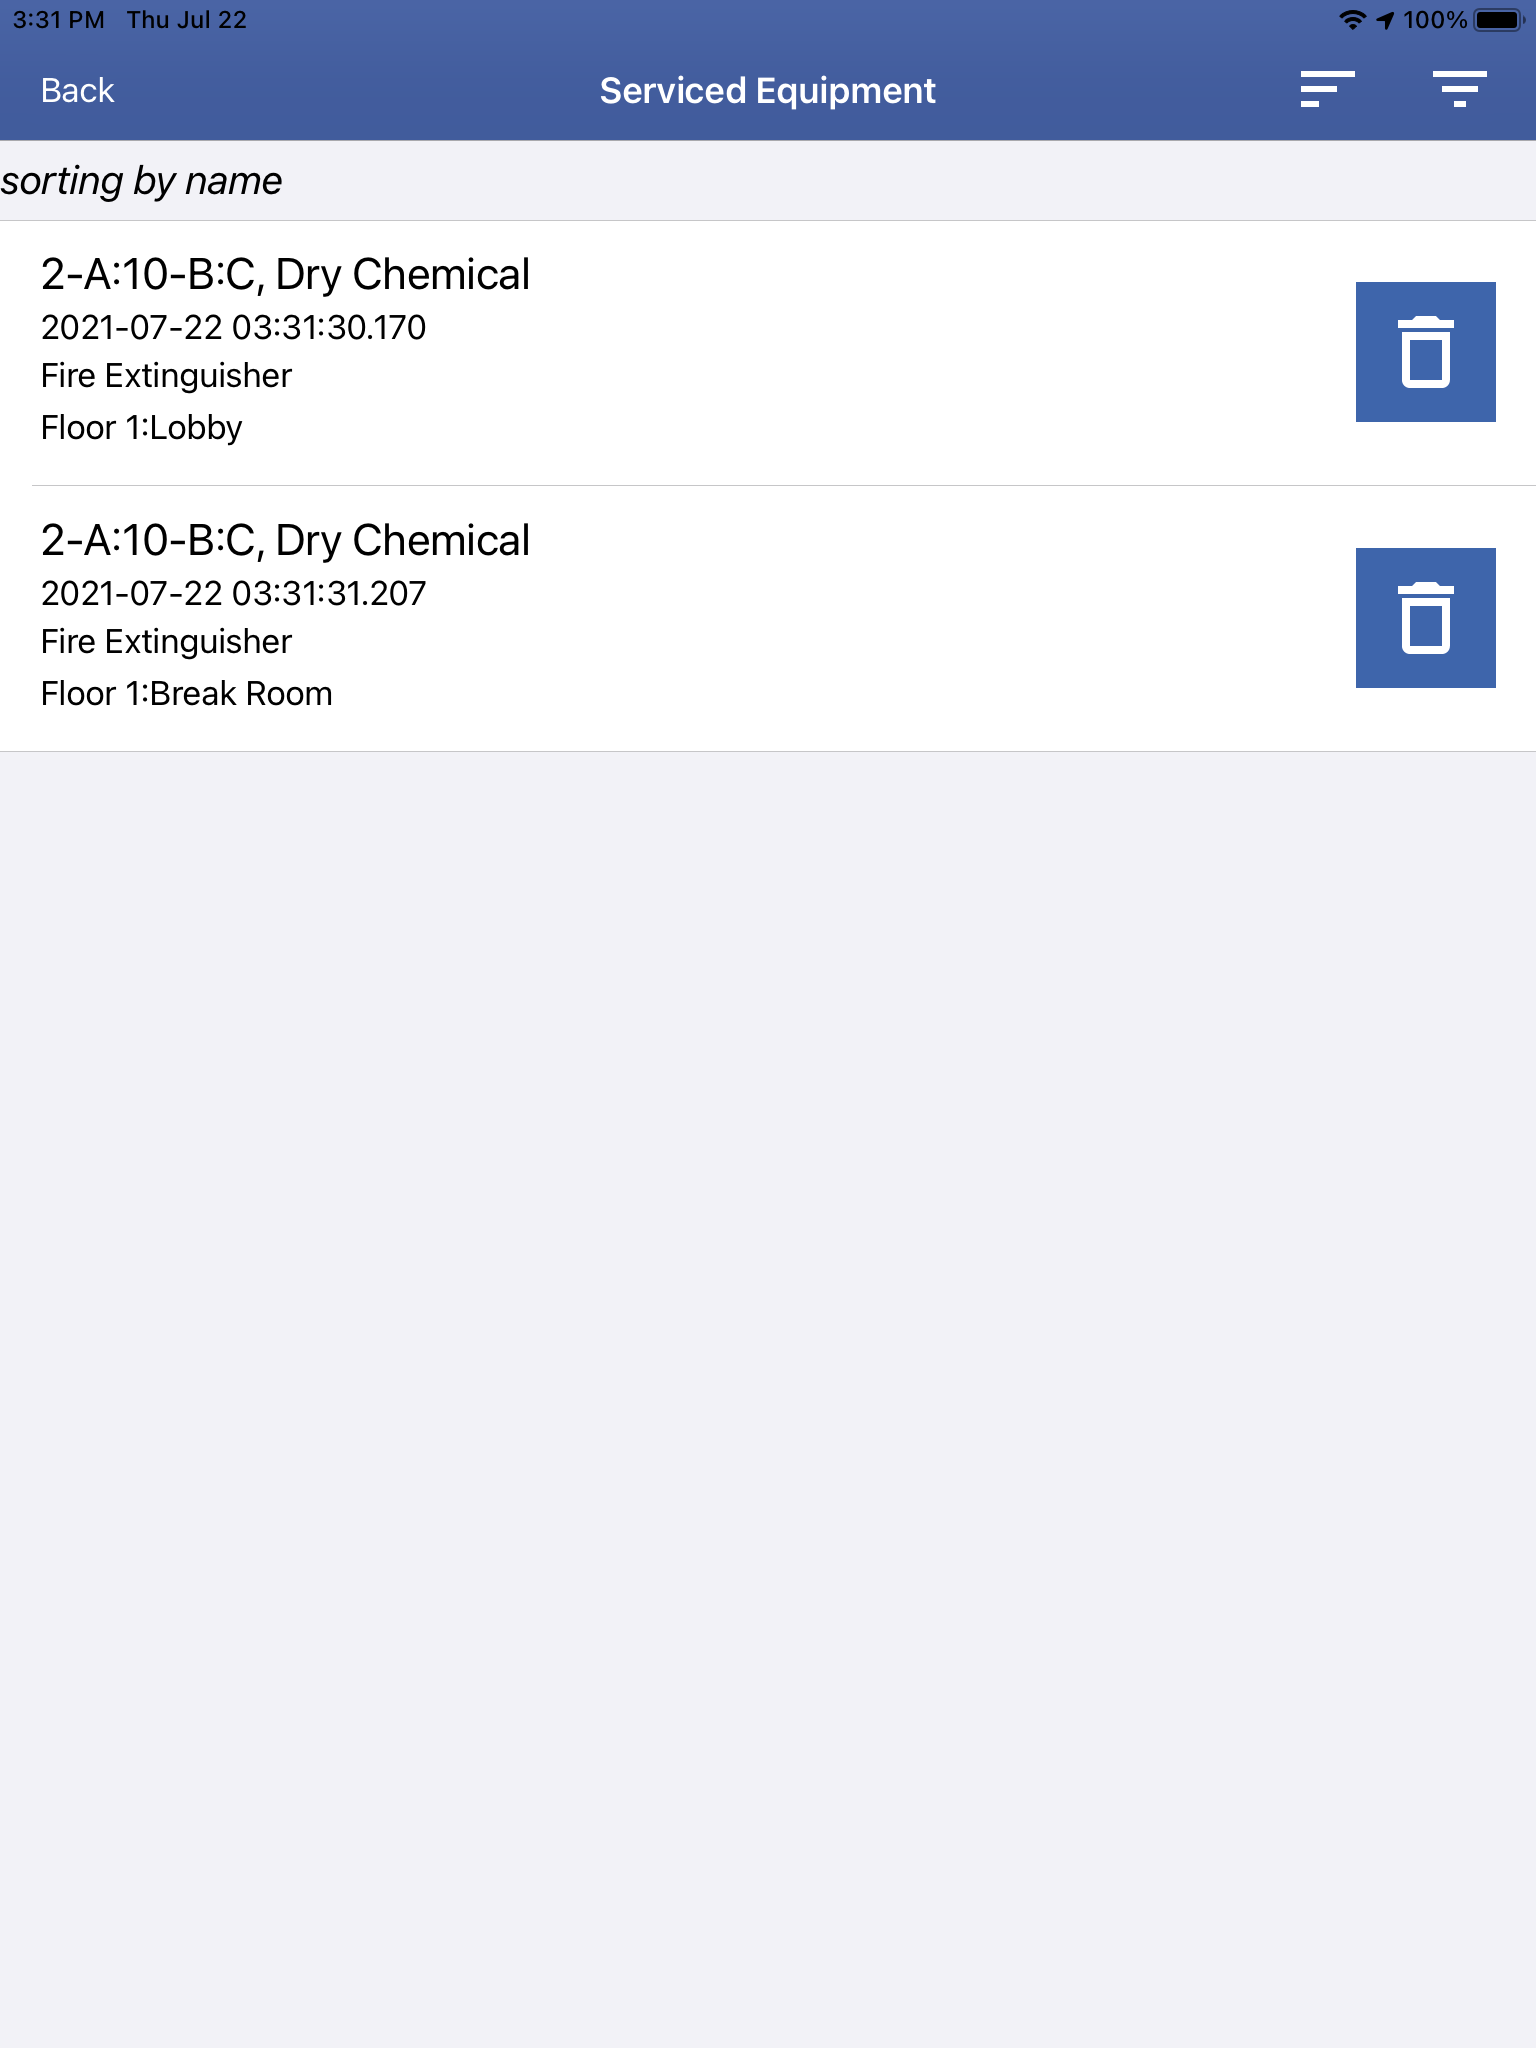
If you want to push equipment records to your form, you need to do this step before you use the form in iFleet. if you’ve opened the form on this job already, it will not receive the information from this step.
From the equipment list, tap the checkmark to the left of the equipment records you wish to see added to your form.
This will open a new “Serviced Equipment” section under the equipment section where you can see what equipment will be added to the form when the form is opened.
If you added an equipment record in error, you can use the trashcan to remove it.
Again, the order of operations is important when using this option to push equipment records to your form. These steps should always be performed in the following order:
- Select equipment records from the equipment list using the checkbox.
- Visit the “Serviced Equipment” section to confirm your equipment selection.
- Summon the form on this work order by tapping on the desired forms in the “Forms” section of iFleet, which is located under “Job Items”. This option only appears if you’ve uploaded a custom form or document to iFleet.
Serviced Equipment UDF's
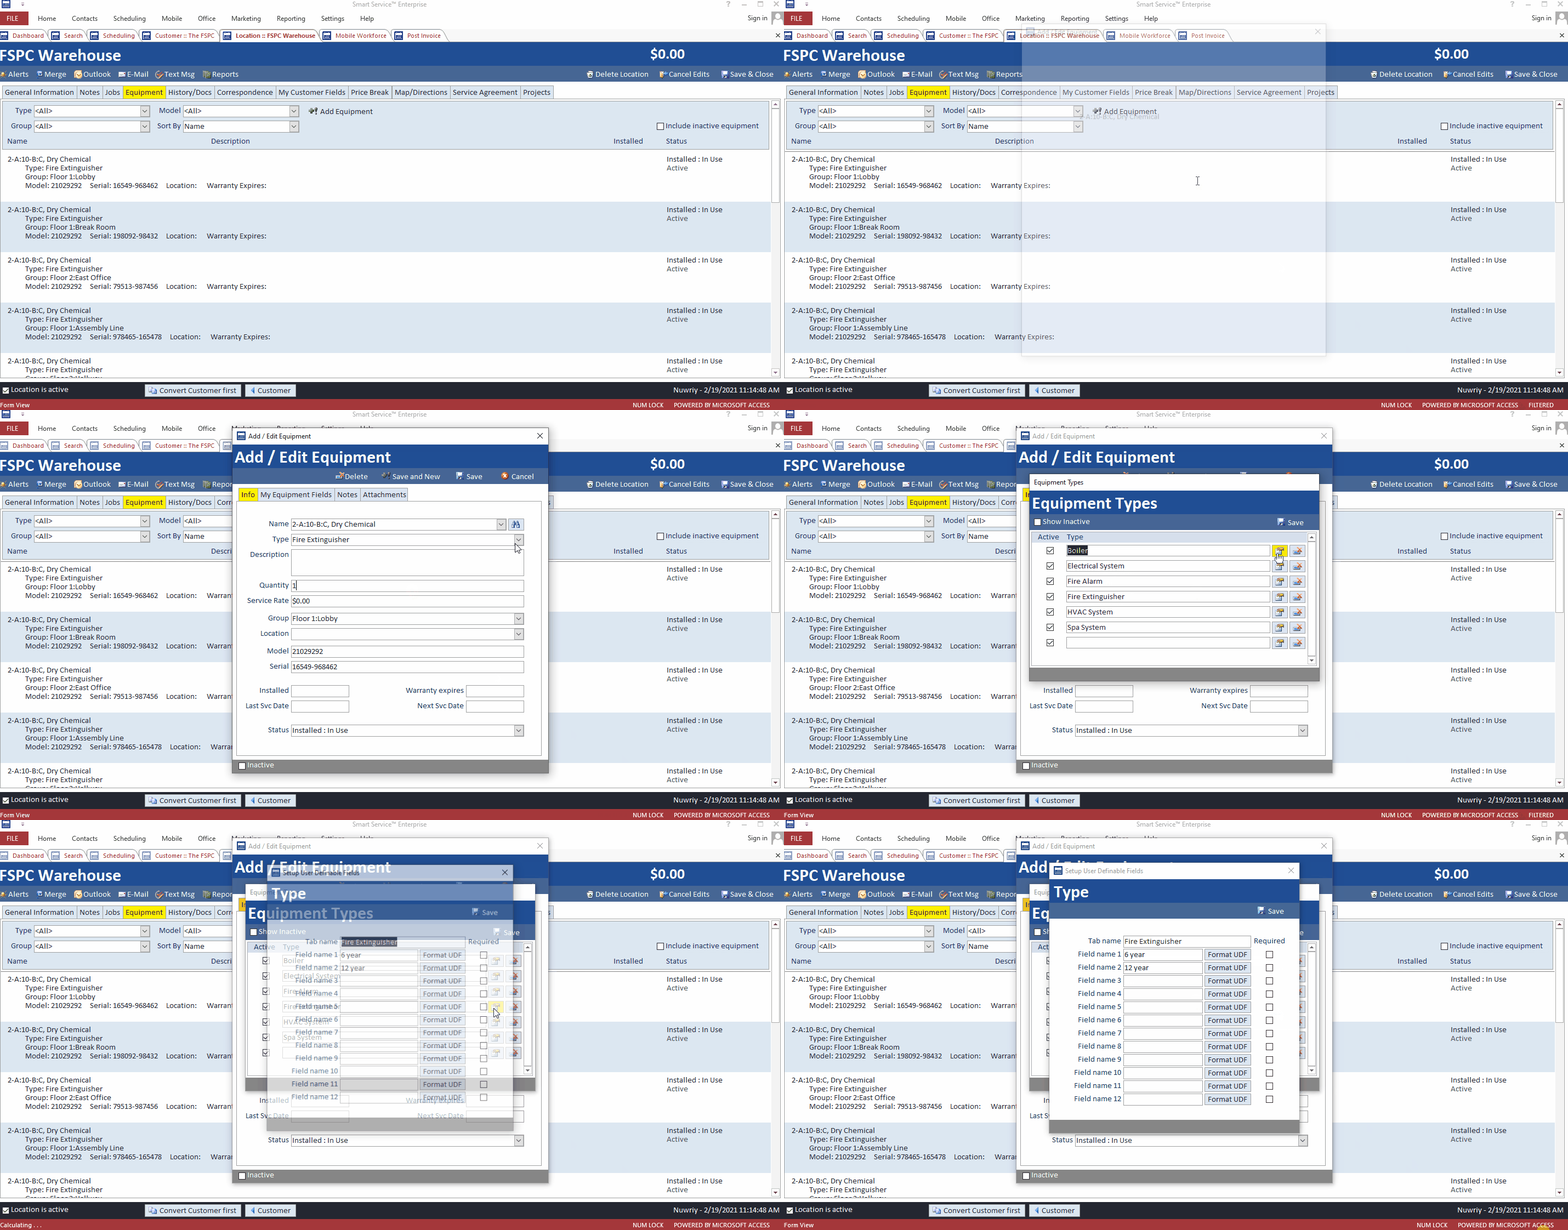
If you’d like to add some additional UDF’s per type of equipment, you can! The GIF below can be clicked on to go full screen and will show you how to add equipment UDF’s per equipment type.
These type fields can be pulled onto forms in iFleet, and can be accessed in the “Serviced Equipment” window mentioned above.

