Invoice
You can choose to enable Smart Service’s customizable invoice template here. Once enabled, this invoice template will replace the customer-facing work order sent out by Smart Service and iFleet. When used with our integrated merchant service, CardPointe, your business can collect payment from your customers easily and securely via your Hosted Payment Page (HPP) which is automatically sent to the customer upon posting to QuickBooks.
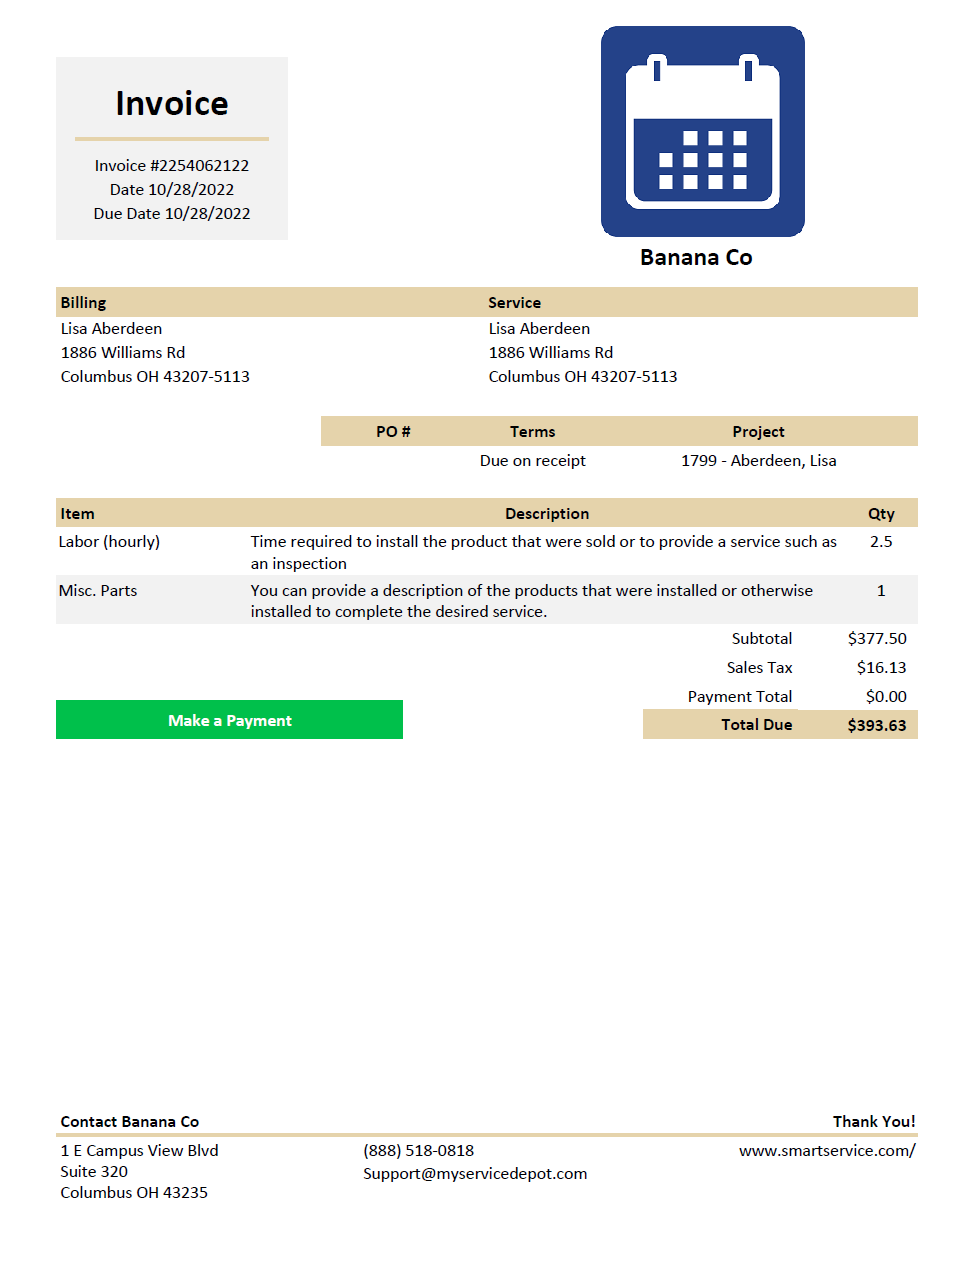
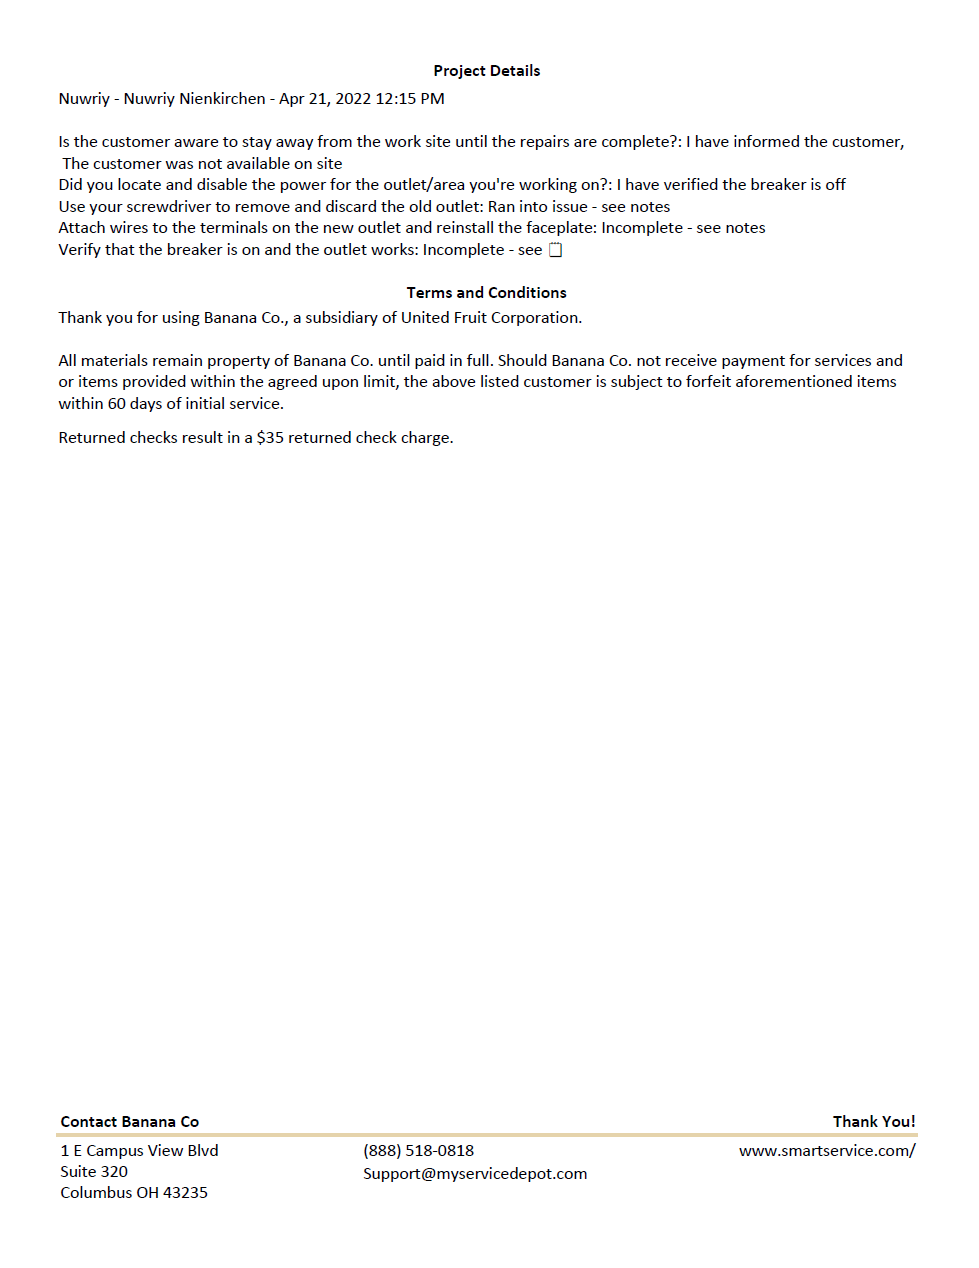
Below is an example of the default invoice template. This is typically a two-page document detailing the scope of work, products and services purchased, and your company’s contact information. Smart Service can also create a customized invoice template to replace the default one you see below if you would like to provide your customers with a document identical to what you’re sending them now. If you would like more information on getting a customized invoice template, please click here.
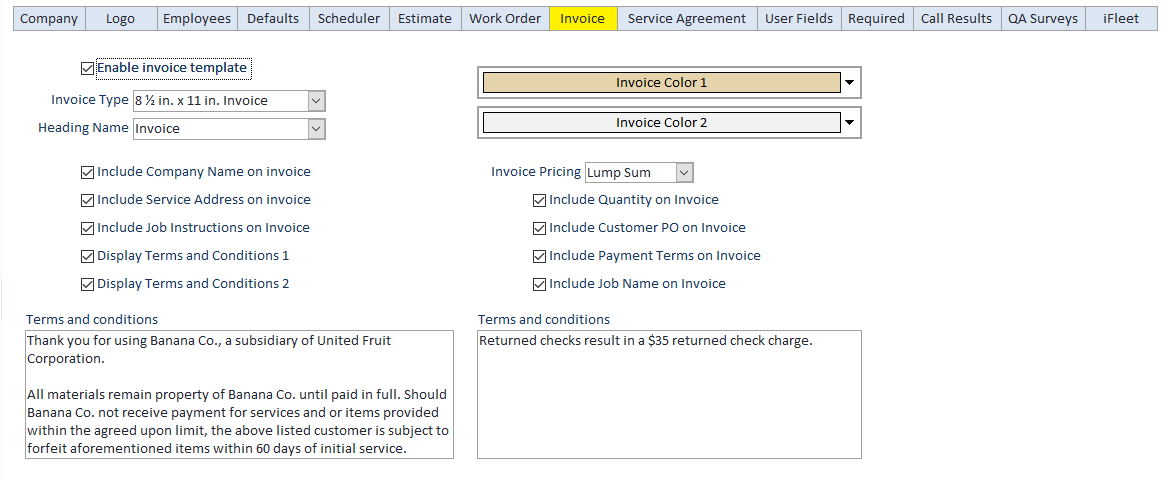
Within the settings tab for invoices, you’ll see not only the option to enable this template but also choices on how to customize the document. Remember, you can fully automate the process of sending invoices to your customers and collecting payment. If you would like to enable those invoicing and payment features, you can check out our article on that subject here.
Once the invoice template is enabled here, your “Send Invoice” button on jobs will use this template instead of the standard work order template. iFleet will also automatically switch to sending this invoice template instead of its work order template.
You can either use our invoice template (the 8 1/2 in. x 11 in. Invoice) or choose your custom invoice template, provided you had our company create and integrate your customized template.
Choose a name for your invoice document here. Changing this name will change the header on the template document so pick something you want the customers to see and something that fits within the space allowed for the name on the document.
The company name field would pull from Settings > Company and would display under the space allotted for your logo on the invoice. Since you may already have your company name as part of your logo, you might choose to disable the company name field here.
We’ll include the customer’s billing address by default, but you can choose whether or now the customer’s service address is represented on the invoice. We encourage the use of this setting for those of your whose customers have more than one property.
There are two terms and conditions sections that display on the invoice. This setting controls the left box on the settings screen (pictured above) and that box will show up first on the invoice template.
There are two terms and conditions sections that display on the invoice. This setting controls the right box on the settings screen (pictured above) and that box will show up second on the invoice template.
Before choosing these colors, you should preview one of your invoices with your logo on it and pick colors that work with your logo. In the image above, you can see the colors in our settings and on the invoice template images above it.
Before choosing these colors, you should preview one of your invoices with your logo on it and pick colors that work with your logo. In the image above, you can see the colors in our settings and on the invoice template images above it.
You can choose to use either itemized or lump sum pricing on your invoices. Itemized pricing will display each item and the price of each whereas lump sum will show the item names but not individual pricing. Either option will display a subtotal, tax, and total at the bottom.
Aside from the pricing preferences, you can choose whether or not your invoice shows the quantity of the items listed.
For those of you who receive a PO number from your customers that must be present on their invoice for you to get paid, enable this option! This will pull the “Customer PO” field from the work order onto the invoice.
If you have payment terms listed on the work order, we can display those terms as well as calculate the due date based on the specified terms. Enabling this setting will display both the payment terms as well as the due date.
The job name will display under the header “Project” on the invoice. Project is a generic term to represent the various types of services companies like you provide to your customers.
Want a Customized Invoice Template? No Problem!
Our team of custom form specialists can create a copy of your existing invoice templates and documentation so your customers are provided with a similar look and feel to what they’re used to seeing from you.
If your company is in need of a custom document for iFleet, Routzy, or Smart Service, you have the option of commissioning our team to create the document to your specification. Clicking the button below will take you to the custom development request form where you can tell us about your new document and attach any examples you may have. Once your project has been assigned to a technician, they will reach out to you and review any questions they have about the document and provide an estimate for the work. We have also included a sample custom development agreement below which outlines all terms and conditions for custom work requests.
If you’re having trouble accessing the form, you’ll want to make sure you’re signing in with your Gmail account. If you do not use Gmail, please email us at [email protected] with any information about your request and the best way to reach you.


