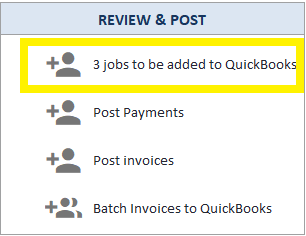
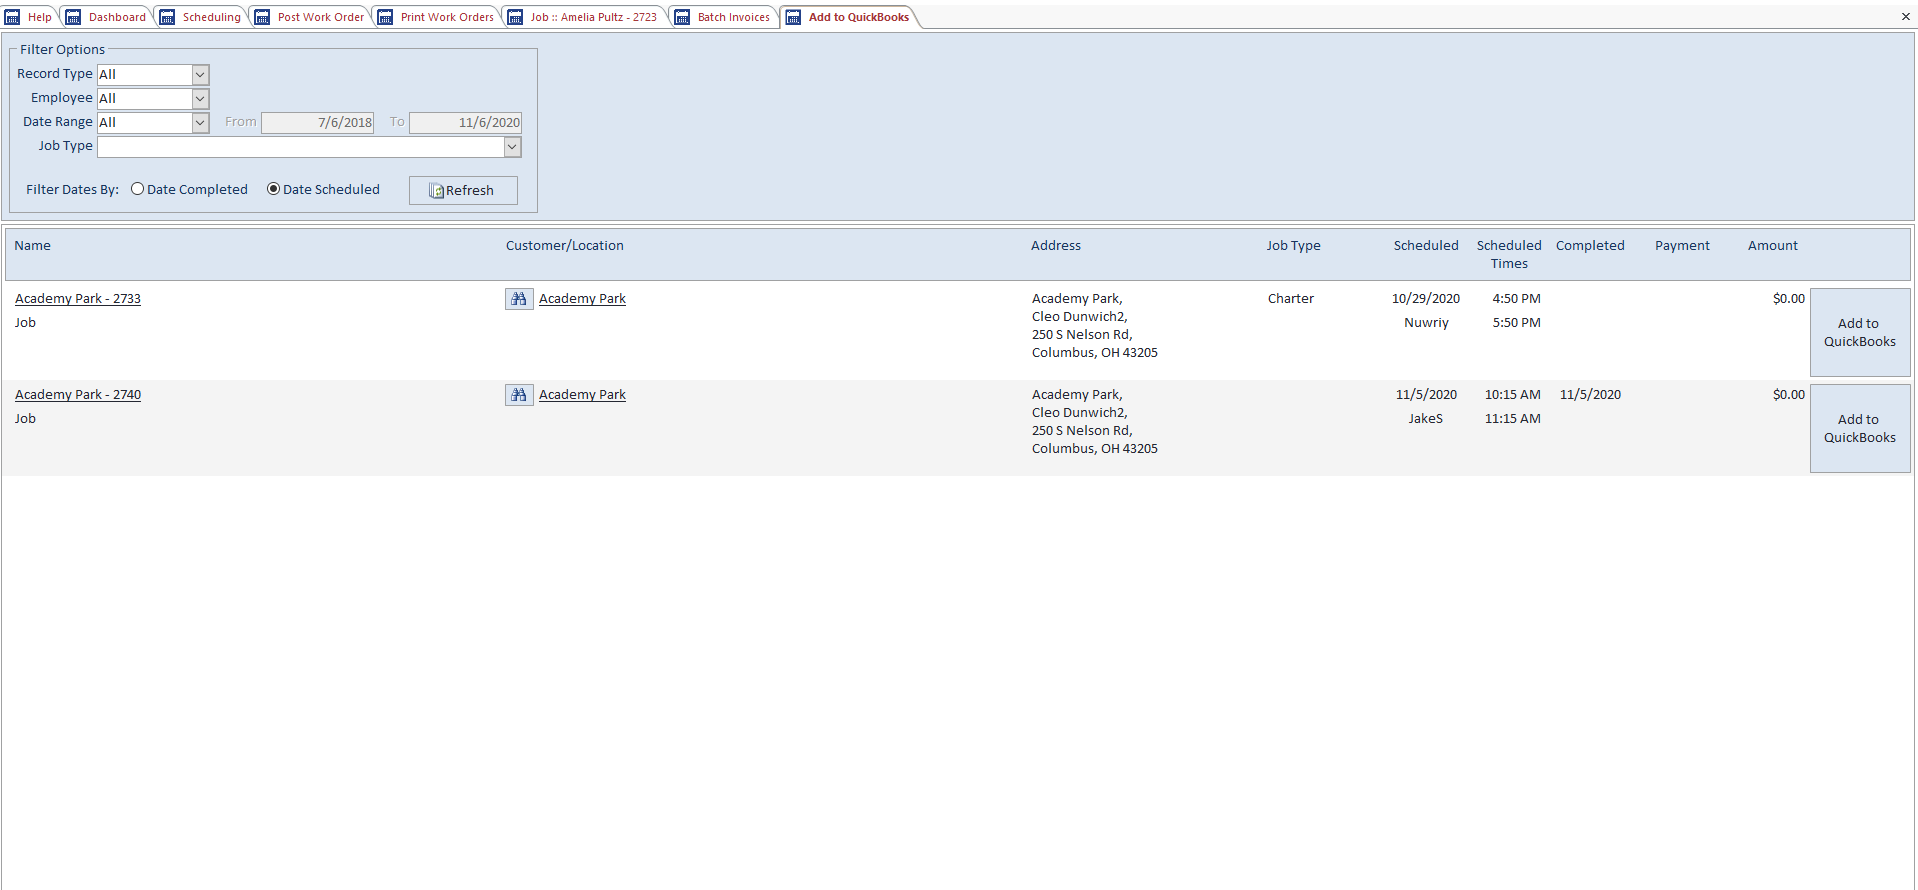
Jobs to Be Added to QuickBooks
The option to create jobs via iFleet may be enabled for one or more of your technicians. If/when they create new customers, locations, or jobs in the field, those records will show up on this screen.
If you’ve enabled this option for iFleet, it’s a good idea to add checking this screen to your daily office routine.
The purpose of this screen is to assist your office users with managing all of the items created in iFleet. From here, you can modify the newly created records, reparent them to the correct customer if needed, and approve their addition into QuickBooks.
Since iFleet can create customers, customer locations, and jobs, you have the option to filter to a specific record type.
You can filter to the employee the work order is scheduled to here. This filter won’t work for customers or customer locations, though.
This date range is based off of either the scheduled dateor the completed date of the service, depending on what you choose for the “Filter Dates By” option below.
If your business uses job types, and you want to filter by the type of service, use this option.
You can choose to filter by the completed date (when the iFleet user completed the work order) or the scheduled date. What you choose here will change what the “Date Range” filter is looking for.
Reparenting Records
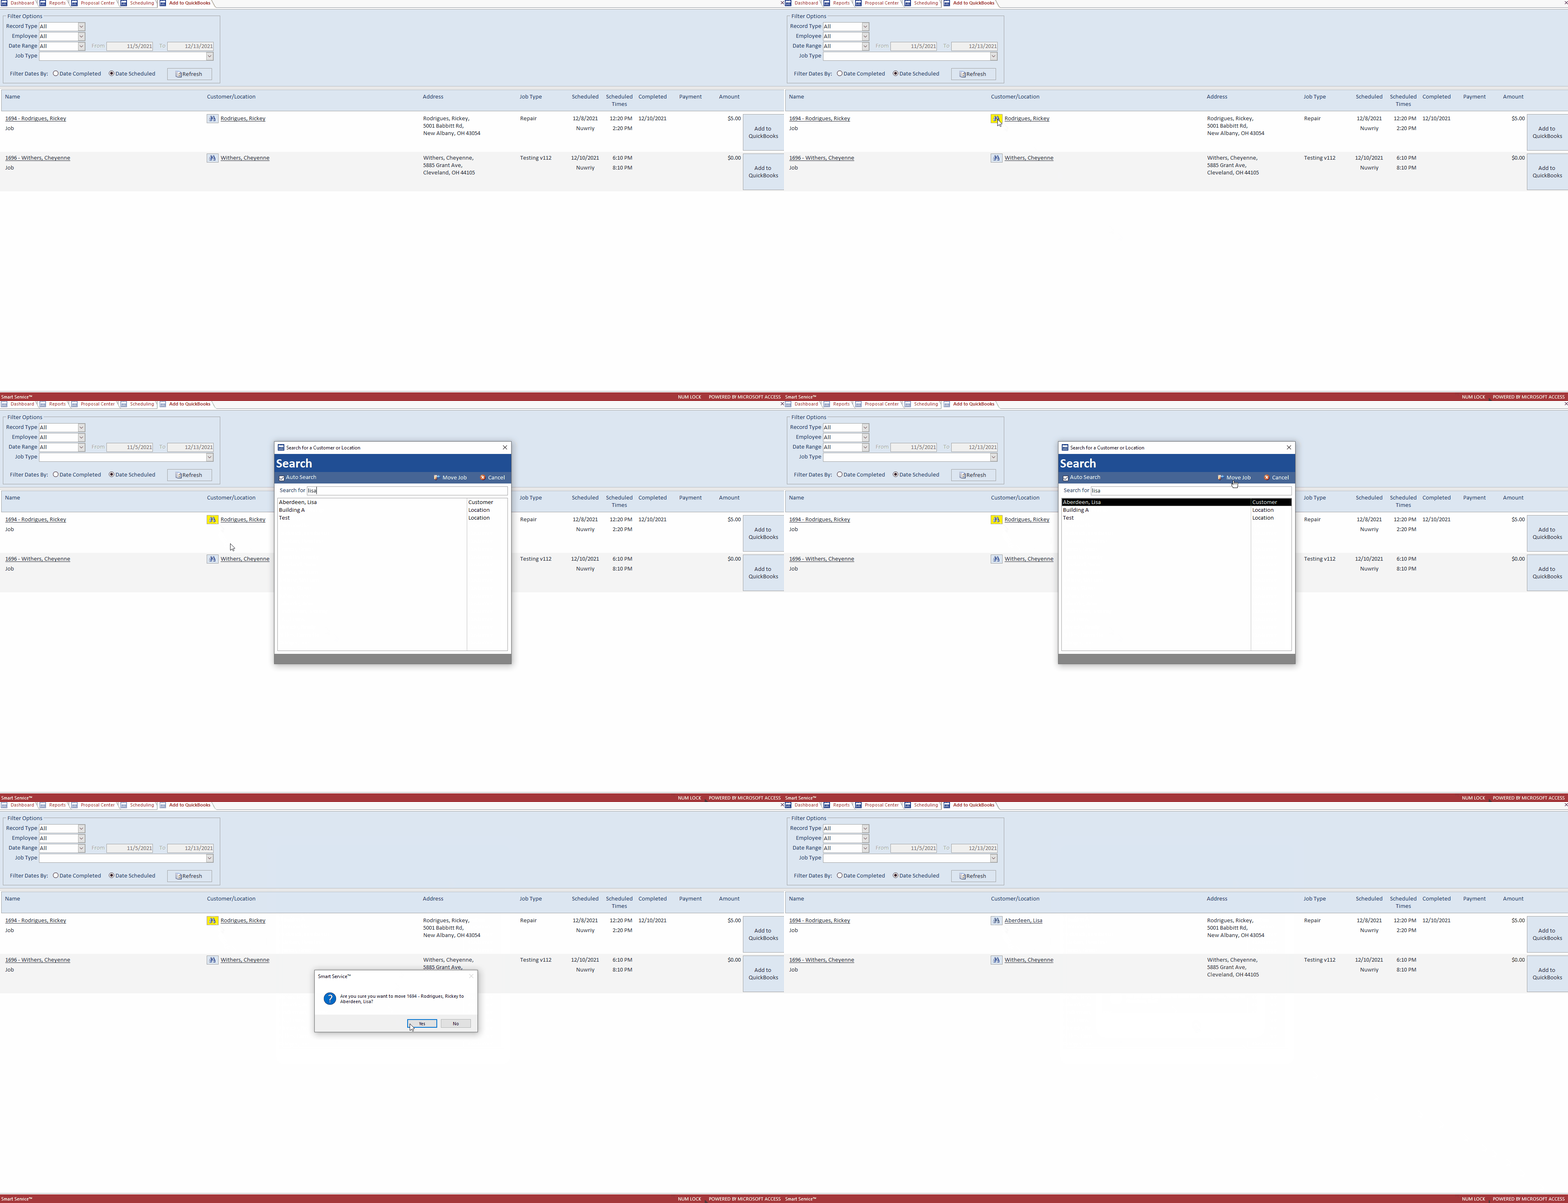
If your iFleet user has created a location or job record under the wrong customer, you can fix the record from this screen! Simply find the record (as shown below) and click the binocular tool next to the parent record’s name. From there, you can select the correct customer/location it should be assigned to!
Add to QuickBooks
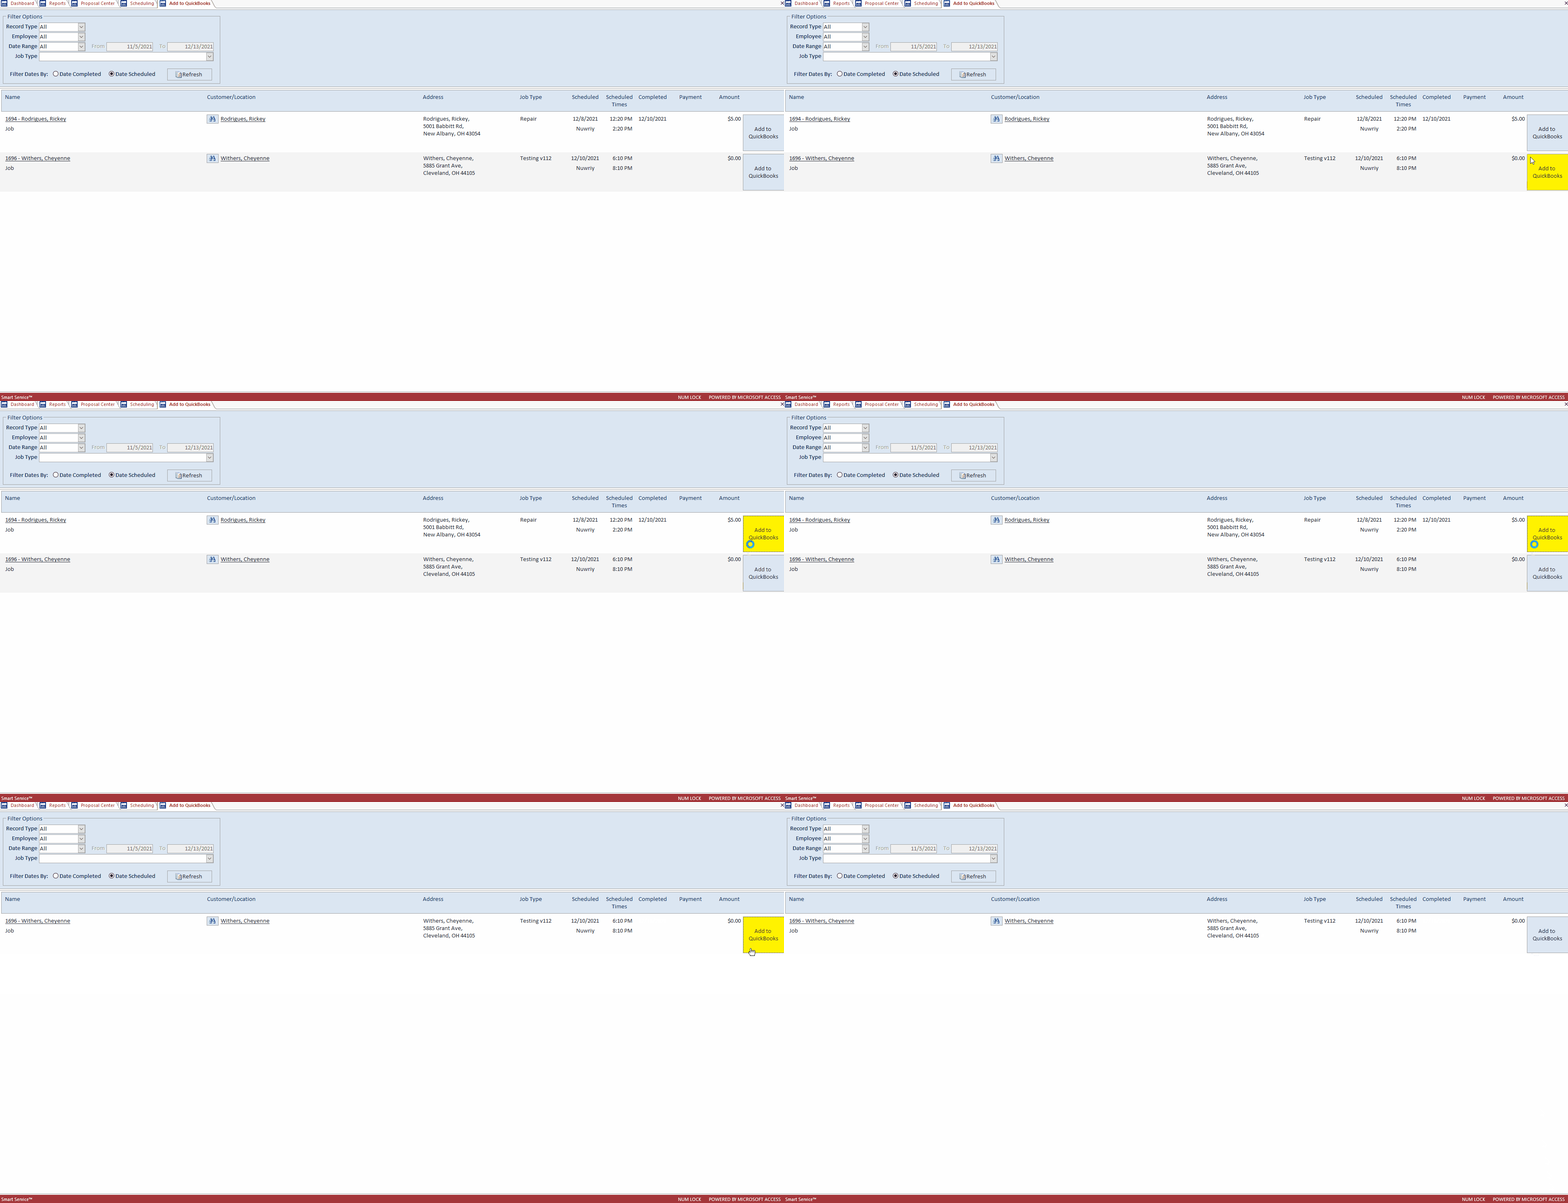
Before doing this step, you can always click on the job name on the left side of the screen to confirm the job details and make any necessary changes. Our next step here is to accept the job into the database as a real work order. So far, the information has been logged but is being held within this screen and separated from the jobs you created via the office.
The step below will tell Smart Service to officially accept the job and add the job record to QuickBooks (if this feature is enabled) as if it were a job created by you in the office.
The reason we keep this job record separate until you accept it is to allow you the chance to correct issues that may occur on jobs created by those who usually receive work. So now is a great chance to double-check their information before submitting it into the system.
Post Work Orders
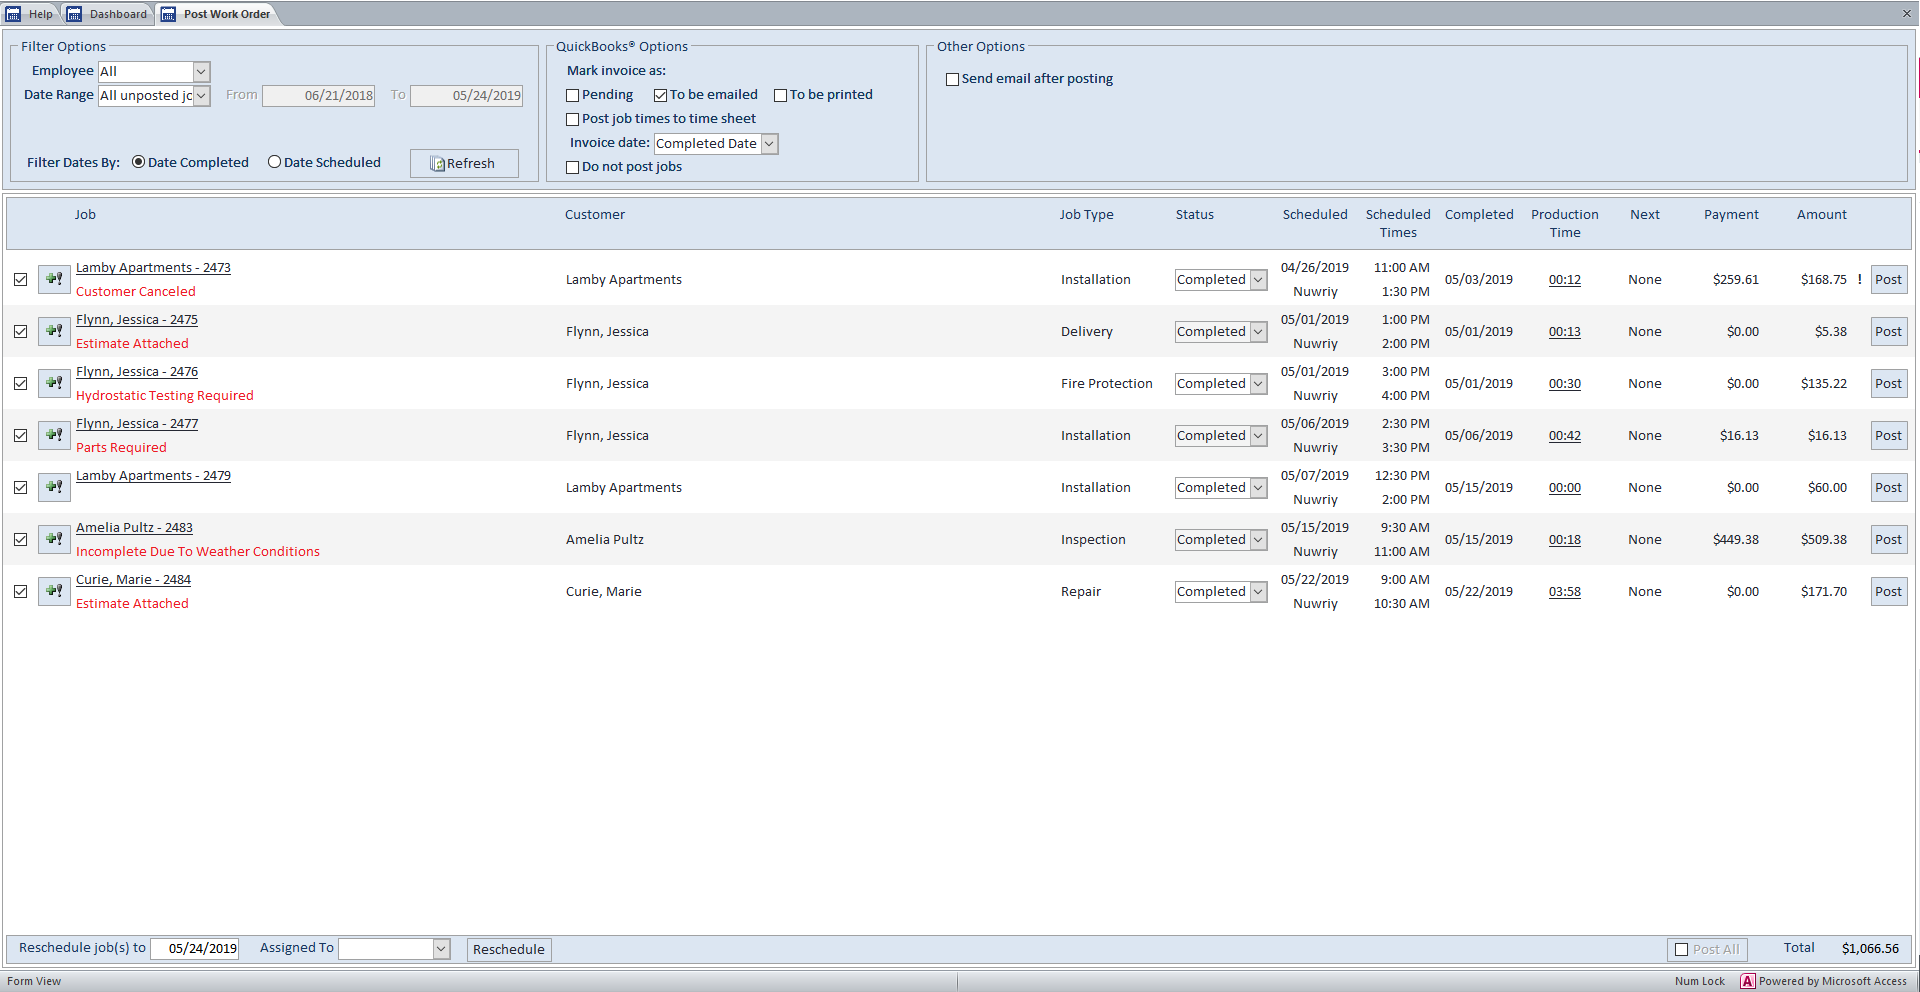
The Post Work Orders screen is one of, if not the most important option in the office section. At the end of each day, one of the office users will come to this screen to review every service completed by the field. Within this section, you can see all active and scheduled services, convert services into QuickBooks invoices, and mass reschedule appointment for a given date or technician.
For those of you who have customized your heading name for work orders, the option available in Smart Service might say something like “Post Service Tickets” or “Post Invoices”. You can learn more about customizing your work order via Smart Service’s setting here.
Office users need to visit this screen at least daily to stay up-to-date on field operations and to post completed services to QuickBooks as invoices. Options to manage job times, cancel jobs, and more are also available here.
Filter Options
Use the filter options section at the top of Post Work Orders to select your desired range of jobs. You may choose all employees or a specific employee using the Employee dropdown. The data range dropdown will allow you to choose from several quick options such as “today’ or “this week”. You can also choose a “custom” date range, which will make the “from” and “to” boxes to the right available.
The “Filter Dates By” option is one of the most important settings in this section. If you’re using iFleet, this should always be set to “Date Completed” as this is the date that iFleet finalized the service. This way, only jobs which have been completed in the field would be visible below. Alternatively, if you’re using a paper work order process, choose the “Date Scheduled” option here as you do not have a completed date from iFleet to reference. Once you’ve selected the scheduled date option, another option will appear for “Include Incomplete Jobs”. Since iFleet has not finalized this job, Smart Service doesn’t consider the service complete. This way you can see any jobs places on the scheduled for the chosen time period and employees.
Like your settings the way they are now? You have the option to set a custom default view of this screen from Smart Service’s settings under defaults.
QuickBooks Options
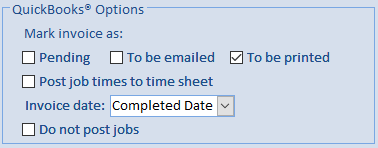
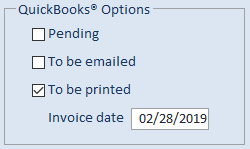
Another important thing to consider is how you want these invoices to go to QuickBooks. Here you can set a few options for Smart Service to use when creating your QuickBooks invoices. Remember, you can set default preferences for this section in Smart Service Settings.
You have the option to mark QuickBooks invoices as “Pending Non-Posting”. This option will send this invoice over in a “paused” state, which is usually done by customers who don’t want this invoice counting against aging or wish to review the invoice in QuickBooks before sending it to the customer.
If you like to email your invoices from QuickBooks to your customers this option will add the posted invoices to the “Email Later” queue in QuickBooks. This will allow you to open any invoice later on and click “Batch Email” to send out any invoices marked as to be emailed at once.
If you like to print your invoices from QuickBooks to your customers this option will add the posted invoices to the “Print Later” queue in QuickBooks. This will allow you to open any invoice later on and click “Batch Print” to print out any invoices marked as to be printed at once.
Check this option if you’d like the times associated with the specified service to be posted to the employee timesheet in QuickBooks for billing, costing, or payroll. If you haven’t set up time tracking yet, check out our article on setting up employees here.
Using the invoice date dropdown, you have the option of setting your QuickBooks invoice date for the desired service(s) to the completed date, scheduled date, or a custom date of your choosing.
This option is only helpful for those who do not wish to receive an invoice in QuickBooks when posting a service. Qualifying reasons for doing this include companies using a memorized transaction in QuickBooks for this service.
How to Use Post Work Orders
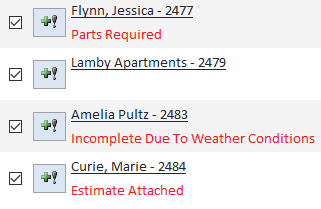
If your company uses iFleet, all services marked complete by iFleet will be displayed automatically in this screen. The first priority is to observe the ‘Job Exceptions’ which appear in red under the job’s name. These exceptions serve as notifications from the field to alert you to various changes in job status or requirements.
You can create a list of these exceptions (which iFleet users must choose from) by visiting our “Settings” page here. In order to get job information back to you, iFleet users MUST finalize their job, albeit with an exception to inform you of additional steps that may be required. For this reason, make sure they have exceptions for things like customer no-shows, parts required, and other items that would cause you to add another day or reschedule the job.
Once all adjustments have been made and the job has sufficient information for posting, you may continue to verify the rest of the information on the right-hand side. All of this information should be reviewed for each job before posting to QuickBooks
This field displays the full record name, which will include the customer’s name and a location if applicable.
The job type is the category of services rendered on this job. You can add job types from the general information tab of any job. Using job types is extremely helpful when filtering or quickly identifying what kind of service was rendered.
Use this status field to mark today’s visit to the customer as completed, canceled, or skipped. When using this option, the status will only be reflected on the date of service in question. If the job has multiple dates until completion, each one will be marked as complete via this option. This change will not take effect until you have posted this date.
This section contains the date and user assigned for the service.
Here you have the time the job was scheduled for. Remember, this has no bearing on the timestamps entered by the field.
This audit date shows the day the iFleet user marked this particular visit as complete.
This value is the total production time spent on the specified date by all users assigned to the job. Although the calculation does not include travel time, clicking on the production time value will display the timestamps associated with this visit for editing, fixing, or adding missing stamps.
If the job has future dates assigned, that future date or recurrence pattern will be displayed here.
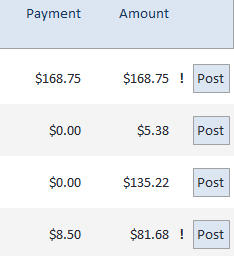
If anyone has received payment for this job, the total of that payment will be displayed here. If you have yet to post the payment to QuickBooks, posting the invoice will take the payment to QuickBooks with it.
If you haven’t learned about taking payment via Smart Service of iFleet yet, we have an article here describing the process.
This is the sum total of the line items currently active on the job.
Once you’ve had a chance to review the information on the job so far, make any changes or corrections now within Smart Service. Although you can always make further corrections to the invoice in QuickBooks later, Smart Service creates a history record when posting that cannot be edited.
The last thing any company wants is inaccurate history, considering your technicians rely on that history (which is visible in iFleet) on their next visit to the customer.
If everything seems to be in order, click the “Post” button to the far right of each job record. You have the option of using the “Post All” button at the bottom of the screen, but that option will restrict you to posting all of the invoices for one date at a time.
If the job in question was set for batching, visit the batch invoice screen (see below) for the next step.
Batch Invoices to QuickBooks
Batch invoicing is a feature you can add to your invoicing process on a per-service or per-company basis. This option is for those who would like to bill their customers at the end of a specified service period, rather than on a per visit basis.
Companies that use batch invoicing would provide something like a weekly service (perhaps pool cleaning or mowing lawns) and bill the customer at the end of the month. Since there are multiple processes built into the program, we recommend you watch this webinar to find the best process for you. We do not recommend using batch invoicing for projects, the video linked above will cover the best processes for jobs that last multiple days.
When a job’s invoicing style is set to either “batch for customer/location” or “batch for job” and the post button for that service is clicked, it will appear here until ready to post to QuickBooks. As mentioned, there are two styles of batch invoices. Please review the options below to determine which type of batch invoice is the best for your service.
Batch invoicing for job is used when there is a service that takes more than 1 day and you require a single invoice at the end of all service work. Using the standard posting process will take each service date’s details and add them to the batch record for the job.
Batch invoicing for customer/location is used in situations where a customer has multiple different jobs that occur over a given date range, but they would like a single invoice compiled for all jobs at the end. Using the standard posting process will take each service date’s details and add them to the batch record for the job.
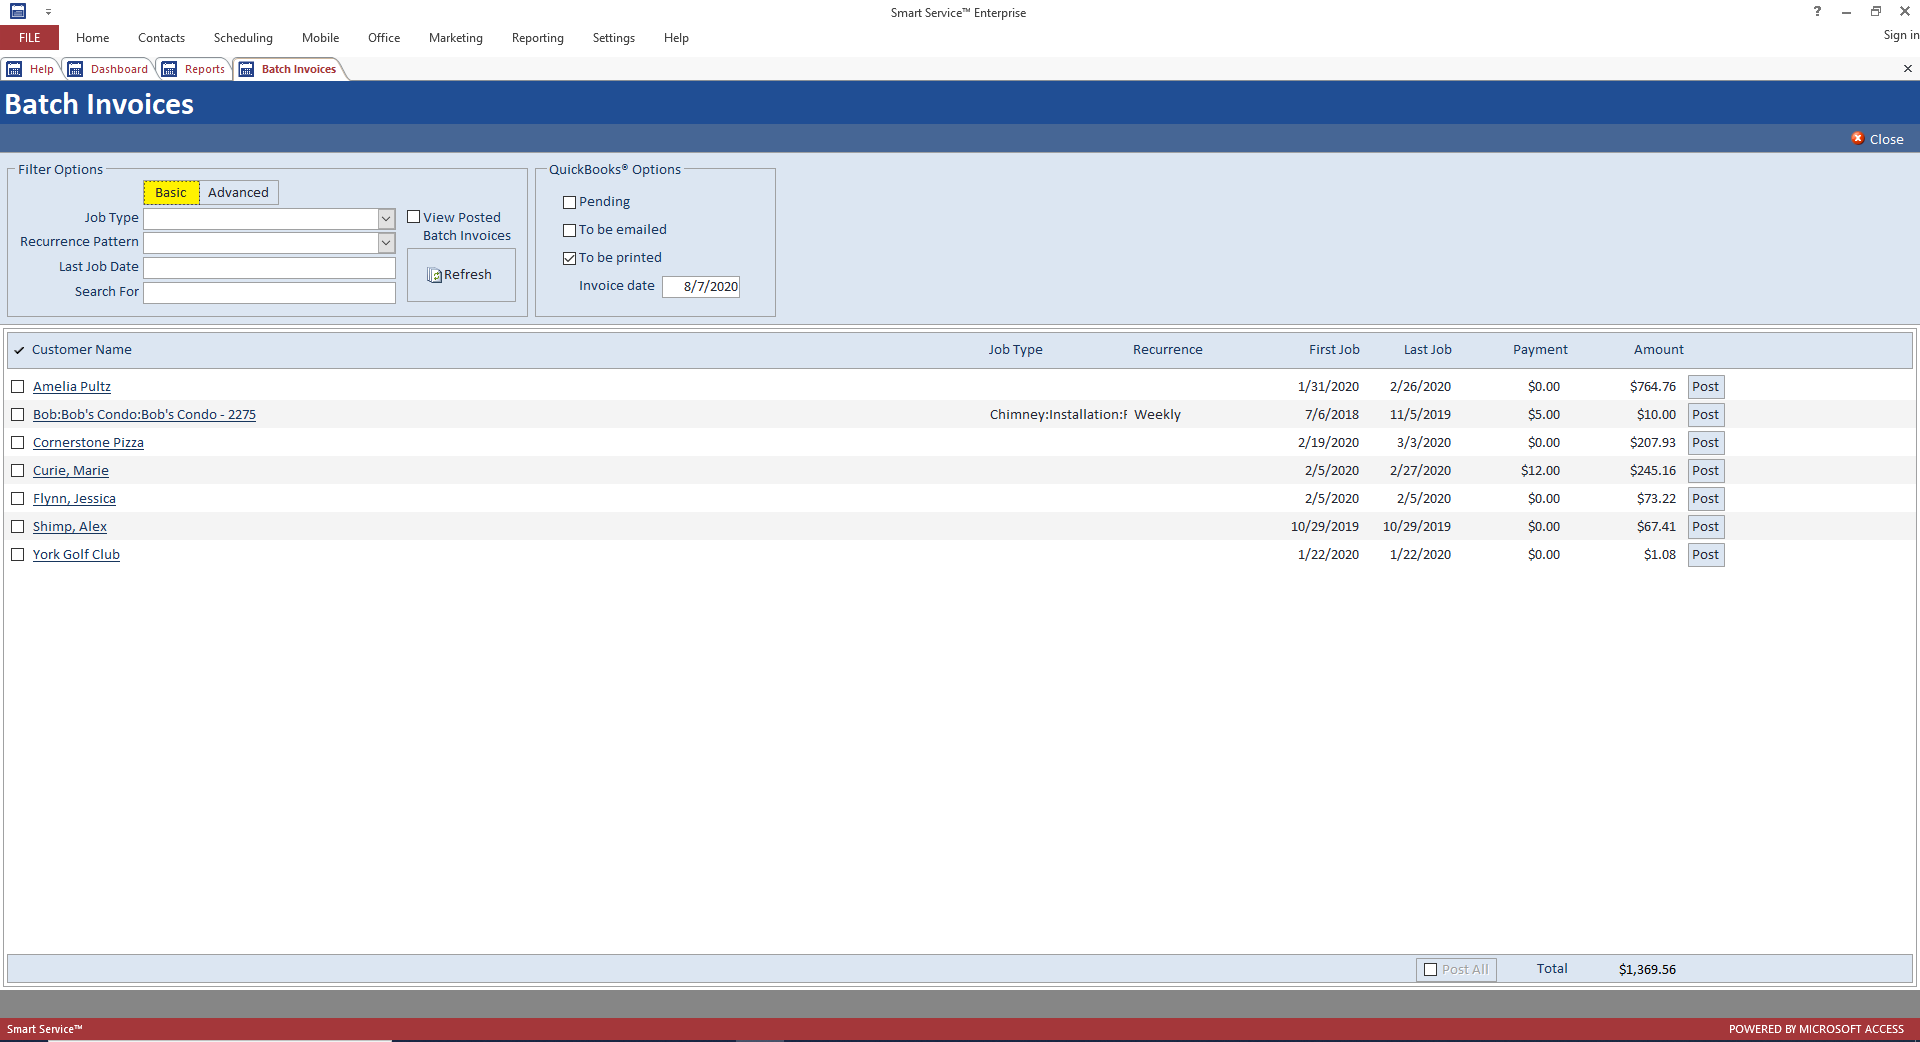
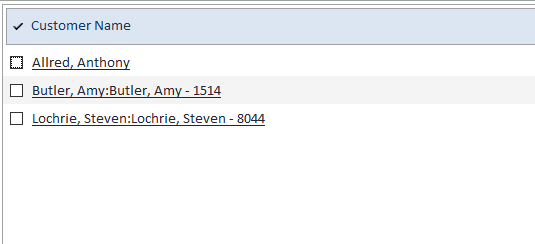
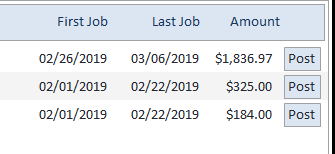
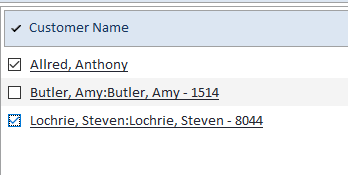
On the left, you can review and select jobs to be posted. Moving from left to right, you have the job type listed, and the type of recurrence pattern used for the job. The “First Job” field is the date of the earliest unposted record in the batch. The “Last Job” field is the most recent unposted record in the batch. Continuing onward, you have the total dollar amount represented by the batch thus far, and the “Post” button which will create an invoice for the selected batch.
Filter Options
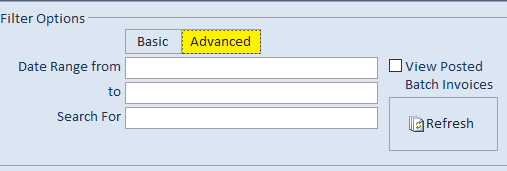
Using the filter options available will allow you to focus on a specific type of service or recurrence pattern for posting. These options could be used to create monthly invoices for ongoing services or longer projects. You also have the ability to switch between basic, and advanced filter options. Advanced will allow you to select a date range from, and to, while also allowing you to search for a specific invoice to be batched.
History Record Details
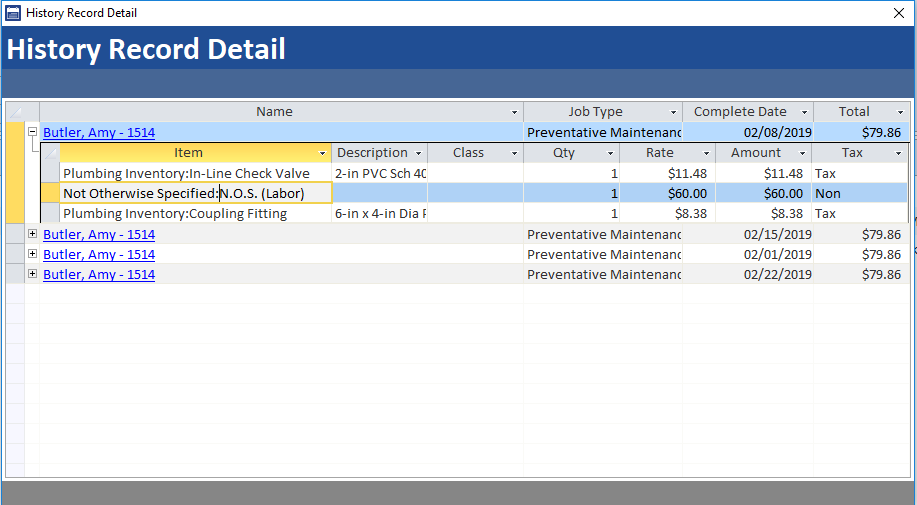
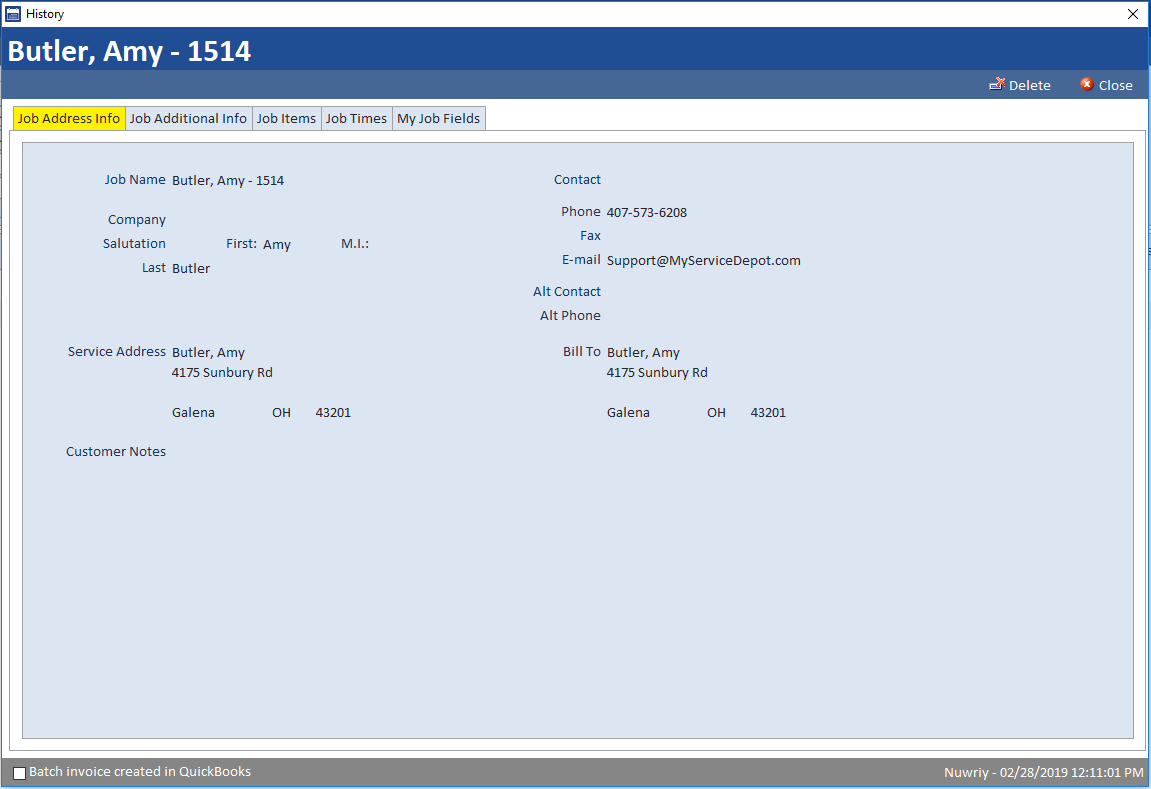
By clicking on a customer or job name on this screen, you will open a dialogue displaying the contents of the batch. Options to expand each instance of the service will display the items that make up the service. Clicking on the blue hyperlinked name will display the history record for that service.
This is especially useful when determining which records need to be removed from the batch. You can find the items that either do not exist in QuickBooks anymore, or history records accidentally created. Clicking the “Batch Invoice created in QuickBooks” option will remove the offending history record from the batch. Use this in scenarios when your batch is producing an error or contains items you do not wish to display on the resulting invoice.
Posting Batch Invoices
Before posting batch invoices to QuickBooks, make sure you’ve used the filter options to narrow down which kinds of services you wish to send to QuickBooks. Posting a batch invoice will combine the history records stored within the batch and produce a QuickBooks invoice from their contents.
Fixing an accidentally posted batch invoice can be a lengthy process since each batch contains potentially multiple days worth of services at a time. Make sure you review any batch before posting to QuickBooks as there is no easy way to bring them back once posted.
We recommend you consider making a backup before posting large amounts of batch invoices to QuickBooks. You can learn more about backing up Smart Service on this page.
To post an individual item, click the “Post” button to the right of the desired batch. This will cause Smart Service to create an invoice for the history records contained with the selected batch.
This is the recommended practice as batches are generally hard to recreate if accidentally posted to QuickBooks or posted with incorrect information.
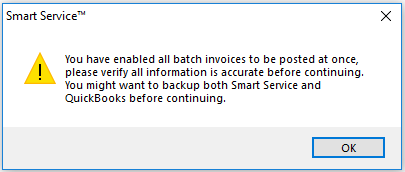
Smart Service also offers the option to mass post batch records to QuickBooks invoices. Before using the feature, ensure that all services have been reviewed and are ready to be sent over to QuickBooks.
Once you’ve reviewed your batch jobs, and selected which ones you’d like to post to QuickBooks, click the “Post All” button at the bottom right-hand corner of the screen to begin the posting process. Please note that once clicked, this process cannot be stopped or reversed. Make absolutely sure all changes have been made before clicking the “Post All” option.
Jobs Added From iFleet
A new portion of your routine may start occurring if your technicians use the Add Job functionality in iFleet. We have an article you can read here to learn more about how it may affect your process.

