What's the Scheduler?
The scheduler is your company’s calendar where you can create and review scheduled appointments. This part of Smart Service is the most important piece for new employees to learn!
In the article below, we’ll cover first time setup, essential navigation, and customization of the scheduler. Since there are multiple ways to use the scheduler depending on your business and industry, we recommend reviewing a job process tutorial at smartservice.com/webinar once you’ve completed this article.
First-Time Setup
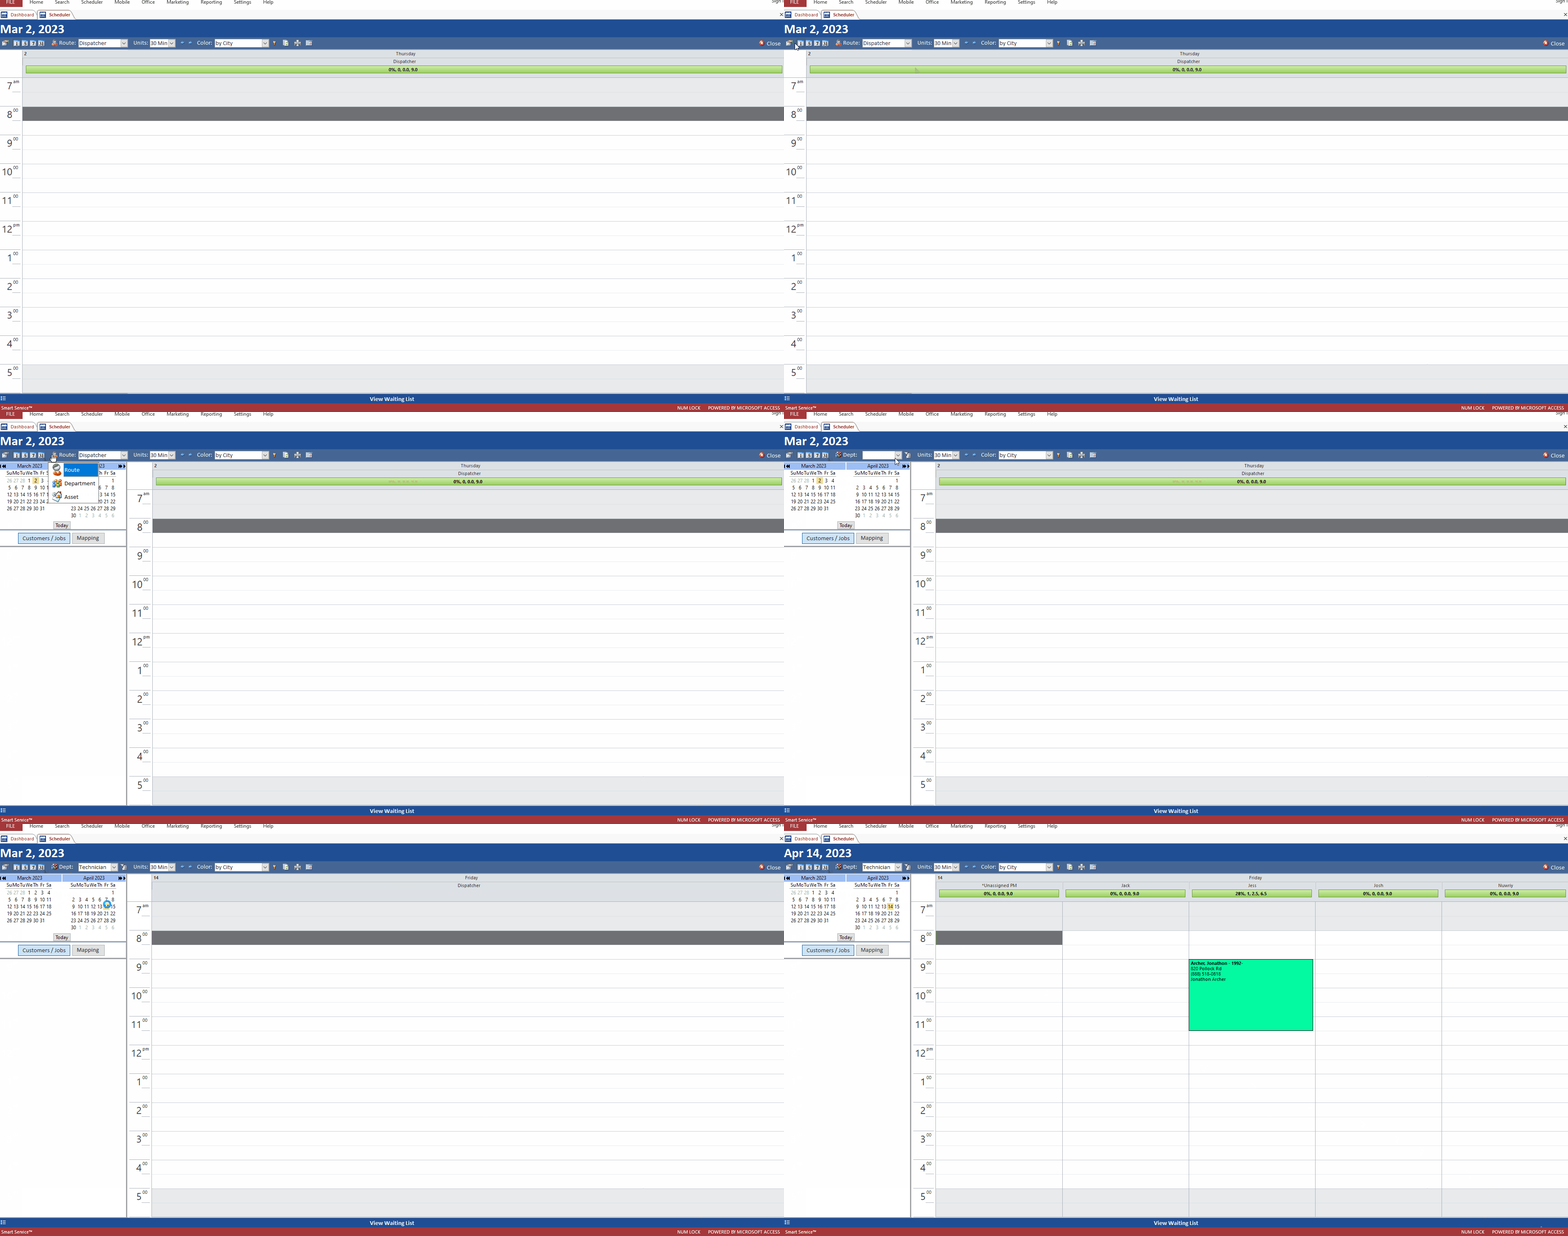
If you’re new to Smart Service, you’ll want to make customizing your scheduler a top priority. Since the view of the scheduler is customizable per user, you may wish to check with your coworkers and see how they’ve set theirs up. If you’re logging in for the first time ever, your scheduler will look like the following picture.
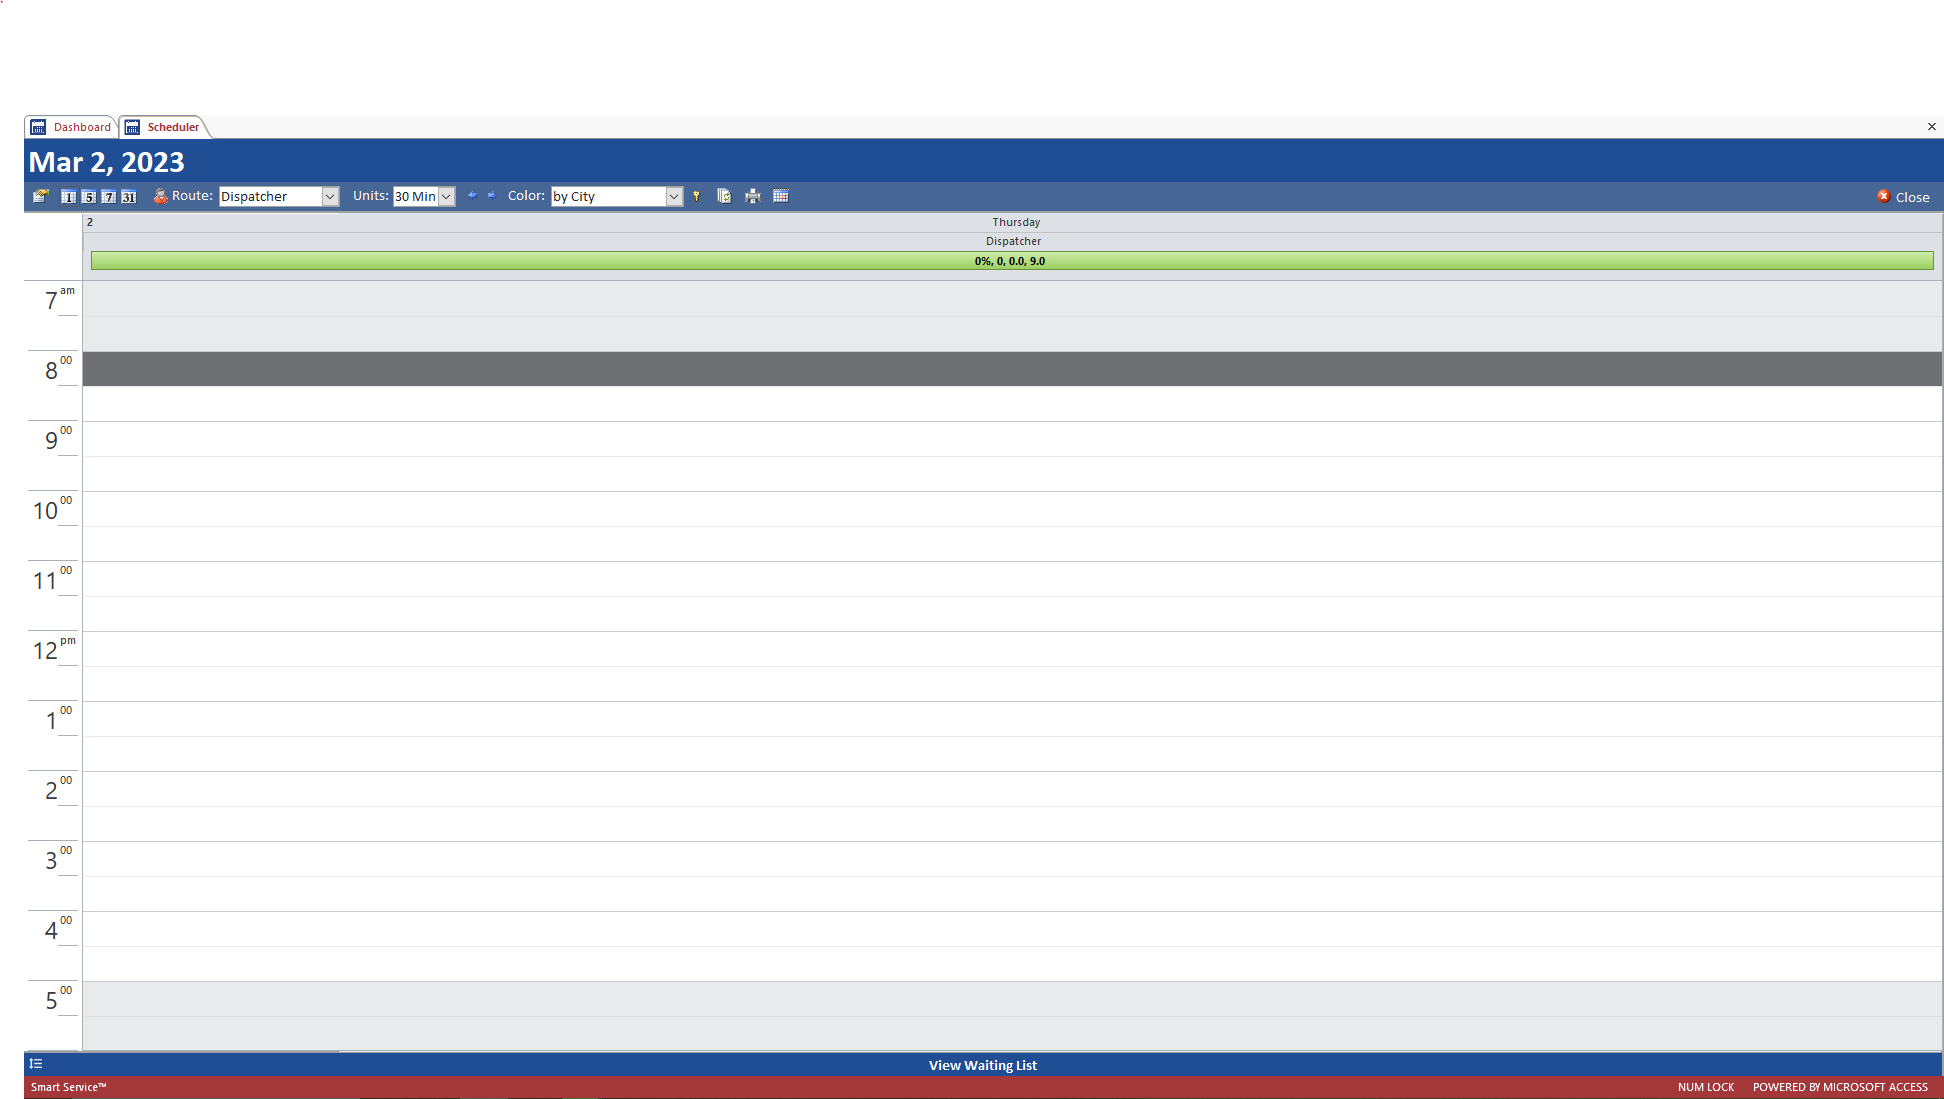
In the GIF below, we’re showing how to open the Smart Pane (the menu on the left) and switch from the default “Route View” (one employee’s schedule at a time) to “Department View” (a group of employees, such as “technicians”) so your scheduler matches the screenshots below.
Since the choices for departments will be unique to your business, your options won’t match ours exactly. You should consult with your coworkers to see which departments contain which employees and why. When employees are created in Smart Service, your business assigns a specific department to that employee.
The purpose of departments is to offer you a “quick select” option but departments don’t determine what a user can and cannot be scheduled, only where to find them on the scheduler!
Learning to Navigate
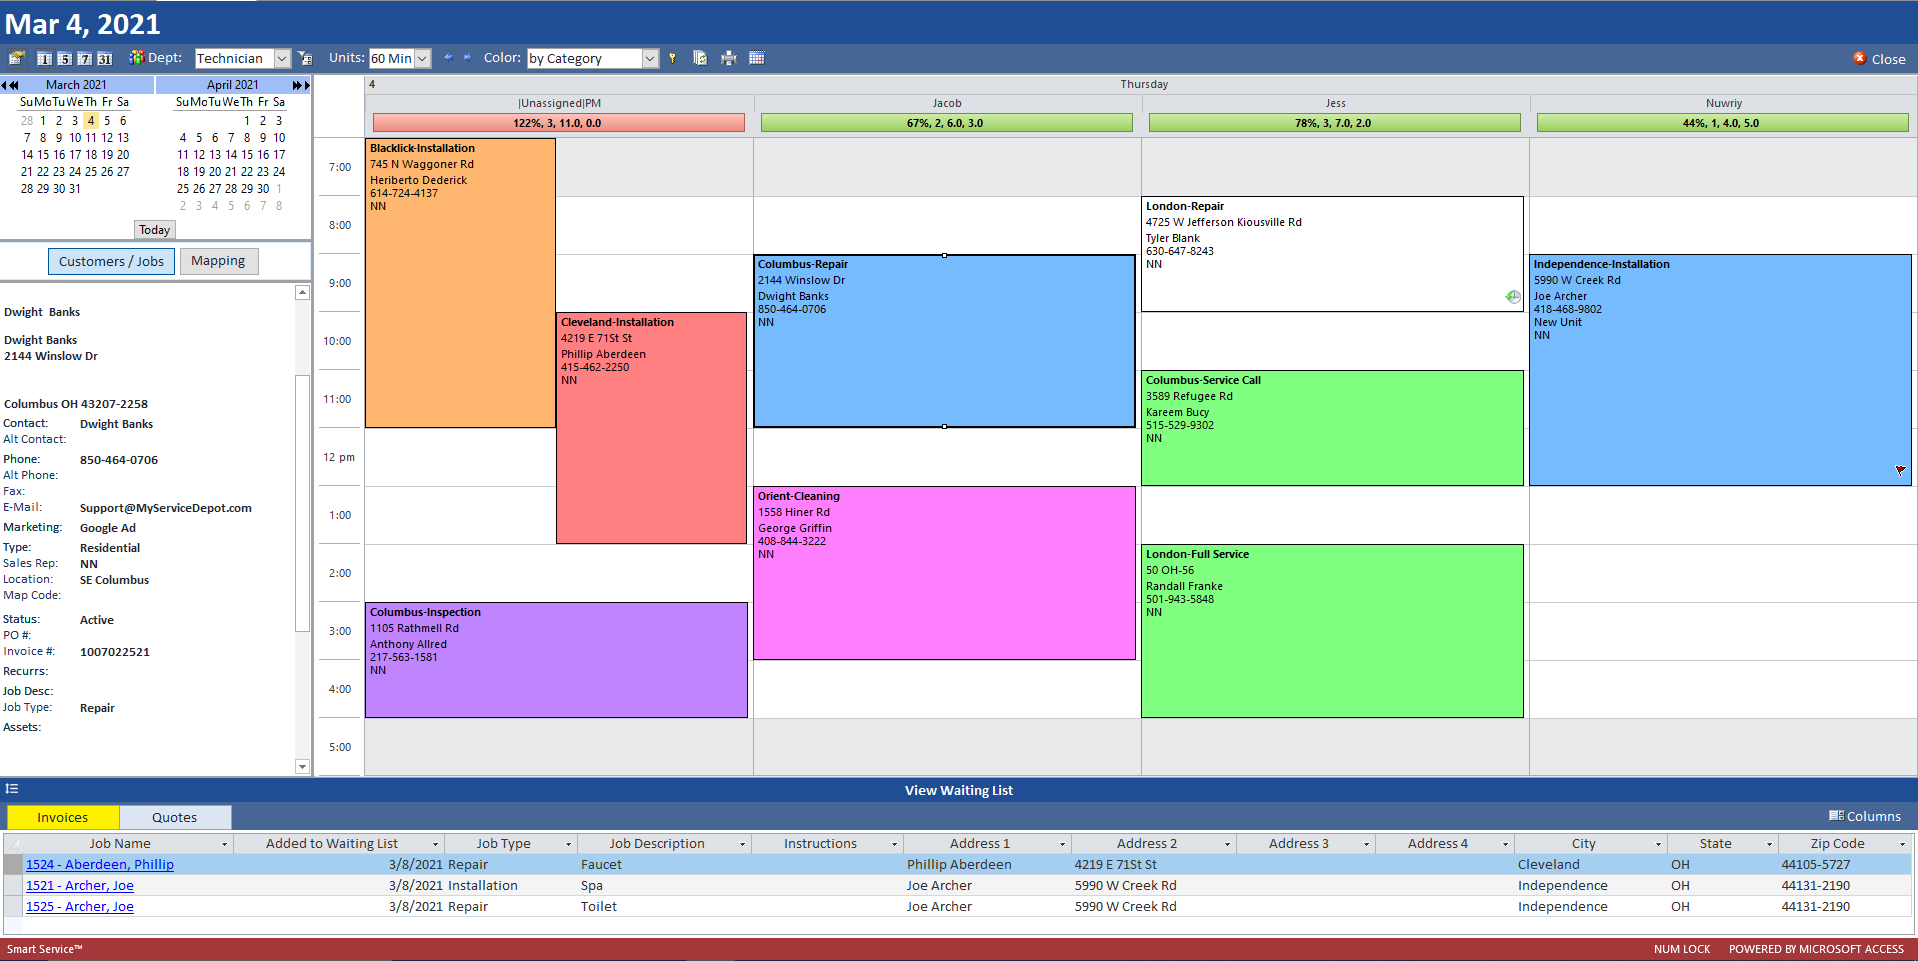
When set up (as shown below) Smart Service’s Scheduler will show you your field team and their schedules. The scheduler has an enormous amount of buttons and features, so let’s look at each portion together and see which parts are most useful to you!
Scheduler Ribbon
The ribbon at the top of the scheduler contains several helpful features when it comes to getting appointments on the scheduler.
This ribbon contains several options to help manage your calendar view. You can check these options out below in the next two sections.
The Smart Pane
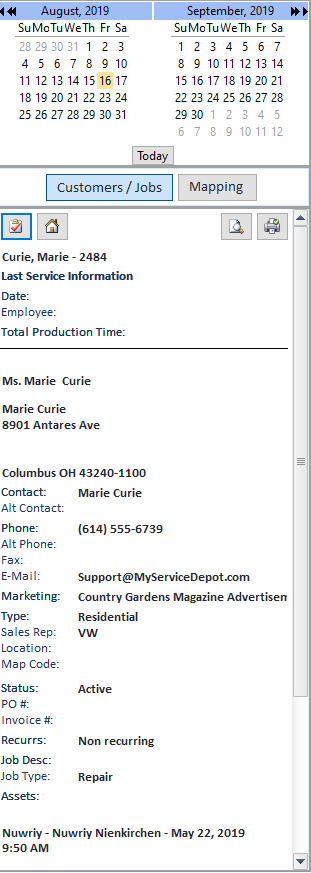
To open or close the Smart Pane click on the icon in the top left corner. The Smart Pane will give you the ability to choose between different dates or date ranges, view information about an employee’s workload, and information about scheduled services.
To open or close the Smart Pane click on the icon in the top left corner. The Smart Pane will give you the ability to choose between different dates or date ranges, view information about an employee’s workload, and information about scheduled services.
The Smart Pane provides a two month view calendar, for quicker date selections than regular schedule navigation options. The two month view calendar will also allow you to navigate a month or year in to the future or in to the past, based on the currently selected view of the calendar.
Through the Smart Pane, you also have the capability to select sequential and non-sequential dates, providing side-by-side date views outside of the default 1, 5, 7, or 31 day view.
The Smart Pane provides a two month view calendar, for quicker date selections than regular schedule navigation options.
By using the Smart Pane, you will also have the ability to select sequential and non-sequential dates. See below for details on this process.
- Sequential Dates: Select the first date needed, press and hold SHIFT + the last date you would like included in your date selection.
- Non-Sequential Dates: Select the first date, press and hold CTRL + the next date you would like to include in your date selection (CTRL+ can be repeated to include multiple non-sequential dates).
- Single Arrow: Move one month forward or one month backward in the two-month view.
- Double Arrow: Move one year forward or one year backward in the two month view.
Toggle Content
When a job has been clicked from the scheduler, it will also on the left hand side display Customer and job information.
Time Units will allow you to change the time increments from 5, 15, 30, 60 minutes or 6 hours. This is a display option, so changing your view will not change the scheduling information of your existing jobs.
Smart Service gives you the ability to chose your own custom color or have it automatically generate a color for with options below.
- by Category
- by City
- by Zip Code
- by Job Type
- by Class
- by State
- by Customer Type
- by Location
- by Map Code
- by Time Stamp
More information on how to customize colors here.
The gold color key next to the “Color” dropdown will display on the right-hand side of the scheduler when clicked. It acts as a legend for the colors currently displayed on the calendar.
If you’ve recently made adjustments to the color codes you will need to close and reopen the scheduler before you updated colors are displayed.
Your scheduler is set to refresh every 60 seconds without your input, but you can click this button or press the F5 key to refresh the screen.
This option will print the calendar view using your computer’s default printer. Options to narrow the printed results are available.
This option will send all quotes, reminders, and work order to Outlook as reminders. When using this function, be careful as clicking the button twice will cause the Outlook reminders to duplicate.
Special Options
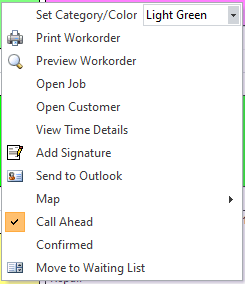
Use your “Color by Category” option to set a custom color on the job. Remember, iFleet users will see this color on their side when receiving the job, making it useful to convey important details.
Click this option to print a paper copy of your work order. Remember, this is intended as an internal work order copy for those not using iFleet. If you’re looking for the work order produced by iFleet, open the customer and check their “history/docs” tab.
Click this option to preview a paper copy of your work order. Remember, this is intended as an internal work order copy for those not using iFleet. If you’re looking for the work order produced by iFleet, open the customer and check their “history/docs” tab.
Clicking this option will open the job record in question and allow you to make edits. Don’t make edits while iFlet is working on the job, or you might cause an accidental resend!
Clicking this option will open the job’s parent record, which may be a location.
You can view, edit, or add times for the field user here. Clicking this option will display all of the time punches your iFleet user has already associated with the job.
This section only applies to those using Fleet, the predecessor to iFleet. Fleet users can capture a signature within Smart Service using the mouse.
This option will send this single event to Outlook as a reminder. Please note that clicking this option multiple times will result in duplicate reminders on your Outlook calendar.
Clicking here will provide options to view the customer’s site with directions, a standard street map, or a satellite view.
You can mark this job as a call ahead, which will alert both your office and field users to call ahead of time to confirm this appointment.
Once an event has been called ahead of time, you can confirm the event to lock it in place on the calendar.
Use this option to move a job off the schedule and onto the waiting list for later.
Adding Scheduled Events
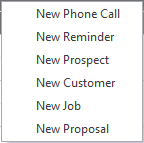
A phone call event can be created and tied to a customer. These events will be displayed in Smart Service, Google calendar, and Outlook. iFleet users will not be able to see phone calls via iFleet.
Phone calls are useful when you have an important call to take note of such as an upset customer, or some 3rd party related information about the customer’s job.
Reminders are primarily used for sick days, call-off, and appointments. Like phone calls, these will be displayed in Smart Service, Google Calendar, and Outlook but not iFleet.
Create a prospect to store contact information of a potential customer. A prospect can later be converted to an actual customer when the make a service request.
Prospects do not save to QuickBooks, but you can create a Smart Service estimate for them. If they accept the work, you can convert the estimate and prospect to a work order and customer respectively.
You can create a new customer using this option. Before you do, make sure to check your existing customer list and verify that you don’t already have this contact created.
When you type a new name for a customer, Smart Service and QuickBooks search the list for a matching name and will reject any duplicates; if you added this customer under a spouse or coworker’s name though, Smart Service wouldn’t be able to tell that this new record is actually a duplicate.
Use this option to create a new work order which will be scheduled for the selected time slot. You will be asked to choose the customer you’re making a work order for.
Depending on what your business has named your prospect jobs, you may see another term like “proposal”, “estimate”, or “quote” here.
Use this option to create a new proposal which will be scheduled for the selected time slot. You will be asked to choose the prospect you’re making a work order for.
The Waiting List
Using the button on the bottom, as pictured below, you can access the waiting list for jobs, and estimates. This would be for jobs that need to be postponed, or instances where the customer calls in to reschedule and you do not have an exact date for when it needs to be scheduled.
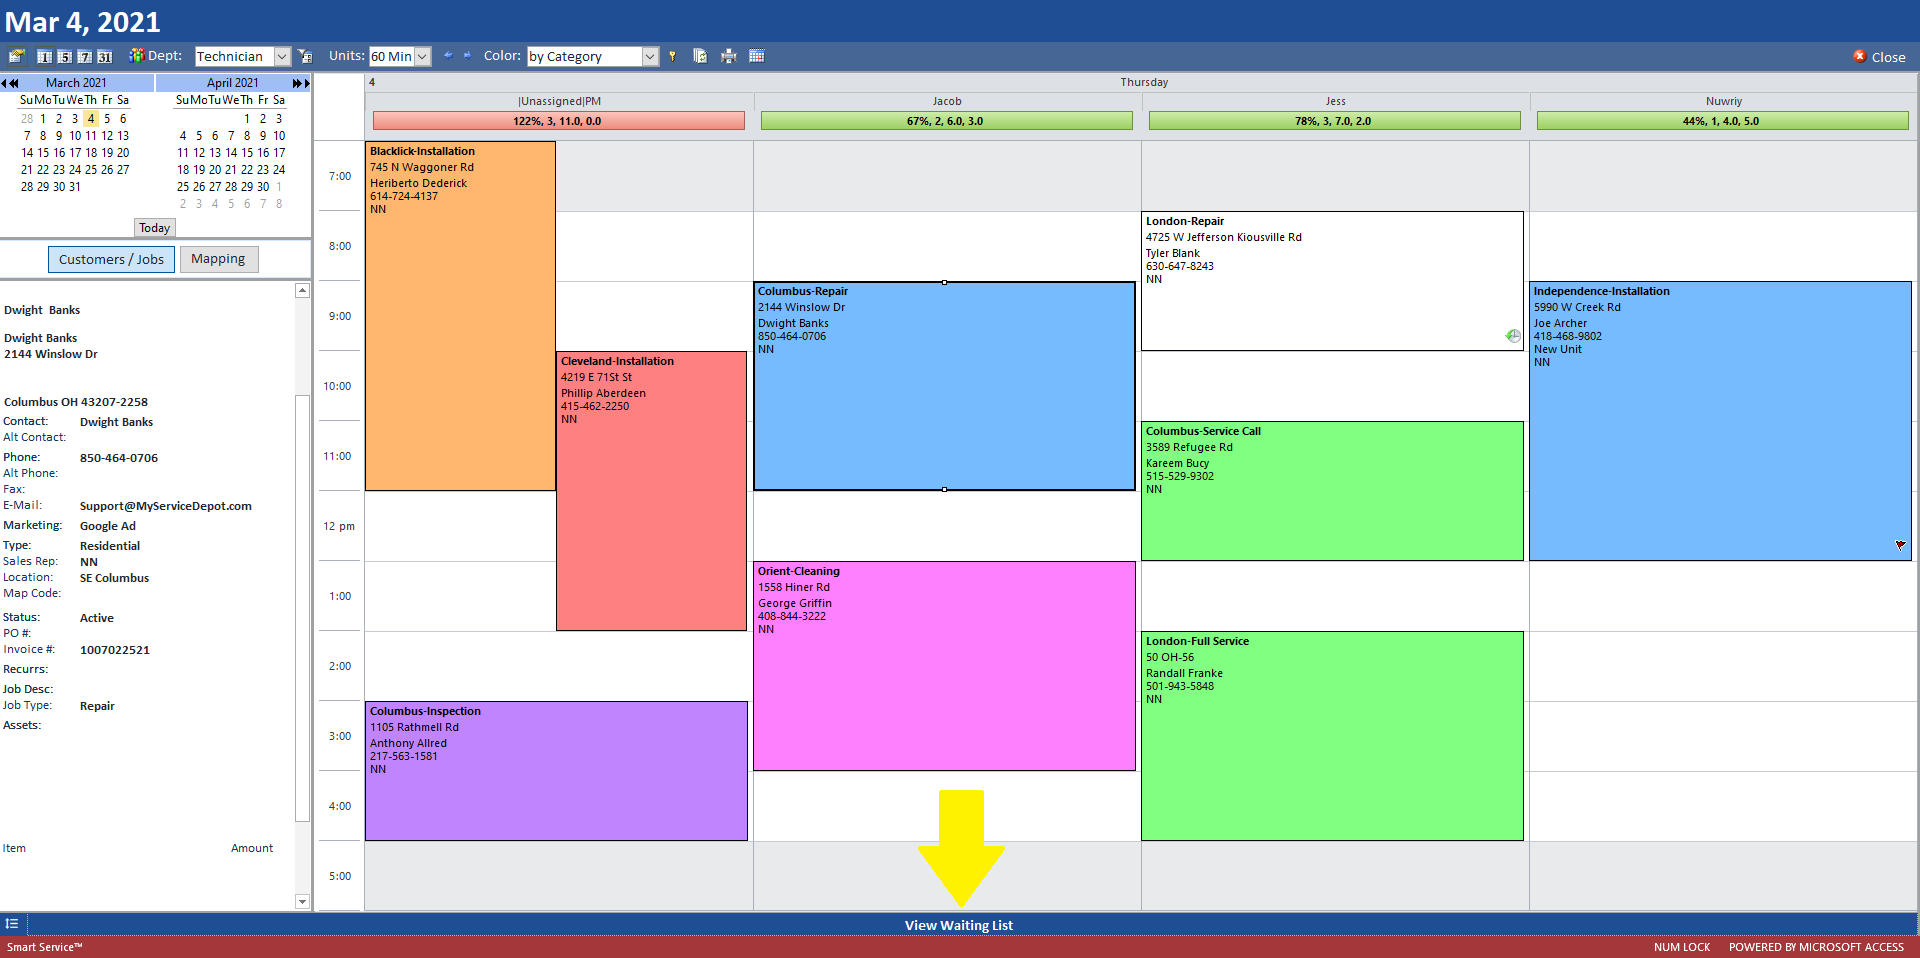

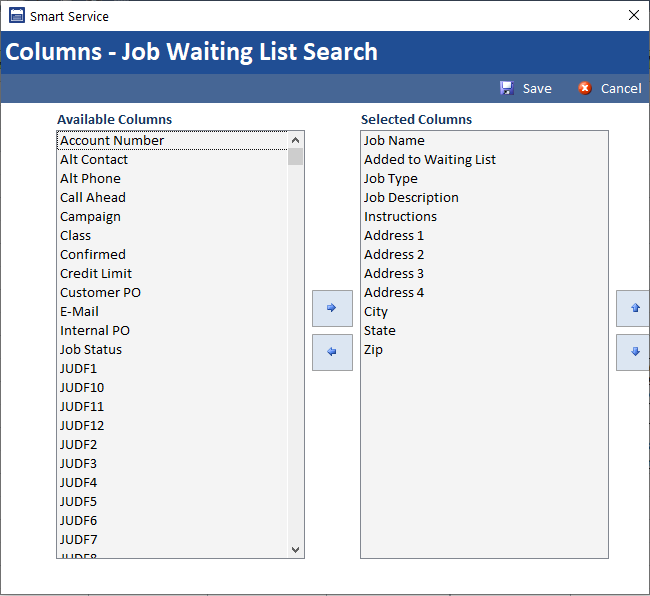
The waiting list also features a column customization option which will allow users to customize what information takes priority on the waiting list.
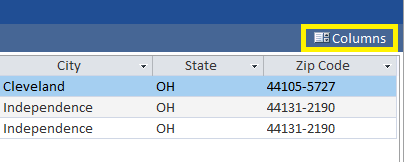
You can use the columns button (pictured left) to pick and choose what columns are the most important for your business to see at a glance on the waiting list.
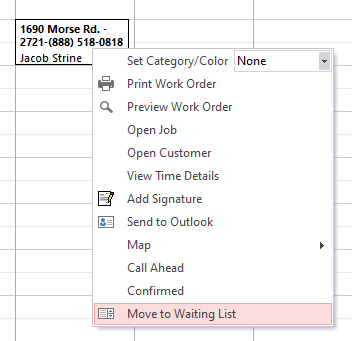
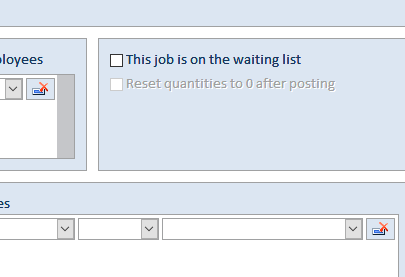
You have two different ways to add a job to the waiting list, you can right click on the job from the scheduling calendar, and select, “Move to waiting List” or, alternatively, you can open the job or estimate, go into the scheduling tab, and check, “This job is on the waiting list.”

